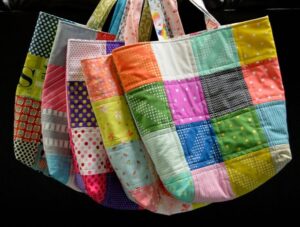
If you’ve been searching for a stylish and functional handmade accessory, this Patchwork Bar Pattern Bag – TUTORIAL will guide you step-by-step through creating a beautiful and practical patchwork bag. From the moment you gather your materials to the final stitches, this tutorial brings creativity and function together, making it ideal for sewists of all experience levels. Whether you’re a passionate quilter or a curious beginner, learning how to sew a Patchwork Bar Pattern Bag will be an enjoyable and rewarding project.
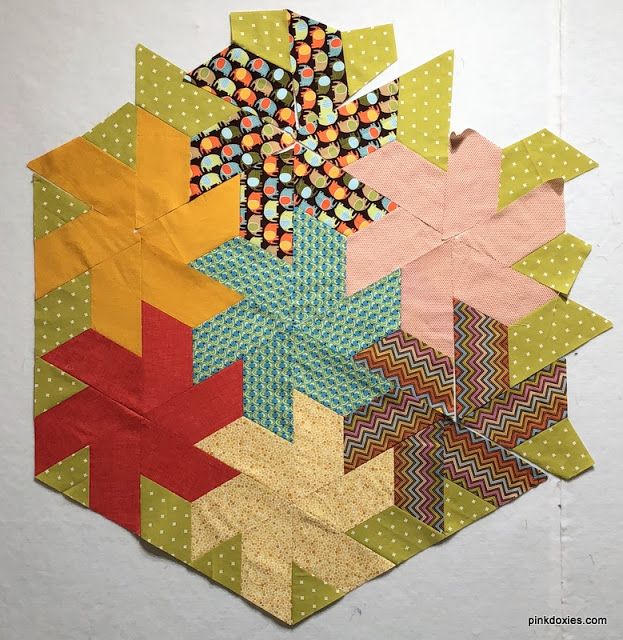
A Patchwork Bar Pattern Bag is not only a fashionable statement piece but also a fantastic way to use fabric scraps in an artistic and resourceful manner. The linear design of the bar pattern offers clean lines and an eye-catching texture. Its modular appearance gives it a structured, geometric charm while also allowing for playful customization. You can choose bold color contrasts or calming neutral tones—each version tells a unique story.
Advertising
This Patchwork Bar Pattern Bag – TUTORIAL has been designed with clarity and simplicity in mind. With a focus on practical construction and aesthetic balance, the tutorial emphasizes techniques that provide clean finishes, durability, and a polished final product. Using carefully selected fabrics and attention to detail, your bag will be a standout piece you’ll be proud to carry or gift to someone special.
Image From Pinterest
1. Preparing Materials for Your Patchwork Bar Pattern Bag
Before diving into the sewing process, gather all necessary supplies. You’ll need quilting cottons or canvas fabrics for the outer panels, interfacing for structure, and a coordinating lining fabric. A sturdy zipper or magnetic snap and strong thread are also recommended to ensure your bag’s longevity and durability.
When choosing fabrics for your Patchwork Bar Pattern Bag, aim for a mix of solids and prints that harmonize. A variety of textures or subtle pattern differences can create an engaging visual dynamic. Many crafters enjoy using scraps from previous projects, giving new life to cherished fabrics.
Cutting your fabric with precision is key. Use a rotary cutter and quilting ruler to ensure straight edges and consistent bar sizes. Typically, bars are cut in uniform rectangles, but feel free to adjust the size to match your preferred aesthetic or to suit the dimensions of the bag you want.
Advertising
For interfacing, fusible fleece or foam adds a professional look and provides structure. Apply interfacing to the wrong side of each outer bar piece before assembly. This step reinforces the bag and prevents sagging.
Organize your cut pieces in the desired arrangement before stitching them together. Play with the layout until the color flow feels balanced and intentional. Remember, the horizontal or vertical direction of your bar placement also changes the mood of the design.
Once you’re confident with your layout, begin sewing bars together with a consistent seam allowance, typically ¼ inch. Press seams open or to one side using an iron to maintain crispness in the pattern.
2. Sewing the Patchwork Outer Panel
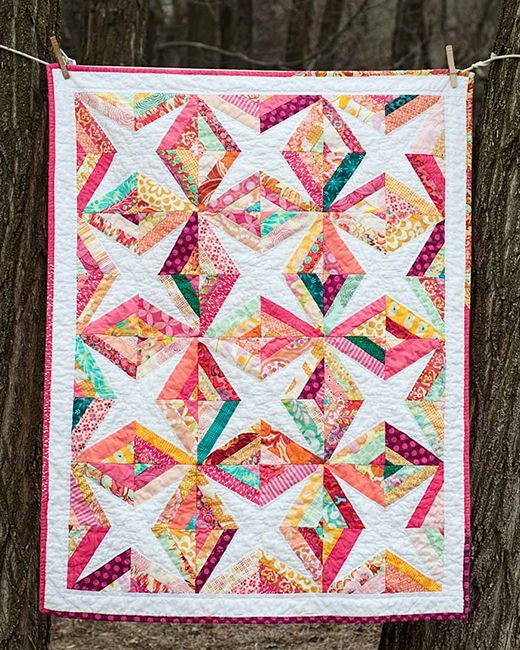
With your bars sewn into panels, you’re now ready to create the main body of your Patchwork Bar Pattern Bag. Two panels will make up the front and back of your bag, while optional side and bottom panels give it depth and functionality.
First, square up your patchwork panels. This ensures the edges are clean and the pattern is aligned. If you’re adding side panels, make sure the bars on the front and back line up visually with the sides for a cohesive look.
Attach any decorative elements like piping, trim, or even a small label now. These touches personalize your bag and give it that handmade charm. They’re easiest to attach before assembling the full body.
Sew the front, back, and sides together, using pins or clips to keep layers aligned. Press seams flat as you go. If you’re adding a bottom gusset for a boxy finish, ensure it fits your dimensions and aligns with the sides.
Once your outer shell is constructed, consider topstitching along the seams for extra reinforcement and a polished appearance. Topstitching also helps seams lie flatter and adds a professional detail.
Now is a great time to decide how your bag will close. A zipper, magnetic snap, or even Velcro can all be used, depending on the look you want and your sewing comfort level. Install closures before attaching the lining.
3. Creating and Attaching the Lining
The lining of your Patchwork Bar Pattern Bag should mirror the outer panel dimensions. Cut your lining pieces accordingly, and consider adding internal pockets for extra functionality. Small patch or zippered pockets can organize keys, phones, or pens.
Construct your lining similarly to the outer bag. Sew the lining panels together and press seams flat. If you’ve planned interior pockets, sew them onto the lining panels before assembling them.
Before inserting the lining, leave a small gap at the bottom seam. This will allow you to turn the bag right-side out later on. Make sure this gap is about 4-5 inches wide for easier turning.
Now, with the outer bag inside out and the lining right side out, nest them together, aligning top edges and side seams. Pin or clip them together, then sew around the top edge, securing them together.
Once sewn, pull the bag through the gap in the lining, turning everything right-side out. Smooth all seams and edges carefully with your fingers or a turning tool. Close the gap in the lining with a ladder stitch or topstitch.
Press the top edge of the bag flat, then topstitch around the opening for a finished look and to help keep the lining in place. This finishing step ensures durability and a crisp edge.
4. Final Assembly and Finishing Touches
With the bag now fully assembled and turned right-side out, the final steps involve securing any handles or straps. Choose between short fabric handles, adjustable webbing straps, or even a crossbody chain for different styles.
Measure and mark strap placement evenly. Reinforce strap areas with extra stitching or small squares of interfacing on the inside for added strength. If using D-rings or lobster clips, ensure they’re securely sewn.
Test the bag’s structure by adding light weight and observing how it holds up. If needed, add stitching reinforcements to stress points. This is especially useful if you plan to carry books or heavier items.
Check for any loose threads or uneven seams. Trim threads carefully and press the entire bag with an iron, using a pressing cloth to protect decorative details and closures.
For embellishment, feel free to add appliqué, embroidery, or even fabric paint for a personalized flair. Many creators love to add their initials or a small motif that reflects their personality.
Now your Patchwork Bar Pattern Bag is ready to use or gift! Whether you wear it to the market, use it as a craft bag, or simply show it off to friends, this project showcases your creativity and sewing skills.
– Patchwork Bar Pattern Bag – TUTORIAL
Q: Can I use pre-cut fabric like jelly rolls for this project? Yes, jelly rolls are excellent for patchwork bar patterns because they come in uniform widths, saving time on cutting. Just make sure the length suits your desired bag size.
Q: What kind of interfacing works best for this bag? Fusible fleece or foam interfacing gives the best structure and body to your bag. Lightweight interfacing can be used, but may not provide as much support.
Q: Do I need a sewing machine, or can I sew this by hand? A sewing machine makes the process quicker and cleaner, but experienced hand sewists can complete this project with patience and strong stitches.
Q: How long does it take to make this bag from start to finish? On average, it takes about 4 to 6 hours, depending on your experience level and the complexity of added details like pockets and closures.
Q: Is this tutorial suitable for beginners? Yes! This Patchwork Bar Pattern Bag – TUTORIAL is beginner-friendly, especially if you start with a smaller version and keep the design simple.
Q: Can I scale the pattern to make a smaller or larger bag? Absolutely. Adjust the size of the fabric bars and panels to scale your bag up or down. Just remember to recalculate the measurements for linings and interfacing accordingly.
Creating a Patchwork Bar Pattern Bag is both an artistic expression and a practical craft. This detailed tutorial has walked you through every step, from fabric selection and cutting to final stitching and embellishments. With the right materials and a bit of creativity, you now have the tools to make a truly unique and functional accessory.
We hope this Patchwork Bar Pattern Bag – TUTORIAL inspired you to start sewing or to try new techniques if you’re already experienced. If you’ve followed along, we’d love to hear from you—please share your thoughts, questions, or suggestions. Your feedback helps us grow and continue bringing valuable tutorials to the crafting community.


