
Lucivania Table Runner – Complete Step-by-Step Guide

The Gorgeous Crochet Table and Bedspread Motif: Tutorial is the perfect guide for anyone who dreams of transforming a living or bedroom space with handmade charm. This timeless craft not only decorates your home with delicate elegance but also carries your personal touch in every stitch. Whether you’re a beginner or an advanced crocheter, this detailed tutorial will walk you through each step of creating motifs that elevate your decor with a cozy, handmade flair.
When people hear about crocheted motifs for tables and bedspreads, they often think of vintage homes or grandmothers’ living rooms. But today, crochet motifs have taken a modern turn, blending traditional techniques with contemporary color palettes and shapes. The Gorgeous Crochet Table and Bedspread Motif: Tutorial honors that tradition while offering ideas that feel fresh and versatile.
Throughout this article, you’ll discover how to choose the best yarn, which hooks to use, and how to assemble your motifs into stunning finished pieces. You’ll also learn tips on maintaining your finished work and discover answers to the most common questions about crochet motif projects. This Gorgeous Crochet Table and Bedspread Motif: Tutorial is your complete resource for creating beauty, one stitch at a time.
The first step in any successful crochet project is selecting the right materials. For tablecloths and bedspreads, your yarn choice makes a significant difference in both appearance and durability. Cotton yarn is highly recommended because it provides structure and resists pilling. It also washes well, making it ideal for items that get regular use.
Crocheters often debate between mercerized cotton and soft cotton blends. Mercerized cotton has a glossy finish and holds its shape beautifully, while soft cotton blends offer a gentler texture. In this Gorgeous Crochet Table and Bedspread Motif: Tutorial, we suggest trying both on small swatches to see which feels best in your hands and suits your project.
Hook size matters too. Smaller hooks, such as 2.0 mm to 3.5 mm, work well for tighter motifs, which are perfect for tablecloths that need a clean finish. Larger hooks may create more flexible motifs, better suited for bedspreads that need to drape naturally.
Color choice should reflect your style and the room where the crochet piece will be displayed. Monochromatic schemes bring a minimalist aesthetic, while vibrant or gradient motifs can add an artistic flair to a neutral room. The Gorgeous Crochet Table and Bedspread Motif: Tutorial encourages experimenting with color combinations to find your perfect palette.
Aside from yarn and hook, don’t forget your accessories. Stitch markers, measuring tape, and tapestry needles will be essential for assembling the motifs. Having quality tools enhances the enjoyment of crocheting and leads to cleaner, more professional results.
If you’re new to buying yarn or hooks, visit a local craft store and feel the textures firsthand. This tactile experience often leads to better decisions, especially for projects as detailed as those in the Gorgeous Crochet Table and Bedspread Motif: Tutorial.
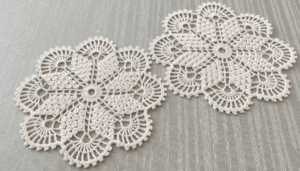
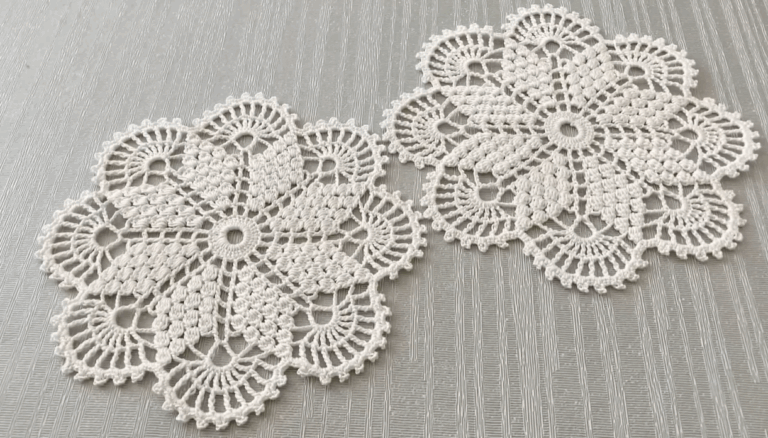
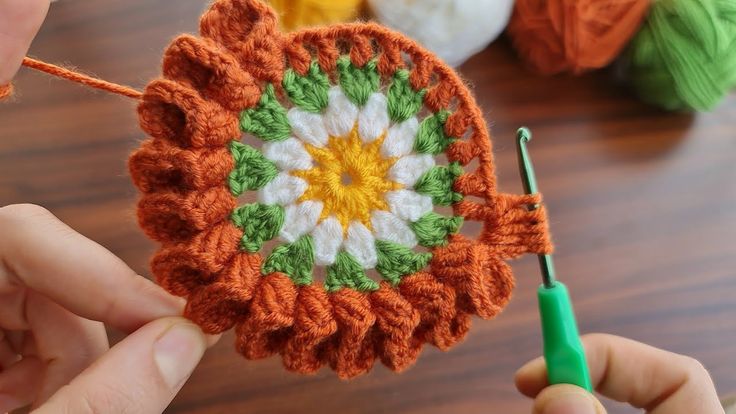
Now that you’ve gathered your materials, it’s time to start crafting. The foundation of this Gorgeous Crochet Table and Bedspread Motif: Tutorial is a symmetrical floral square made of chain, double crochet, and cluster stitches. Begin by making a magic ring or chain 4 and slip stitch to form a loop.
In the center loop, chain 3 (which counts as your first double crochet), then add 11 more double crochets. Join with a slip stitch. This forms the circular base of your motif. Each motif will expand outward from this point, layering beauty with each round.
In round two, you’ll begin your petals or shell pattern. Chain 3, skip 1 stitch, and make 5 double crochets in the next stitch. Skip one, and single crochet into the next stitch to anchor your petal. Repeat around. Your motif will begin to show its floral shape.
Round three expands the motif further. You’ll start shaping the edges if you’re aiming for square motifs. Add chain spaces and clusters into specific points to create corners and give structure. This is where stitch markers help maintain even spacing.
As your motif grows, keep checking your tension. A consistent tension ensures that when motifs are joined, they lay flat without puckering. The Gorgeous Crochet Table and Bedspread Motif: Tutorial recommends blocking each motif before joining them for the best finish.
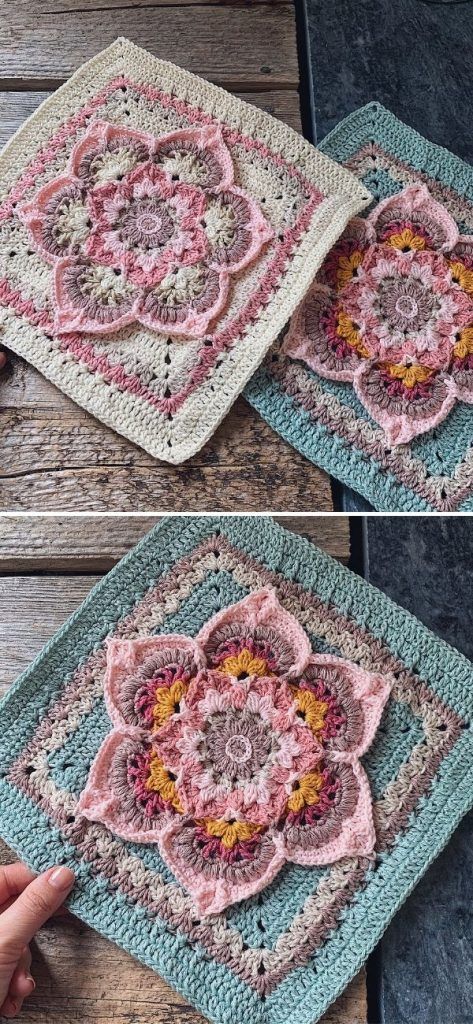
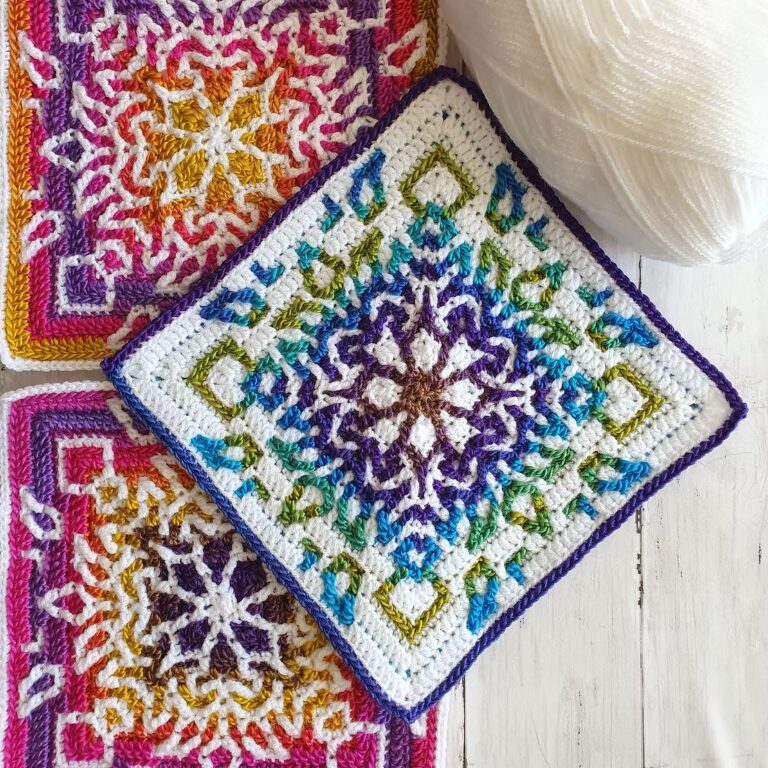
Make several motifs before beginning to join. This helps you test different color patterns and layouts. You might decide to alternate motifs with a solid border or to create gradient effects for visual interest across your table or bedspread.
Practice patience. The first few motifs might feel slow, but once you find your rhythm, you’ll be surprised at how quickly you can produce these beautiful pieces.
With a stack of beautiful motifs complete, it’s time to join them. There are multiple joining methods, and this Gorgeous Crochet Table and Bedspread Motif: Tutorial covers the most popular and durable options. The join-as-you-go (JAYGO) method is ideal for seamless connections that don’t require extra sewing later.
To use JAYGO, finish your last round of the motif with a chain space between corners. As you crochet the final motif round, slip stitch into the chain spaces of neighboring motifs. This technique helps your motifs stay aligned and ensures an even tension throughout the fabric.
Another common method is whip stitch or mattress stitch joining. Lay your motifs side by side and use a yarn needle to sew through the back loops only. This method creates a slight seam but is often preferred for bedspreads where a bit of extra reinforcement is beneficial.
Arranging your motifs beforehand is key. Use a large surface like your bed or floor to layout your pieces in various patterns. Do you want a checkerboard of colors? A symmetrical diamond layout? A border of solid-colored motifs? The choice is yours.
Assembling can take time, especially for large bedspreads. Set small goals for each day. Join a row or a column at a time to avoid burnout. The beauty of handmade work lies in the journey as much as the result.
Once fully joined, consider adding a border. A simple scalloped edge or picot border can bring harmony to the overall piece and add that extra touch of elegance. This final step ties together the entire Gorgeous Crochet Table and Bedspread Motif: Tutorial.
After completing your project, caring for it properly will ensure it lasts for years. Handmade crochet pieces need gentle washing and drying techniques. This Gorgeous Crochet Table and Bedspread Motif: Tutorial recommends handwashing your finished items in cold water with a mild detergent.
Avoid wringing out the fabric. Instead, lay your crochet piece flat on a clean towel and roll it up to absorb excess moisture. Then lay it flat to dry in its natural shape. This prevents stretching and maintains the design’s integrity.
If needed, block the piece again after washing. Use rust-free pins and a foam board or towel-covered surface to stretch and pin the crochet into its correct shape. Blocking revives the motif structure and keeps your project looking crisp and fresh.
For display, ensure your table or bedspread is free of sharp objects that might snag the yarn. If placing on a dining table, use a protective transparent cover to prevent food stains and moisture from damaging the piece.
Seasonal storage is also crucial. Fold the crochet item loosely and store it in a breathable cotton bag. Avoid plastic, as it can trap moisture and lead to mildew. Cedar blocks or lavender sachets can be added to keep moths away naturally.
Remember, your project is not only decorative but also an heirloom piece. With these care tips, your Gorgeous Crochet Table and Bedspread Motif: Tutorial creation can be passed down or cherished for decades to come.
FAQ: Gorgeous Crochet Table and Bedspread Motif: Tutorial
Q: What’s the best yarn type for table and bedspread crochet motifs?
A: Cotton yarn is the most recommended for its durability and clean finish. Mercerized cotton offers a glossy touch, while softer blends are great for cozier textures.
Q: How many motifs do I need for a bedspread?
A: It depends on the motif size and bed dimensions. On average, a twin bed may require around 120 motifs, a queen around 200, and a king about 250.
Q: Can I use leftover yarn for the motifs?
A: Yes! This is a great stash-busting project. Just be consistent with yarn weight and tension to ensure the motifs match in size and texture.
Q: How do I keep my motifs from curling?
A: Tension and blocking are key. If your motifs curl, block them with steam or pin them flat after spraying with water to shape them evenly.
Q: What’s the easiest joining method for beginners?
A: The whip stitch method is beginner-friendly and doesn’t require complicated stitch counting. It’s great for learning how motifs fit together.
Q: How long does it take to complete a table or bedspread with motifs?
A: Time varies based on motif size, your experience, and available time. On average, a small table runner can take a week, while a bedspread may take several months.
In this Gorgeous Crochet Table and Bedspread Motif: Tutorial, we’ve covered everything you need to create beautiful, handmade decor for your home. From choosing the right yarn and learning the stitches, to assembling your motifs and caring for your final piece—this guide provides all the inspiration and instruction you need.
Crochet is more than just a hobby—it’s a form of storytelling through yarn, a tradition handed down and recreated with love. If you’ve followed this tutorial, we’d love to hear from you! Leave a sincere comment with your thoughts, results, or suggestions for future patterns. Your feedback makes this creative community even more vibrant!

