Crochet Easy Peacock Feather Coasters or Motif Tutorial
Advertising
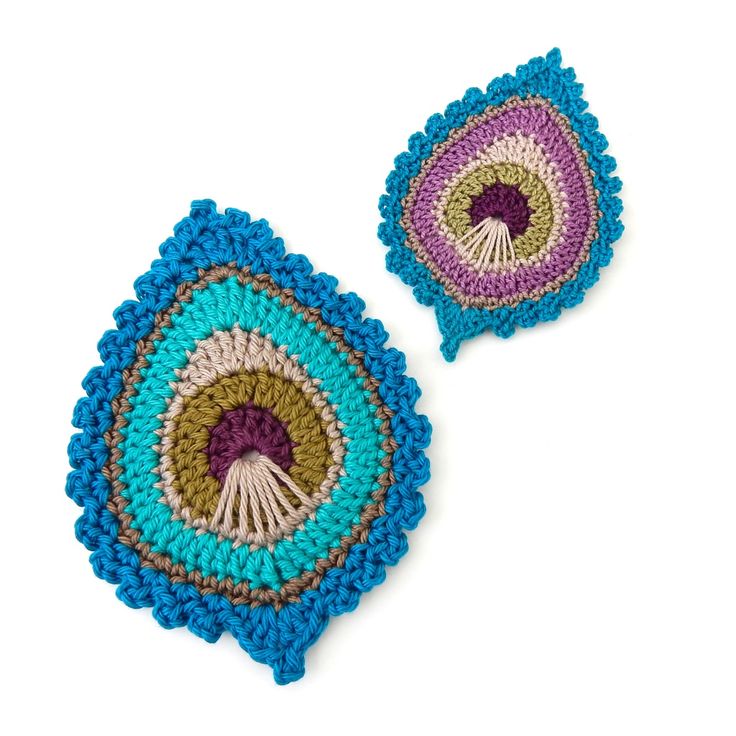
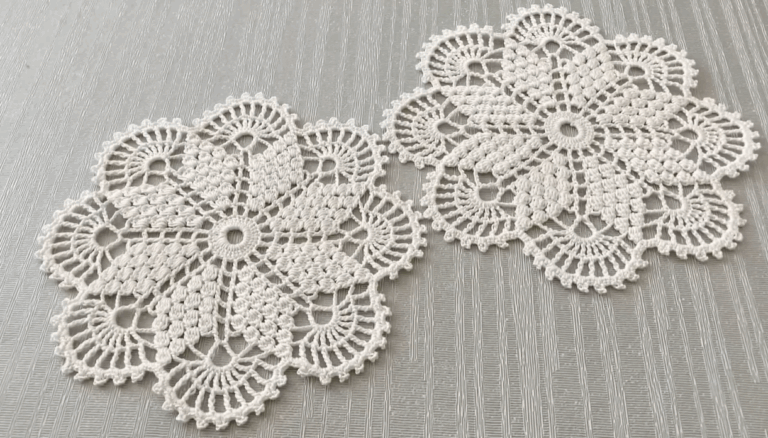
If you are looking for a creative and vibrant project, this Crochet Easy Peacock Feather Coasters or Motif Tutorial is exactly what you need. These stunning motifs are not only beautiful but also functional, making them perfect as coasters, wall decorations, or appliqués for other crochet projects. With their eye-catching colors and elegant shapes, peacock feathers add a touch of nature-inspired charm to any space.
This step-by-step guide will show you how to create your own crochet easy peacock feather coasters or motif, even if you’re a beginner. The process is simple, relaxing, and rewarding. You will learn how to combine stitches, change colors smoothly, and shape the motif into the iconic peacock feather look.
Advertising
Whether you want to decorate your dining table, gift handmade items to loved ones, or simply enjoy a calming crochet project, this Crochet Easy Peacock Feather Coasters or Motif Tutorial has everything you need. Let’s dive into the materials, techniques, and steps required to bring these stunning crochet feathers to life.
When starting your Crochet Easy Peacock Feather Coasters or Motif Tutorial, gathering the right materials is the first step toward success.
You will need medium-weight cotton yarn in four different colors: a deep blue for the eye of the feather, a rich turquoise or teal for the next round, vibrant green for the body of the feather, and a gold or mustard yellow to outline it all beautifully.
A crochet hook that matches your yarn weight is essential. Typically, a 3.5 mm to 4 mm hook works perfectly for this project, ensuring your motif is firm and holds its shape.
Advertising
Don’t forget to have a pair of sharp scissors and a yarn needle for weaving in the ends neatly once your feather is complete. These finishing touches make a big difference in the overall appearance of your project.
A stitch marker can be handy if you are still getting comfortable with keeping track of your rounds, especially when changing colors frequently throughout the crochet easy peacock feather coasters or motif tutorial.
Optional but helpful, blocking tools such as a foam board and rust-proof pins can help shape your motif perfectly after it’s finished. A gentle steam block gives a polished look to your work.
Make sure to set up a comfortable space to crochet. Good lighting, a cozy seat, and your materials neatly arranged can enhance the overall experience of following this Crochet Easy Peacock Feather Coasters or Motif Tutorial.
2. Step-by-Step Instructions to Start the Center Eye
Now that your materials are ready, let’s begin crafting the iconic eye of the feather in this Crochet Easy Peacock Feather Coasters or Motif Tutorial.
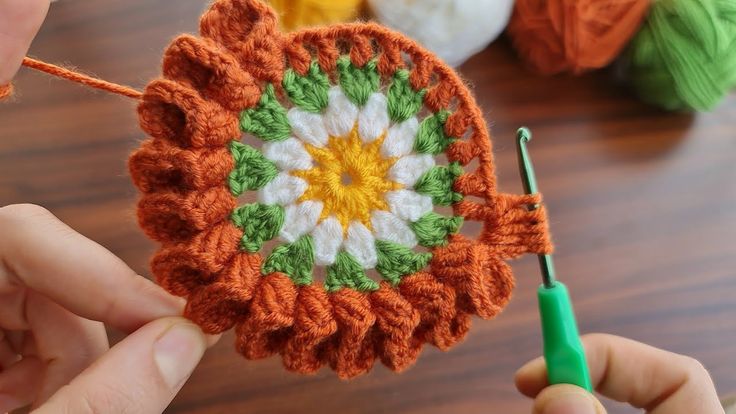
Start with a magic ring. This technique creates a tight, neat center for the motif, which is essential for the eye of the peacock feather. Into this ring, crochet 12 double crochet (dc) stitches using the deep blue yarn.
Slip stitch to join the round. This closes the circle neatly and prepares you for the next color change. Fasten off the blue and attach the turquoise or teal yarn to begin the next round.
In this round, crochet two double crochets into each stitch around. This will result in 24 stitches, forming a smooth circle that represents the next layer of the feather’s eye.
Secure this round with a slip stitch, then change to the vibrant green yarn. This color starts to bring the body of the feather to life.
For the green round, alternate between one double crochet and two double crochets in the next stitch. Repeat this pattern around to slowly expand the motif into an oval shape rather than a perfect circle.
At the end of this round, use a slip stitch to finish, then prepare for the most creative part—adding the feather’s curved outline with the gold yarn.
3. Shaping the Feather with Elegant Curves
This section of the Crochet Easy Peacock Feather Coasters or Motif Tutorial focuses on transforming the round base into a feather-like motif with graceful curves.
Attach the gold yarn at the top center of the oval. Begin with a chain of six, then slip stitch back into the same starting point to create a small loop that forms the top tip of the feather.
Continue crocheting single crochets (sc) evenly around the left side of the oval. When reaching the bottom tip, crochet five single crochets into the same stitch to form a rounded point.
Work your way up the right side of the oval with single crochets, mirroring the left side. This helps the motif maintain a symmetrical feather-like appearance.
Once you reach the top again, repeat the chain-six loop to balance both sides of the feather. Slip stitch to secure the loop, giving the top of the feather an airy, elegant finish.
To add a final flair, crochet small picot stitches (chain three, slip stitch into the first chain) at equal distances along the outer edge. This creates a delicate, frilly look reminiscent of real peacock feather strands.
Finish this section by fastening off and weaving in all ends securely. Your feather shape is now complete and beautifully defined.
4. Finishing, Blocking, and Creative Uses
Completing the crochet motif is rewarding, but finishing it properly enhances its beauty. This part of the Crochet Easy Peacock Feather Coasters or Motif Tutorial covers the final steps.
Gently stretch the feather motif into the ideal shape. Pin it to a foam board, focusing on keeping the top loops symmetrical and the sides smooth.
Lightly steam the motif with an iron held a few inches above (never pressing directly on the yarn) or use a garment steamer. This sets the stitches and flattens the coaster for functional use.
Allow it to dry completely while pinned. This ensures the motif maintains its perfect shape when unpinned, whether used as a coaster, wall décor, or appliqué.
These peacock feather motifs can be stitched onto pillow covers, tote bags, or blankets to add a pop of color and unique style. The possibilities are endless for anyone following this Crochet Easy Peacock Feather Coasters or Motif Tutorial.
You can also crochet multiple motifs and join them together to form a table runner or a stunning wall hanging, creating a cohesive, decorative statement piece.
Don’t forget to make a matching set of coasters in various colors or sizes for gifting purposes. Handmade gifts like these are always cherished and appreciated.
About Crochet Easy Peacock Feather Coasters or Motif Tutorial
Q1: Is this tutorial suitable for beginners? Yes! This Crochet Easy Peacock Feather Coasters or Motif Tutorial is beginner-friendly. Basic knowledge of chain, slip stitch, single crochet, and double crochet is enough to complete the project.
Q2: How long does it take to make one feather motif? On average, it takes about 45 minutes to an hour to complete one coaster, depending on your crochet speed and experience.
Q3: What type of yarn works best for this project? Cotton yarn is highly recommended because it holds shape well, is durable, and is absorbent—perfect for coasters.
Q4: Can I adjust the size of the motif? Absolutely! To make a larger motif, simply add extra rounds before shaping the feather outline. For smaller motifs, use thinner yarn and a smaller hook.
Q5: What are some alternative uses for this motif? Besides being a coaster, this motif works wonderfully as an appliqué on bags, cushions, clothing, wall art, or even as part of a garland.
Q6: How do I care for crochet coasters made from this pattern? If made with cotton yarn, they are machine washable. Use a gentle cycle and lay flat to dry to preserve the shape.
In this comprehensive Crochet Easy Peacock Feather Coasters or Motif Tutorial, you learned how to create beautiful peacock feather-inspired motifs step by step. From choosing the right materials to shaping and finishing your project, this guide covers everything you need to succeed.
These stunning crochet motifs are versatile, functional, and incredibly fun to make. Whether you use them as coasters, decorations, or gifts, they will surely bring color and joy wherever they are placed.
If you enjoyed this tutorial, I would love to hear your feedback. Please leave a sincere comment with your thoughts, experiences, and suggestions for future tutorials. Happy crocheting


