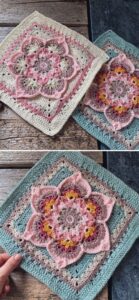
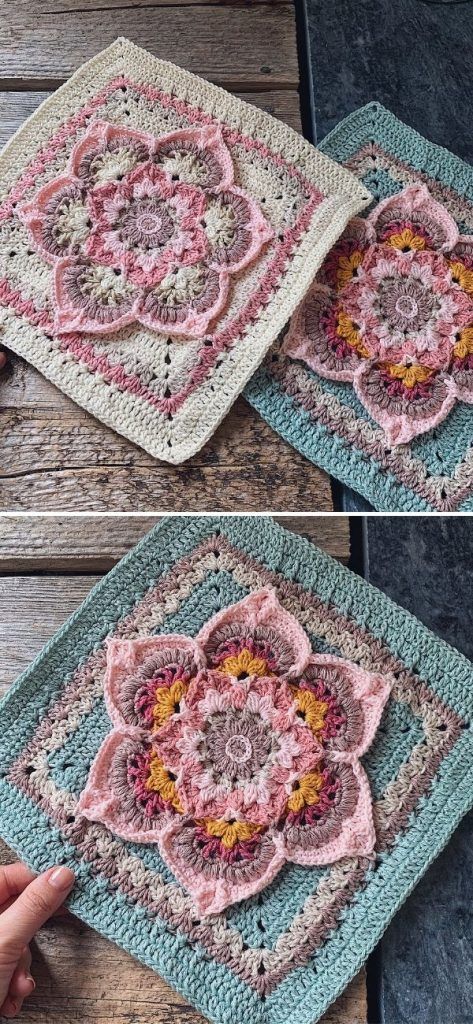
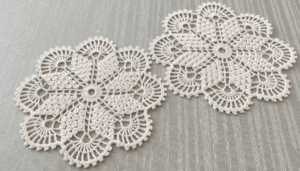
How to Crochet a Lotus Square | Granny Square Tutorial
Advertising
If you’ve ever wondered how to crochet a Lotus Square | Granny Square Tutorial, you’re in the right place. This beautiful crochet motif is versatile, elegant, and perfect for many projects, from blankets and pillows to bags and wall art. The delicate petal-like design of the lotus adds a graceful touch to any handmade piece.
In this detailed guide, you’ll learn how to crochet a Lotus Square | Granny Square Tutorial step by step, even if you are a beginner. This pattern combines classic granny square techniques with modern flair, making it a must-learn for anyone who loves crochet.
Advertising
Mastering the Lotus Square is not only enjoyable but also an excellent way to improve your crochet skills. Whether you want to create a single square or a full project, this tutorial will guide you through each step carefully and clearly.
Before diving into how to crochet a Lotus Square | Granny Square Tutorial, gathering the right materials is essential. Having everything ready will make the process smoother and more enjoyable.
For this pattern, you will need medium-weight cotton or acrylic yarn. Choosing yarn with good stitch definition will help highlight the beauty of the lotus petals.
A crochet hook that matches your yarn is crucial. Typically, a 4.0mm to 5.0mm hook works perfectly for a medium-weight yarn, but always check your yarn label for guidance.
Advertising
You’ll also need scissors to trim the yarn and a yarn needle for weaving in the ends. Stitch markers can be helpful but are optional.
If you want to create multiple Lotus Squares for a blanket or other large project, prepare several yarn colors to make your piece vibrant and unique.
Select colors that either contrast for a striking effect or stay within the same palette for a soft, harmonious look. This makes your Lotus Square Granny Square even more special.
Finally, make sure to have a comfortable space to work, good lighting, and a cup of tea or coffee to enjoy while crocheting!
2. Step-by-Step Instructions for the Lotus Square Center
Let’s start the actual process of how to crochet a Lotus Square | Granny Square Tutorial by creating the center. This part forms the foundation of your square.
Begin with a magic ring or chain four and slip stitch to form a ring. This will be the center circle where the lotus petals will blossom from.
Next, chain three (this counts as your first double crochet) and work eleven more double crochets into the ring. Slip stitch to the top of the starting chain to close the round.
For the second round, chain three again, then double crochet into the same stitch. In each stitch around, make two double crochets. By the end of this round, you should have 24 stitches.
This double increase creates a nice, flat circle, essential for forming a balanced Lotus Square Granny Square pattern.
In the third round, you start forming petal bases. Chain five (counts as a double crochet plus chain two), skip one stitch, double crochet in the next stitch. Repeat this pattern around to create twelve chain spaces.
These chain spaces are crucial as they set the framework for the petal details in the following round. Each gap is where your petals will blossom.
Finish the round by slip stitching into the third chain of the starting chain five. Now you’re ready to start making the lotus petals!
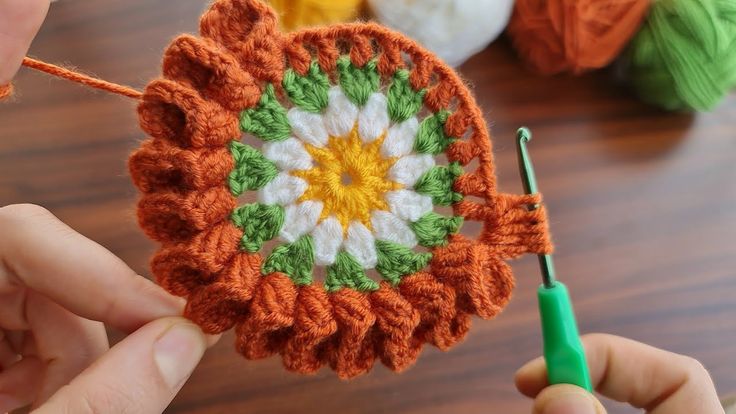
3. Creating the Petal Design in the Lotus Square
Now comes the fun and creative part of how to crochet a Lotus Square | Granny Square Tutorial — the lotus petals. These give the square its signature look.
Start by slip stitching into the first chain space. Chain three (counts as a double crochet), then work four more double crochets into the same space.
Chain three and slip stitch back into the same space to anchor the petal. This forms the first complete petal of your Lotus Square Granny Square.
Move to the next chain space with a slip stitch, then repeat: chain three, work four double crochets, chain three, and slip stitch back into the same space.
Continue this pattern around the circle. You should end up with twelve beautiful petals when the round is complete.
The petals will slightly curve outward, giving the motif a floral and delicate look. This is completely normal and part of the charm.
To finish this round, slip stitch into the base of the first petal. You’ll notice your piece now has a lovely flower-like center.
At this point, the motif starts to transition from a circle into a square, preparing it for the final rounds that turn it into a proper Lotus Square Granny Square.
4. Turning the Lotus into a Perfect Square
The final step in how to crochet a Lotus Square | Granny Square Tutorial is transforming your flower into a square so it can be joined with others or used in your projects.
Start by working into the space behind each petal. Locate the gap behind the petal where the previous chains were made — this is where your next stitches go.
In one of the corner spaces, chain three (counts as a double crochet), double crochet, chain two, double crochet twice — this forms the first corner.
In the next space (between petals), make one double crochet. This serves as the side stitch, keeping the square’s edges straight.
Repeat the corner: two double crochets, chain two, two double crochets all in the next space. Then one double crochet in the side space.
Continue this sequence: corner, side, corner, side, until you have four corners and four sides established around the petals.
To finish, slip stitch into the top of the starting chain. Your Lotus Square Granny Square should now have a defined square shape with a gorgeous flower in the center.
If you prefer a larger square, you can add additional rounds of double crochet with corners made from (2 DC, ch 2, 2 DC) and sides from simple double crochets.
About How to Crochet a Lotus Square | Granny Square Tutorial
Q1: Is the Lotus Square beginner-friendly? Yes, this pattern is beginner-friendly with basic stitches like chains, double crochets, and slip stitches. The petal formation may seem tricky at first, but it becomes simple with practice.
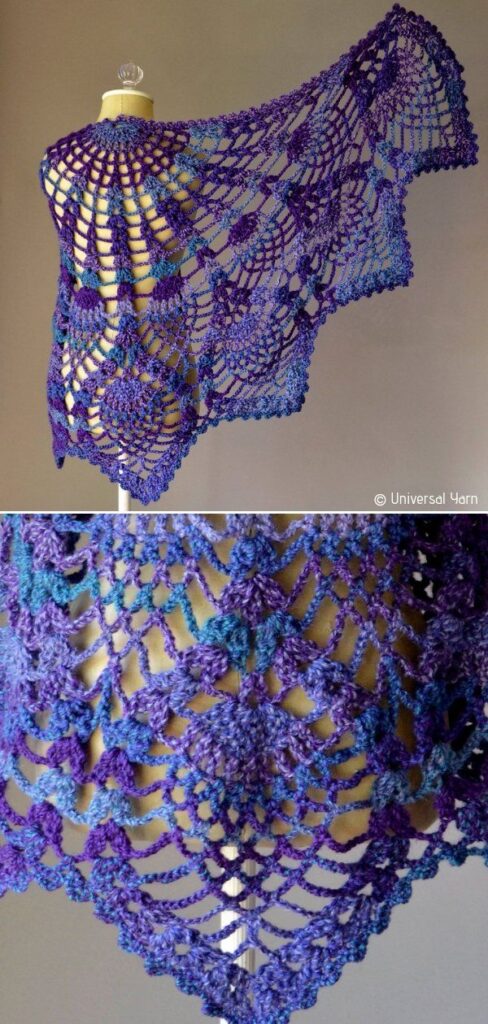
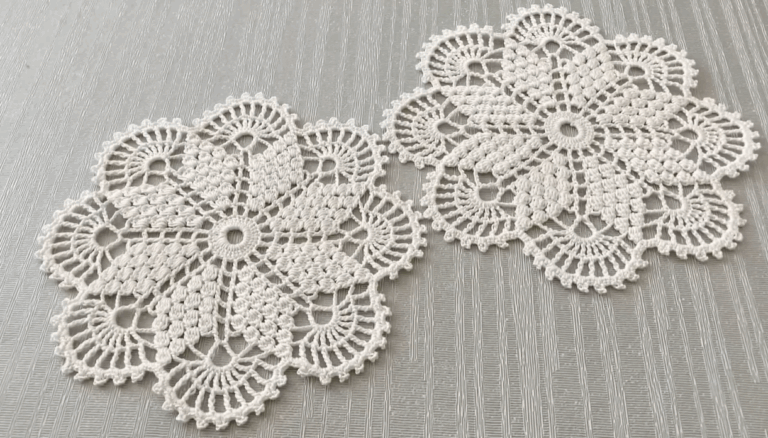
Q2: What can I make with the Lotus Square? You can use the Lotus Square Granny Square to create blankets, pillows, wall hangings, bags, table runners, or even garments when combined with other motifs.
Q3: How do I join multiple Lotus Squares together? You can join them using whip stitch, slip stitch join, or join-as-you-go methods, depending on the look you prefer for your finished piece.
Q4: What yarn works best for the Lotus Square? Cotton yarn is excellent for structure and stitch definition. Acrylic yarn is also a good choice for softness and affordability. Make sure the yarn has a consistent thickness.
Q5: Can I change the size of the Lotus Square? Yes! You can adjust the size by changing the hook size, using thicker yarn, or adding extra rounds of double crochet after completing the petal and corner sections.
Q6: How do I stop the Lotus Square from curling? If your Lotus Square Granny Square curls slightly, blocking it by pinning it to a flat surface and spraying it with water will help it hold its shape.
Congratulations! You’ve learned how to crochet a Lotus Square | Granny Square Tutorial from start to finish. This beautiful and versatile pattern adds a touch of elegance to any project. Whether you make one square or dozens, the result is always stunning.
I hope this tutorial has inspired you to pick up your hook and create something beautiful. Please leave your honest opinion, share your experience, and feel free to suggest what kind of crochet tutorials you would love to see next!


