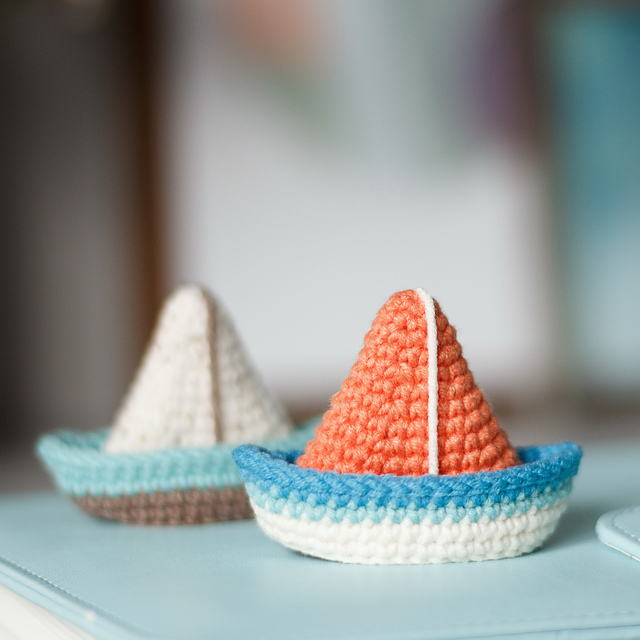
Boat and Sailboat- Crochet Pattern
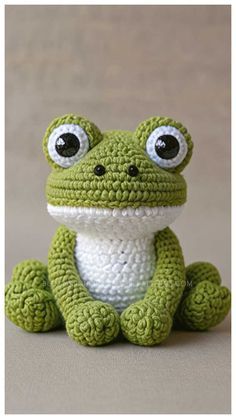
If you’ve been searching for a unique and joyful amigurumi project, the AMIGURUMI GIAN THE FROG FREE PATTERN is exactly what you need! This charming frog character is a delightful addition to any handmade toy collection. Whether you’re new to crocheting or an experienced maker, this free pattern offers a fun and rewarding experience. Not only will you learn how to create a lovable frog named Gian, but you’ll also explore techniques that can be applied to many other amigurumi creations.
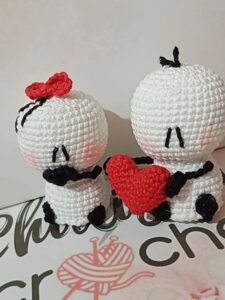
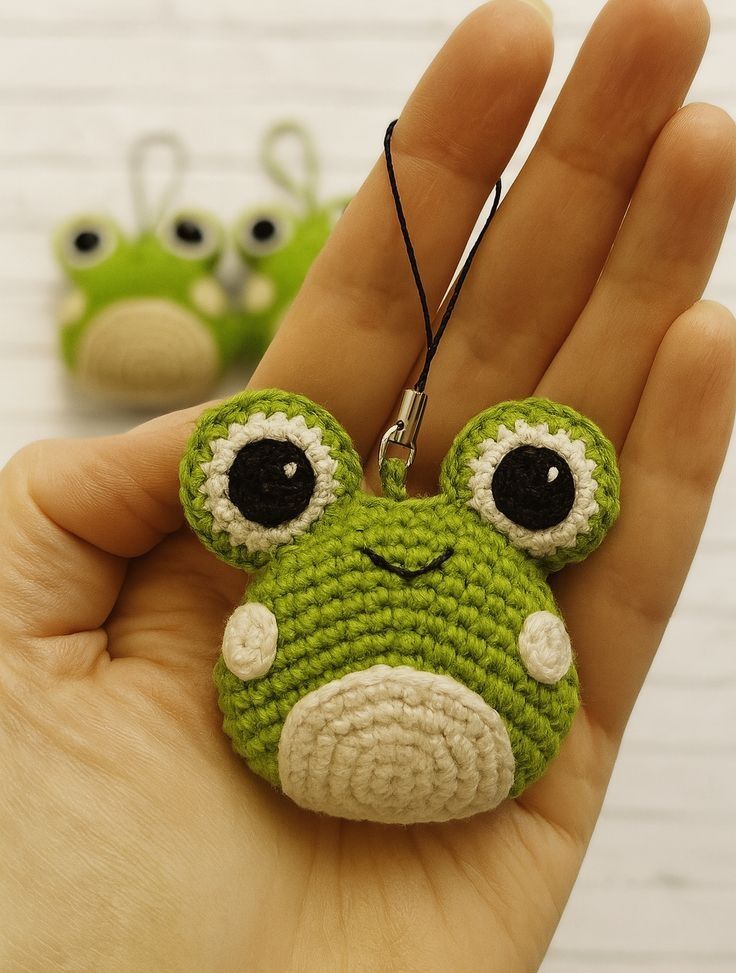
The AMIGURUMI GIAN THE FROG FREE PATTERN has become a favorite among crocheters for its playful look, beginner-friendly structure, and versatility. Gian the Frog is designed to be cute, cuddly, and full of personality. With his big eyes, long limbs, and adorable smile, Gian quickly becomes a favorite among children and adults alike. As a handmade gift or a personal project, this frog brings joy wherever he hops.
Using basic crochet stitches and a small amount of yarn, this project is not only accessible but also a great way to use leftover materials. The AMIGURUMI GIAN THE FROG FREE PATTERN allows for creativity — you can customize colors, expressions, and even add little accessories to make your frog truly one-of-a-kind. Let’s dive into how to bring Gian to life!
The first step in any successful amigurumi project is preparation. Before picking up your hook, make sure you have the right tools and materials to complete your frog from start to finish.
You’ll need some medium-weight yarn in green tones for Gian’s body, along with white, black, and possibly red or pink for details like the eyes and cheeks. A 2.5mm or 3mm crochet hook works well to create tight stitches that keep the stuffing inside.
Stitch markers, a yarn needle, scissors, and fiberfill stuffing are also essential. These simple tools make the process smoother and ensure your AMIGURUMI GIAN THE FROG FREE PATTERN comes out neat and well-shaped.
It’s important to familiarize yourself with the basic stitches used: magic ring, single crochet (sc), increase (inc), and decrease (dec). These are the foundation of most amigurumi and are all you need to complete Gian.
To maintain shape and durability, always crochet tightly and consistently. Loose stitches can lead to gaps, making your finished frog look messy. Take your time, especially if you’re new to amigurumi.
Once you’ve gathered all the materials, take a moment to study the AMIGURUMI GIAN THE FROG FREE PATTERN instructions. Reading ahead will help you understand the construction sequence and visualize the final toy.
The body and head of Gian are usually made in one continuous piece, which makes the frog look seamless and professionally crafted. This is a common technique in amigurumi that adds durability and aesthetic appeal.
Start with a magic ring and create the base of the body. This will be worked in continuous spirals — a signature method used in amigurumi. Keep track of your rounds with a stitch marker to avoid counting errors.
Gradually increase the stitches to shape the round belly of Gian. The belly should be nice and plump, so don’t forget to stuff it firmly as you go to maintain the frog’s shape.
Once the body is complete, you’ll begin shaping the neck and then expanding again to form the head. The transition between body and head should be smooth, creating a natural, frog-like silhouette.
Stuffing is key here. Be sure to stuff the body and head while crocheting — not afterward — to avoid uneven distribution. This keeps Gian upright and gives him that adorable roundness.
Add safety eyes or crochet your own, depending on your preference. The eyes should be spaced evenly and symmetrically on the head to give Gian a cute, balanced look. Embroider the smile and cheeks to bring his personality to life.
Gian the Frog wouldn’t be complete without his signature long arms and legs. These add a touch of humor and playfulness that make him so special. Plus, they’re simple to make and attach.
Start with the arms. They are made using basic rounds, just like the body, but in smaller sizes. You can choose to stuff them lightly or leave them floppy for a more relaxed look.
The legs are slightly longer and give Gian his fun, frog-like charm. Like the arms, they’re crocheted in spirals and are easily attached to the lower part of the body with a yarn needle.
To keep your AMIGURUMI GIAN THE FROG FREE PATTERN looking neat, be sure to sew the limbs symmetrically. Uneven placement can make the frog look off-balance or crooked.
Now comes the fun part: adding optional accessories! A little bow tie, a tiny backpack, or even a crown can make Gian even more charming. Let your creativity shine here.
Don’t forget to add final touches like blush using a bit of pink yarn or fabric paint. These small details give Gian life and character, making your version unique and personal.
One of the great joys of working with the AMIGURUMI GIAN THE FROG FREE PATTERN is how easily it can be customized. Once you’ve mastered the basic structure, you can get playful with colors, sizes, and expressions.
Experiment with variegated yarns to give Gian a fun pattern, or go bold with bright neons for a modern twist. The color palette is entirely up to you, and it’s a great way to make each frog unique.
Want to make a family of frogs? Simply change the yarn thickness and hook size. A finer yarn makes a smaller frog, while a bulky yarn creates a giant Gian perfect for hugging.
Facial expressions are another area for creativity. Try different eyebrow shapes, eyelash embroidery, or even a winking eye. These little changes can give Gian a whole new personality.
If gifting Gian to a child, consider using embroidered eyes instead of safety eyes for extra security. Safety always comes first in amigurumi toys intended for young kids.
Lastly, don’t rush the process. Enjoy every stitch, every detail, and every moment of creating your AMIGURUMI GIAN THE FROG FREE PATTERN. Crocheting is as much about the experience as the result.
What is the skill level required for the AMIGURUMI GIAN THE FROG FREE PATTERN?
This pattern is great for beginners with some basic knowledge of amigurumi techniques. If you know how to single crochet, increase, and decrease, you’ll be able to complete this project with ease.
Can I sell the frogs I make from this pattern?
Yes, as long as the pattern itself is not sold or redistributed. You can sell your finished frogs at markets or online, especially if you add your personal touch and give credit to the design inspiration.
What kind of yarn should I use for Gian the Frog?
Any medium-weight cotton or acrylic yarn will work well. Cotton provides great stitch definition, while acrylic is softer and more flexible. Both are suitable for this pattern.
How do I prevent gaps in my stitches when making amigurumi?
Use a smaller hook than you would typically use for the yarn. This keeps your stitches tight. Also, be sure to crochet tightly and consistently to avoid holes where stuffing might show.
Can I wash the finished frog toy?
Yes, hand washing is recommended. Use mild soap and cold water, then squeeze gently and air dry. If you use safety eyes, ensure they’re secured tightly before giving the toy to children.
What if my frog doesn’t look like the picture?
That’s perfectly fine! Every handmade item is unique. Differences in yarn, tension, or placement of features can make your Gian one of a kind. Embrace the charm of handmade imperfections!
Creating your own AMIGURUMI GIAN THE FROG FREE PATTERN is more than just a craft project — it’s an experience filled with joy, creativity, and a sense of accomplishment. You’ve learned how to gather the right materials, follow detailed steps to build the body and limbs, and add those extra special touches that make your frog stand out.
Whether you make Gian for yourself, as a gift, or to sell at local craft fairs, you’re spreading a little bit of handmade happiness. This pattern is a fun reminder that creativity is always within reach — one stitch at a time.
We’d love to hear from you! If you’ve tried this pattern, leave your honest opinion and suggestions below. Did you give Gian a twist? Add a special accessory? Let us know how your frog turned out!
