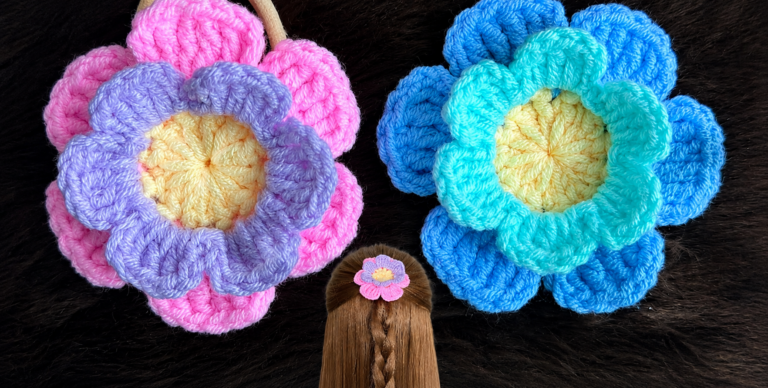
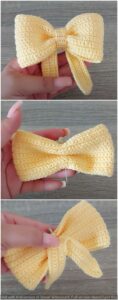
Crocheted Flower Headband - Pattern
The Pinwheel keychain – Crochet Pattern is a delightful project that combines creativity, functionality, and charm. Perfect for both beginners and seasoned crafters, this design offers a playful twist on the traditional pinwheel motif while being small enough to complete quickly. A crochet keychain is not only practical for keeping keys together but also makes a thoughtful handmade gift for friends, family, or even yourself. By working with a few simple stitches, you can create a colorful accessory that reflects your personal style.
What makes the Pinwheel keychain – Crochet Pattern so popular is its versatility. You can experiment with different yarn colors, textures, and embellishments to give each pinwheel its own unique personality. Whether you prefer bright, bold hues or subtle, minimalist tones, this little project adapts beautifully. It’s also a wonderful way to use up leftover yarn scraps, turning them into something both functional and decorative.
In addition to being fun and customizable, the Pinwheel keychain – Crochet Pattern is budget-friendly. Since the project requires only a small amount of yarn and basic crochet supplies, it’s accessible to anyone looking to practice their skills without a big investment. Plus, once you’ve mastered the technique, you can produce multiples in a short amount of time, which makes them great for craft fairs, gifts, or personal use.
Before diving into the details, it’s important to gather your materials. For the Pinwheel keychain – Crochet Pattern, you’ll need small amounts of yarn in two or more colors, a matching crochet hook, scissors, a yarn needle, and a metal keyring or clasp. Cotton yarn is often preferred for keychains because it’s durable and holds its shape well, but you can experiment with acrylic or even specialty yarns depending on your preference.
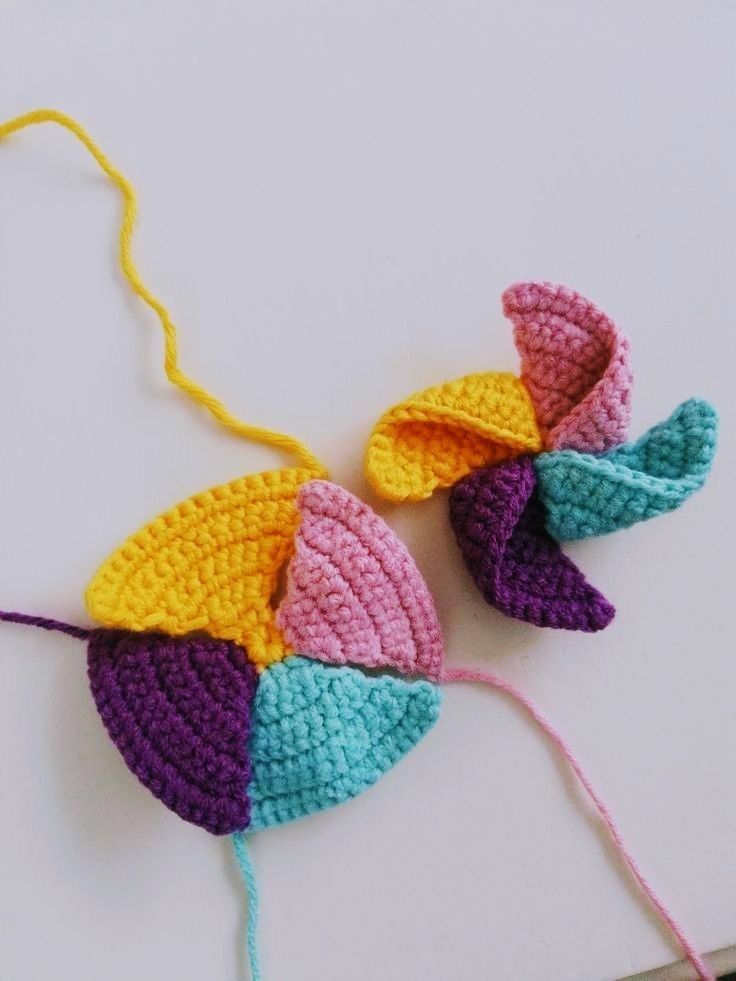
The pinwheel design typically involves creating small triangular sections that are joined together to form the classic spinning wheel shape. Each section is crocheted separately, then assembled to create the final piece. This modular approach makes the pattern simple to follow and less intimidating for beginners.
When starting your project, make sure your stitches are consistent in tension. Since this will be a small item, even slight variations in stitch size can affect the symmetry of the finished pinwheel. Taking time to practice your gauge on a small swatch can help ensure a neat outcome.
Another advantage of the Pinwheel keychain – Crochet Pattern is that it allows you to practice color changes. Switching yarns in the middle of the project gives each triangle a distinct look, and learning to manage these changes without tangling yarn is a valuable skill for future projects.
Once you’ve prepared your materials, it’s helpful to decide on the color arrangement before starting. Planning ahead makes the assembly process smoother and helps you visualize the final design. You can go with alternating bright shades for a playful vibe or stick to monochromatic tones for a more elegant style.
By keeping your materials organized and planning your colors, you’ll set yourself up for success when working through this charming and practical crochet project.
The first step in creating your Pinwheel keychain – Crochet Pattern is to crochet the triangular sections. These are usually made by working in rows or rounds, gradually increasing stitches to form a triangle shape. Depending on the variation you choose, you might work each triangle separately and then join them, or crochet continuously while changing colors.
After finishing the triangles, the next stage is assembly. Lay the pieces flat in the shape of a pinwheel, making sure the points align neatly in the center. This alignment is crucial to achieving the spinning-wheel effect that gives the pinwheel its charm. Secure them with pins or stitch markers before sewing them together.
Use a yarn needle to carefully join the triangles at their edges. For a clean finish, use the same color yarn as one of the triangles, blending your seams invisibly. Alternatively, you can highlight the joins by using a contrasting color, which can add a decorative border to the design.
Once the pinwheel shape is complete, it’s time to attach it to your keyring. Use a sturdy yarn tail or a piece of strong thread to connect the pinwheel securely. Make sure the attachment is tight enough to withstand daily use, as keychains tend to be handled frequently.
You can also add optional embellishments such as beads, buttons, or small tassels to personalize your Pinwheel keychain – Crochet Pattern. These extra touches give your project more flair and make it stand out as a unique handmade item.
Finally, check your work for any loose ends or uneven stitches. Trimming and securing yarn tails neatly will give your pinwheel a polished and professional look.
While the main purpose of the Pinwheel keychain – Crochet Pattern is to create a charming key holder, this little project can serve many other creative uses. Its compact size and cheerful design make it perfect for accessorizing everyday items.
One popular idea is to use the pinwheel as a zipper pull for bags, pouches, or jackets. This not only makes zippers easier to grab but also adds a touch of handmade personality to otherwise plain accessories.
The pinwheel can also be turned into a backpack charm for kids or teens. Bright, colorful versions are especially appealing for school bags, giving them a playful look while making them easier to identify.
Crafters also love to use this pattern as a decorative element for gift wrapping. Attaching a handmade pinwheel to a wrapped present gives it a personal touch and doubles as a small extra gift the recipient can use.
Another creative use is turning the pinwheel into festive decorations. By making multiple pieces in seasonal colors, you can string them together into a garland or scatter them on a table as cheerful accents.
Lastly, the Pinwheel keychain – Crochet Pattern can be adapted into jewelry. Adding a chain or clasp transforms it into a pendant or even a pair of earrings, offering endless possibilities for handmade fashion.
Achieving the best results with the Pinwheel keychain – Crochet Pattern comes down to a few helpful tips. First, always block your finished pinwheel before attaching it to the keyring. Blocking helps set the shape and ensures the triangles lay flat.
Second, experiment with different yarn weights and hook sizes. A thinner yarn will give you a delicate and lightweight keychain, while a thicker yarn produces a sturdier, bolder design. Adjusting the hook size also affects the overall look.
Third, focus on neat color changes. Carrying the yarn neatly along the back or fastening off between sections makes the front of your pinwheel look crisp and professional.
Fourth, don’t be afraid to add structure. A small piece of felt or fabric sewn behind the pinwheel can give it extra stability, making it last longer and hold its shape during daily use.
Fifth, consider making sets of pinwheels in different colors. These can be sold as themed bundles or gifted to friends, offering variety and showcasing your creativity.
Finally, practice patience. While the Pinwheel keychain – Crochet Pattern is a small project, it still requires attention to detail. Taking your time ensures that each stitch contributes to a beautifully finished product.
Q: Is the Pinwheel keychain – Crochet Pattern suitable for beginners?
Yes, this project is great for beginners. It uses basic stitches and simple assembly, making it a friendly introduction to crocheting small accessories.
Q: What type of yarn works best for a Pinwheel keychain?
Cotton yarn is recommended because it holds its shape well and is durable. However, acrylic or blended yarns can also be used depending on your preference.
Q: How long does it take to make one keychain?
Most crafters can complete a Pinwheel keychain – Crochet Pattern in under an hour, especially once they are familiar with the process.
Q: Can I wash the pinwheel keychain if it gets dirty?
Yes, hand washing with mild soap is recommended. Avoid machine washing, as it may distort the shape or damage the keyring attachment.
Q: Can I sell items made from this pattern?
Absolutely. Handmade pinwheel keychains are popular at craft fairs, online shops, and as gifts. Just remember to give them a personal touch with your own color choices.
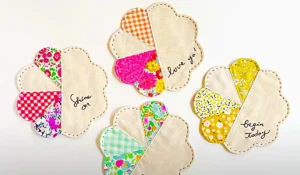
Q: Can I enlarge the pinwheel to make it a coaster or decoration?
Yes, by using thicker yarn and a larger hook, the same Pinwheel keychain – Crochet Pattern can easily be adapted into coasters, ornaments, or other decorative items.
The Pinwheel keychain – Crochet Pattern is a simple yet rewarding project that brings together creativity, practicality, and charm. Whether you’re making it as a personal accessory, a thoughtful gift, or a small item for sale, the possibilities are endless. With just a little yarn and some time, you can craft a delightful pinwheel that brightens everyday life.
I hope this guide has inspired you to try your own version of the pinwheel keychain. If you found the article helpful, please share your thoughts and leave a sincere opinion along with any suggestions for future tutorials. Your feedback is always appreciated and helps keep the crochet community thriving with creativity.


