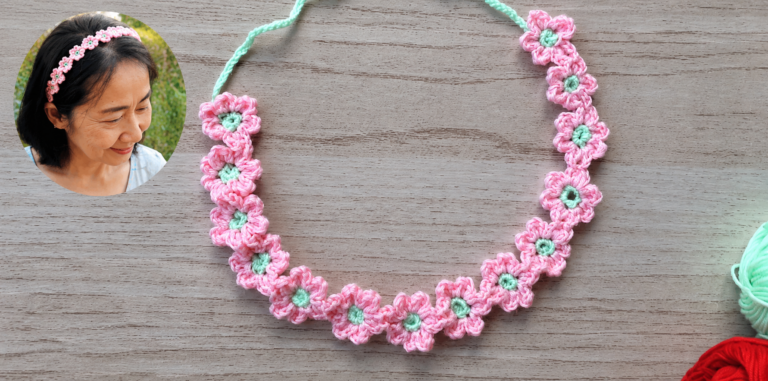
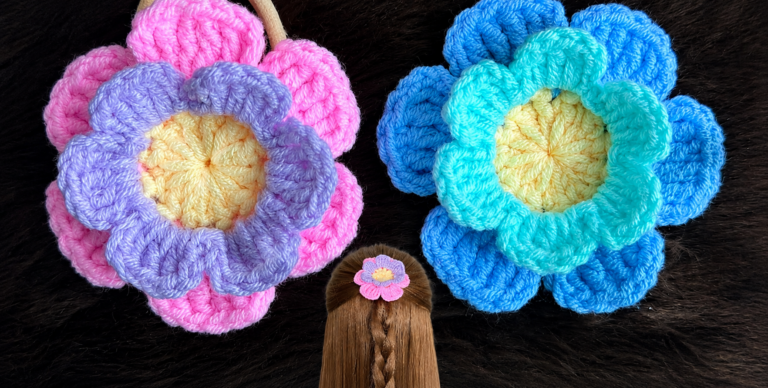
Crocheted Flower Headband - Pattern
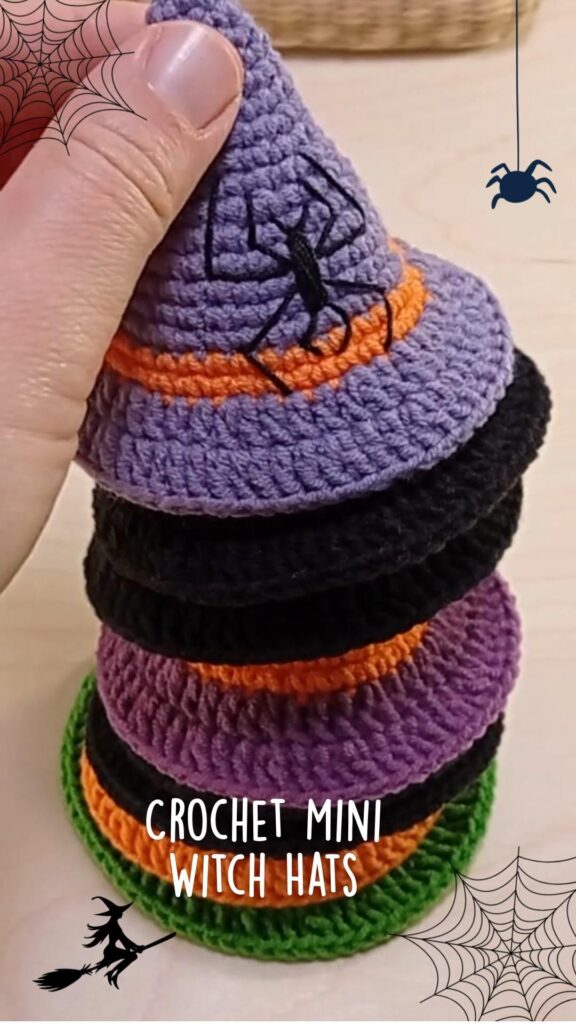
The Crochet Witch Hat – Crochet Pattern is one of those timeless and magical projects that combine creativity, tradition, and functionality. Whether you’re preparing for Halloween, adding a whimsical accessory to your wardrobe, or crafting something special as a gift, this pattern allows you to showcase your crochet skills while having fun with a theme that never goes out of style. From bold black hats that echo classic witch vibes to colorful versions that show off a playful side, the possibilities are endless when it comes to this enchanting design.
One of the biggest joys of working with a Crochet Witch Hat – Crochet Pattern is how customizable it can be. You can make a tall, pointy version that leans into fantasy themes or create a shorter, more subtle hat for daily wear or casual costume parties. Yarn choice, stitch variation, and sizing adjustments mean this project can suit both beginners and advanced crocheters, making it a versatile favorite in the crochet community.
Beyond being a seasonal craft, the Crochet Witch Hat – Crochet Pattern is also a creative way to practice shaping techniques in crochet. Unlike flat projects such as blankets or dishcloths, this design requires you to understand increases, decreases, and structure building. That means you’ll not only end up with a fun accessory but also grow your crochet skills along the way.
To bring your Crochet Witch Hat – Crochet Pattern to life, the first step is gathering the right materials. Choosing the correct yarn weight, hook size, and additional embellishments makes a huge difference in the final look and durability of your hat.
Start with yarn selection. For a sturdy hat that holds its shape, many crocheters prefer worsted weight yarn or even bulky yarn. Cotton yarn offers structure, while acrylic yarn provides flexibility and affordability. Black yarn is the classic choice, but purple, orange, or even sparkly yarns add flair.
Your crochet hook size should match the yarn you’re using, typically ranging from 4.5mm to 6mm. Using a slightly smaller hook than recommended can give the hat a firmer texture, which is excellent for shaping the brim and peak of the witch hat.
Don’t forget about accessories. Some makers like to add ribbons, buckles, or even faux flowers to their hats for decoration. These small details elevate your Crochet Witch Hat – Crochet Pattern from simple to spectacular.
Stuffing and wire can also play a role. If you want a hat that stands tall and firm, lightweight stuffing or craft wire inside the brim and cone can keep everything in place. This step is optional but worth considering if durability matters.
Lastly, make sure you have stitch markers, a yarn needle, and scissors. These tools may seem simple, but they make the process smoother and help ensure precision in your Crochet Witch Hat – Crochet Pattern.
Once you have your supplies ready, it’s time to start crocheting. The Crochet Witch Hat – Crochet Pattern typically begins at the tip of the hat and works downward, creating the signature cone shape before adding the wide brim.
Start at the peak by creating a magic ring or a small chain loop. This is where you’ll build your foundation rounds, gradually increasing stitches as you go. The goal here is to form the cone, so you’ll continue increasing until the base of the cone is wide enough to sit comfortably on the head.
After building the cone, the next step is shaping the brim. This is where the project gets exciting, as you’ll begin working outward to form the wide circle that makes a witch hat instantly recognizable. Controlled increases are key to keeping the brim flat rather than wavy.
To add flair, consider using decorative stitches around the brim. For example, crab stitch or picot edging creates a textured look that makes your Crochet Witch Hat – Crochet Pattern stand out. Experimentation here allows you to express your personality.
Once the main structure is complete, block the hat if needed. Blocking helps to shape the stitches and ensure the brim lays neatly. This step is particularly useful if you used natural fibers like cotton or wool.
Finally, finish off by weaving in ends and attaching any decorative details such as ribbons, appliqués, or charms. These last touches turn a simple hat into a statement piece, perfect for costumes or themed parties.
One of the greatest strengths of the Crochet Witch Hat – Crochet Pattern is how many creative variations exist. By changing colors, textures, and sizes, you can adapt this pattern for countless themes and occasions.
A mini witch hat, for example, makes an adorable accessory for dolls, pets, or table decorations. These smaller versions work up quickly and use minimal yarn, making them ideal for last-minute projects.
For a whimsical twist, try using multicolored or variegated yarn. A self-striping yarn can naturally create layers of color, giving your Crochet Witch Hat – Crochet Pattern a magical appearance without extra effort.
Another popular idea is incorporating Halloween themes directly into the design. Adding crocheted stars, moons, or pumpkins to the brim transforms the hat into a festive decoration that doubles as wearable art.
If you’re looking for something elegant, consider a lace-style witch hat. Using fine yarn and delicate stitches, you can create a lightweight, decorative piece that’s less about function and more about fashion.
Lastly, don’t limit yourself to traditional Halloween use. A white or pastel version of the Crochet Witch Hat – Crochet Pattern can fit into fantasy or fairy-inspired outfits, showing just how versatile this pattern can be.
Crocheting a witch hat may seem straightforward, but a few expert tips can make the process smoother and the results more professional. Paying attention to tension, shaping, and finishing techniques ensures your Crochet Witch Hat – Crochet Pattern turns out beautifully.
First, maintain consistent tension. Loose stitches can make the hat floppy, while overly tight stitches may cause the brim to curl. Finding the right balance is essential for structure.
Second, measure as you go. Try the hat on or use a head form to check fit. This ensures that your Crochet Witch Hat – Crochet Pattern is comfortable to wear and sits properly on the head.
Third, reinforce the brim if needed. Adding a hidden wire, stiffening spray, or even sewing in a fabric lining helps the brim hold its shape for longer.
Fourth, play with embellishments. A simple bow, a decorative buckle, or crocheted flowers can elevate your design from basic to eye-catching. These small touches personalize your project.
Fifth, practice patience when weaving in ends and finishing details. Clean finishing makes a huge difference in the overall quality of the hat.
Finally, don’t be afraid to experiment. Adjust stitch counts, change yarn types, or play with proportions until you find a version of the Crochet Witch Hat – Crochet Pattern that feels uniquely yours.
1. Is the Crochet Witch Hat – Crochet Pattern beginner-friendly?
Yes, many versions are suitable for beginners. If you’re comfortable with basic stitches like single crochet, double crochet, and increases, you can make a witch hat.
2. How long does it take to complete a Crochet Witch Hat – Crochet Pattern?
It depends on the size and complexity. A simple child-sized hat can be done in a few hours, while a detailed adult version with embellishments may take a couple of days.
3. Can I make the Crochet Witch Hat – Crochet Pattern without wire?
Absolutely. While wire adds structure, the hat will still look great without it. Choosing sturdy yarn and maintaining tight stitches will help it hold its shape naturally.
4. What yarn works best for Crochet Witch Hat – Crochet Pattern?
Worsted weight or bulky yarn is most popular. Cotton gives firmness, acrylic adds flexibility, and wool offers warmth, making each a good option depending on your needs.
5. Can the Crochet Witch Hat – Crochet Pattern be resized?
Yes, you can adjust by increasing or decreasing stitch counts. Measuring as you go is the best way to ensure the perfect fit for children or adults.
6. How do I stiffen the brim of my Crochet Witch Hat – Crochet Pattern?
You can use craft wire, fabric stiffener, or even starch spray. Blocking also helps to create a smooth, flat brim.
The Crochet Witch Hat – Crochet Pattern is more than just a seasonal accessory—it’s a project that combines creativity, skill, and personal expression. From material selection to finishing touches, every step allows you to experiment and make the design your own. Whether you choose a traditional black version or a colorful fantasy-inspired hat, the result is always charming and unique.
I hope this guide has given you both inspiration and practical tips for creating your own Crochet Witch Hat – Crochet Pattern. Now I’d love to hear from you: have you ever made one before, or are you planning to try it soon? Share your honest opinion and suggestions—I look forward to your feedback!


