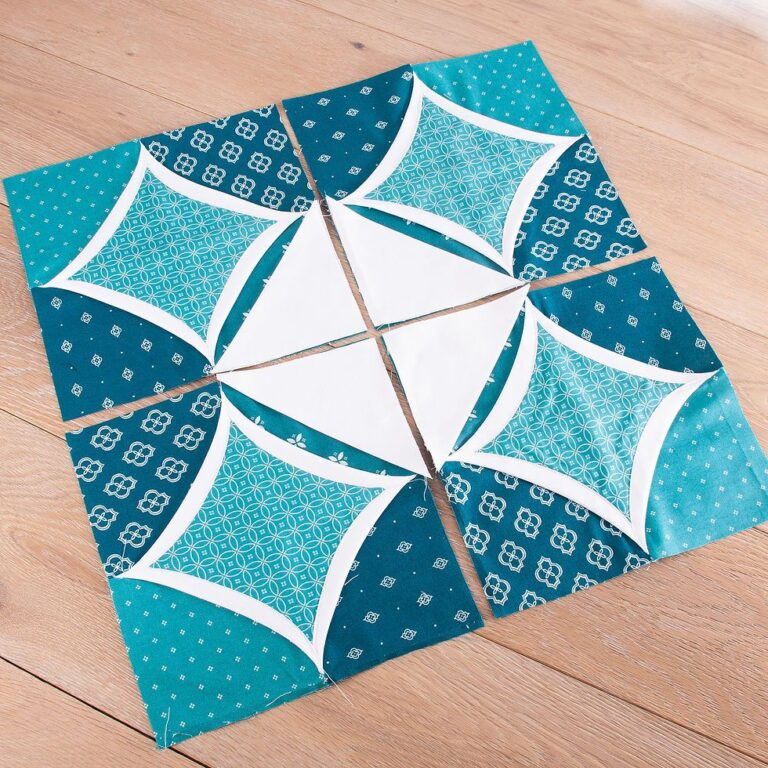
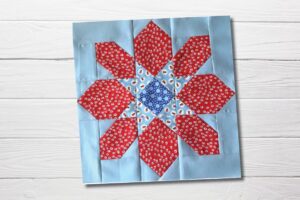
Cathedral Block - Quilt Pattern
The Quilted Apple Pillow Pattern – Quilt Pattern is a delightful project that blends comfort, creativity, and charm into one handmade piece. If you are a beginner looking for a small and manageable project, or an experienced quilter who enjoys adding seasonal flair to home décor, this design is the perfect fit. By creating an apple-shaped pillow with quilted details, you can bring a touch of warmth and coziness to any room in your house.
A quilted pillow not only offers decorative appeal but also adds functionality. The apple shape makes it whimsical and eye-catching, while the quilting ensures durability and texture. Whether you use it on a couch, a reading chair, or a child’s room, the Quilted Apple Pillow Pattern offers endless opportunities to personalize the look with fabric choices, colors, and quilting styles.
In this article, we will explore the details of making the Quilted Apple Pillow Pattern – Quilt Pattern, step by step. We’ll cover fabric selection, cutting, assembly, and finishing tips, ensuring that you can confidently take on this project. Whether you want to make one as a gift, a seasonal decoration, or simply as a relaxing sewing activity, this pillow will quickly become a favorite in your handmade collection.
The first step to creating your Quilted Apple Pillow Pattern – Quilt Pattern is selecting the right fabrics and tools. Fabric choice plays a crucial role in the overall look of your project, and this is where your creativity shines. You can choose solid colors for a modern look or printed fabrics for a more rustic and traditional style. A red apple pillow can bring a classic harvest theme, while green or even golden tones can offer a fresh twist.
Quilters often recommend cotton fabrics because they are durable, easy to work with, and widely available. Cotton blends also provide structure without being too heavy, making them perfect for pillows. Using high-quality fabric ensures your pillow will withstand frequent use and retain its shape and color over time.
Besides fabric, you will need batting or a thin layer of quilt padding to give the pillow its quilted texture. Batting adds volume and makes quilting stitches more visible. For stuffing, polyester fiberfill works well since it is lightweight, washable, and creates a fluffy yet firm finish for your apple pillow.
Essential tools include a rotary cutter, quilting ruler, and cutting mat for precise measurements. Good quality thread, pins, and a sewing machine with a quilting foot will make the sewing process much smoother. A hand needle is also helpful for finishing the final seams neatly.
If you are planning multiple pillows, consider creating a mix of apple colors. A basket of quilted apples, each with different fabrics, can turn into a charming decorative display for the fall season or even a playful addition to a child’s playroom.
Finally, think about the leaf and stem details. These small accents complete the apple shape and give your pillow personality. Felt, wool, or green cotton fabrics work well for leaves, while brown fabric or even twine can be used to mimic the stem. Each choice makes your Quilted Apple Pillow Pattern – Quilt Pattern truly unique.
Once you have your fabrics ready, the next step in creating the Quilted Apple Pillow Pattern – Quilt Pattern is cutting and assembling the apple shape. Accurate cutting ensures all pieces fit together seamlessly, which is key for quilting projects.
Start by drawing an apple template on paper. The template should include curves for the apple’s body and a section for the leaf and stem. You can scale the template depending on how large or small you want your pillow to be. Remember to add seam allowances when cutting the fabric to make sewing easier.
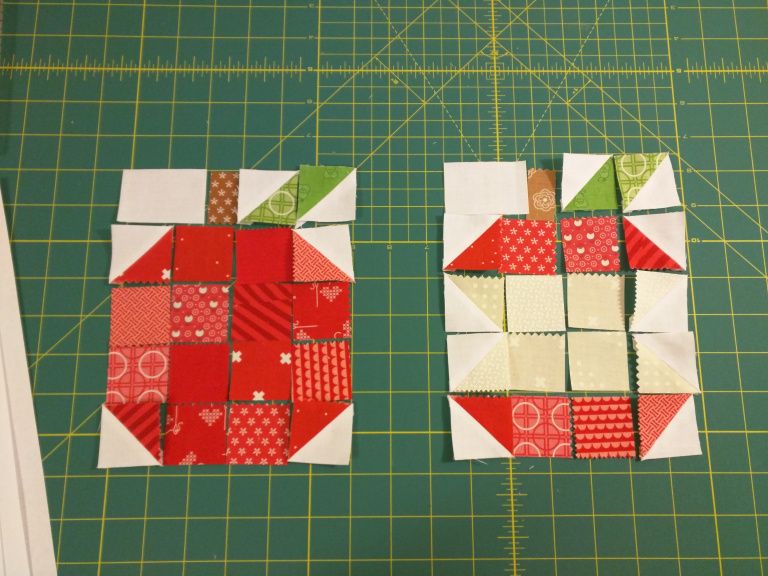
After tracing the template onto your fabric, carefully cut the apple shapes using a rotary cutter or fabric scissors. For a quilted look, you may want to cut multiple pieces and sew them together, forming patchwork sections that resemble apple segments. This adds texture and interest to the finished design.
Once the pieces are cut, pin them together with the right sides facing. Sew along the seams carefully, pressing them flat as you go. If you are new to quilting, start with larger segments before moving on to smaller curved sections. This step ensures that your apple shape remains balanced and symmetrical.
For the leaf, cut a separate piece of green fabric and sew it to the top of the apple body. You can also add batting inside the leaf for extra texture. The stem can be made from a small piece of fabric folded into a strip or even a piece of ribbon. These details bring the apple shape to life and make the pillow visually appealing.
By carefully piecing together your apple shape, you create the foundation of the pillow. At this stage, it already begins to resemble the finished design, making the process rewarding and motivating.
The quilting step is what transforms a simple pillow into the Quilted Apple Pillow Pattern – Quilt Pattern. Quilting involves sewing layers together—typically the fabric top, batting, and fabric backing—to create texture and durability.
To begin quilting, layer your apple-shaped fabric top over the batting and backing fabric. Secure the layers with pins or basting spray to prevent shifting. Then, choose a quilting design that suits your apple theme. Straight-line quilting works beautifully for a clean look, while curved or diagonal lines can enhance the round shape of the apple.
For added creativity, you can try free-motion quilting with swirls or leaf patterns. This makes the apple pillow look more artistic and personalized. Even simple stitches, when repeated consistently, create a lovely quilted effect that elevates the pillow’s charm.
Once you have quilted the apple front, trim away any excess batting and backing. This ensures clean edges and makes the next assembly step much easier. The quilting not only secures the layers but also gives the pillow a soft, plush texture that feels cozy to the touch.
Quilting also provides durability. A pillow without quilting may lose its shape over time, but quilting stitches help distribute pressure evenly, keeping the pillow firm and long-lasting. This is especially important if the pillow will be used frequently.
By experimenting with different quilting techniques, you can make each apple pillow unique. Some may have tight quilting for a dense, textured look, while others may use wider stitches for a softer, looser feel. The choice is yours, making the Quilted Apple Pillow Pattern – Quilt Pattern an enjoyable and flexible project.
The final step in completing the Quilted Apple Pillow Pattern – Quilt Pattern is assembling and finishing the pillow. This stage brings everything together and prepares the project for display or use.
To assemble, place the quilted apple front and a plain fabric backing piece with right sides facing. Sew around the edges, leaving a small opening for stuffing. Carefully clip the curves to reduce bulk and help the pillow maintain a smooth shape once turned right side out.
Turn the pillow right side out through the opening. At this point, the apple design is fully visible, and it’s time to stuff it. Fill the pillow with polyester fiberfill, making sure to distribute the stuffing evenly for a smooth, plump finish. Adjust the amount of filling to your preference—more stuffing creates a firm pillow, while less makes it softer.
Once stuffed, hand-stitch the opening closed using a ladder stitch or slip stitch. This creates an invisible seam, giving the pillow a neat and professional look. Ensure that the stitches are secure so the stuffing does not escape over time.
Now add any extra embellishments you desire. A small embroidered detail on the leaf, decorative stitching on the apple body, or even buttons for a whimsical touch can make your pillow stand out. These final touches highlight your creativity and make the pillow truly personal.
Before considering the pillow finished, give it a gentle press with an iron to smooth out wrinkles. Be cautious not to flatten the stuffing, and use a low heat setting to protect the fabrics and stitching.
With your pillow completed, you can display it on your couch, bed, or favorite chair. The Quilted Apple Pillow Pattern – Quilt Pattern is not only a cozy addition to your home but also a handmade treasure that reflects your effort and creativity.
1. Is the Quilted Apple Pillow Pattern beginner-friendly?
Yes, this project is suitable for beginners. It involves simple cutting, piecing, and quilting techniques that can be learned with practice.
2. What type of fabric works best for this pattern?
Cotton fabrics are the most popular choice for quilting projects. They are durable, easy to sew, and come in a wide range of colors and prints.
3. Do I need special tools to make the apple pillow?
Basic quilting tools like a rotary cutter, ruler, cutting mat, sewing machine, and pins are enough to complete this project successfully.
4. Can I make different sizes of apple pillows?
Absolutely! By scaling the template, you can create smaller or larger apple pillows depending on your preference and fabric availability.
5. How do I wash and care for a quilted apple pillow?
Hand-washing or using a gentle machine cycle is recommended. Use mild detergent and let it air dry to maintain the fabric’s quality and the pillow’s shape.
6. Can I personalize the Quilted Apple Pillow Pattern?
Yes, you can use patchwork fabrics, add embroidery, or include decorative stitches to make the pillow unique and tailored to your style.
The Quilted Apple Pillow Pattern – Quilt Pattern is a creative and rewarding project that combines quilting techniques with home décor. From selecting fabrics and cutting shapes to quilting and finishing touches, this pillow offers a chance to explore your creativity while making something practical and beautiful. Whether for yourself or as a handmade gift, this apple-shaped pillow is sure to bring charm and coziness to any space.
I would love to hear your thoughts on this tutorial. Share your honest opinions and suggestions—your feedback helps make future projects even more inspiring and enjoyable. Would you like me to also prepare a printable step-by-step version of this pattern for you?


