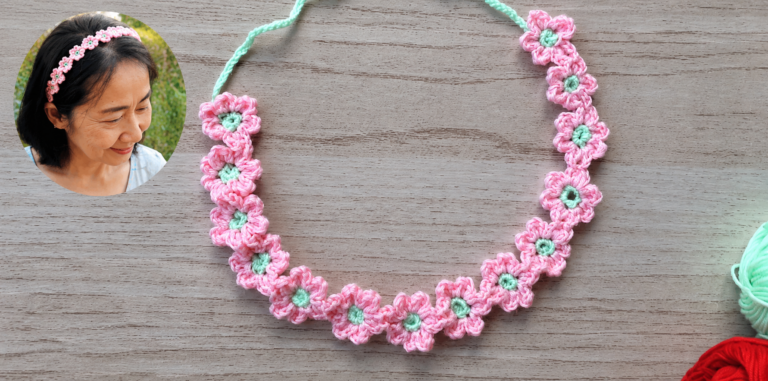
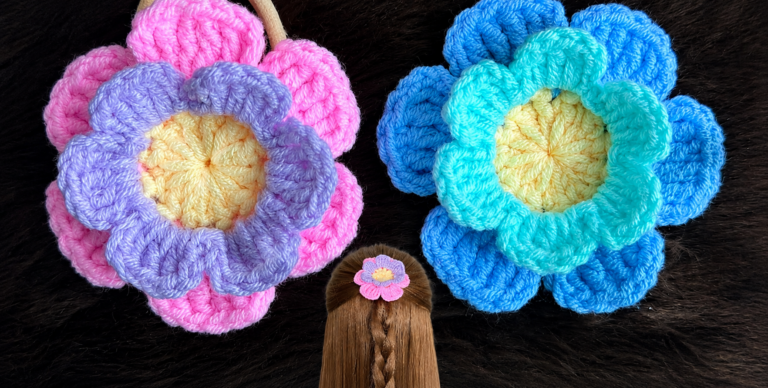
Crocheted Flower Headband - Pattern
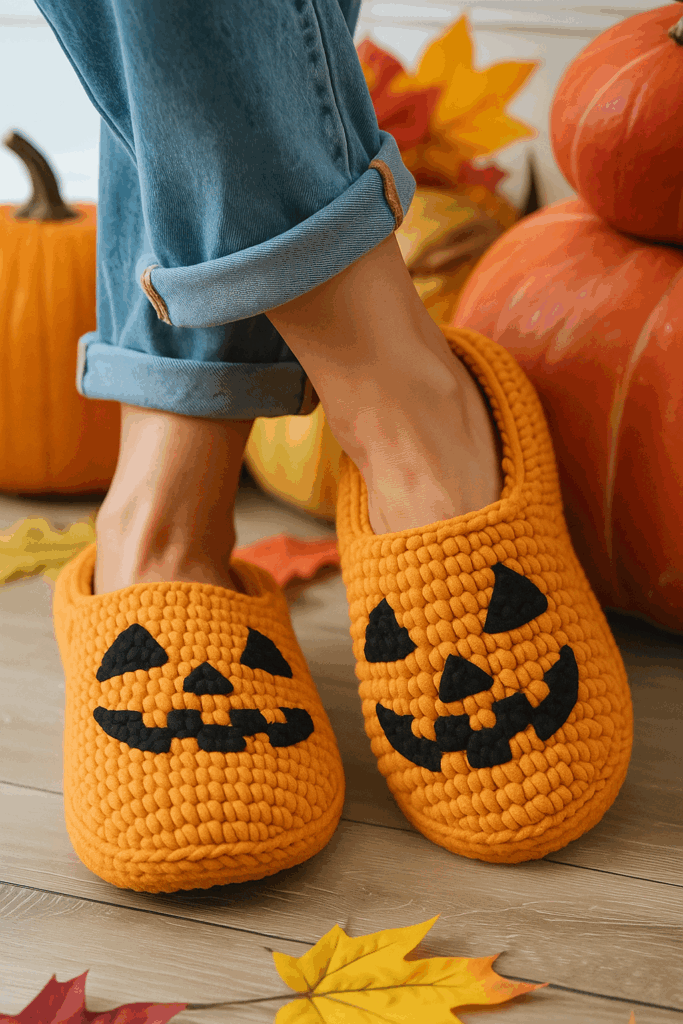
The Pumpkin Slippers Free – Crochet Pattern is a delightful and cozy project that brings the warmth of autumn into your crochet creations. From the soft texture to the seasonal charm, these slippers combine practicality with a touch of festive creativity. Whether you are a beginner or an advanced crocheter, this pattern is a perfect choice to make a handmade piece that feels both functional and stylish. Many crafters enjoy creating slippers because they are quick to make and always useful, and this pumpkin-inspired design adds that extra special seasonal twist.
When crocheting Pumpkin Slippers Free – Crochet Pattern, you will notice how easily this design adapts to different yarn types and foot sizes. The idea behind this project is to create something wearable, yet decorative, making it an excellent handmade gift for friends and family. As fall approaches, the pumpkin theme naturally resonates with holidays, cozy evenings, and seasonal decorations, making this project even more meaningful.
Another reason why crafters love the Pumpkin Slippers Free – Crochet Pattern is the opportunity to experiment with colors and details. While traditional pumpkin shades like orange and green are popular, you can also personalize the slippers with vibrant autumn palettes or even modern neutrals. The versatility of this crochet pattern allows it to be customized to reflect your style, ensuring that each pair is unique and one-of-a-kind.
The first step to successfully making the Pumpkin Slippers Free – Crochet Pattern is to understand the basic structure. These slippers are typically crocheted in rounds, starting from the sole and working upward toward the ankle. This method ensures durability and comfort since the base forms a sturdy foundation. Most patterns recommend using medium-weight yarn, but you can adjust depending on the warmth or texture you prefer.
The pumpkin inspiration comes through in the color selection and shaping. Using orange yarn for the body of the slipper and green or brown accents for the trim mimics the look of a real pumpkin. You can even add decorative stitching to imitate the natural grooves of a pumpkin, making the theme instantly recognizable. This small touch elevates the slippers from simple footwear to a festive piece of handmade art.
Another important aspect of the Pumpkin Slippers Free – Crochet Pattern is the stitch selection. Single crochet and half double crochet stitches are commonly used for durability, while decorative stitches can be added around the ankle cuff. These variations not only make the project enjoyable but also give the slippers a unique texture.
Sizing is also easy to manage with this crochet pattern. By increasing or decreasing the number of stitches in the sole, you can adapt the design for children, teens, or adults. This flexibility is one of the reasons many crafters choose slippers as a go-to handmade gift. With a few simple adjustments, one pattern can serve the whole family.
For beginners, the Pumpkin Slippers Free – Crochet Pattern offers a manageable project that builds confidence. Unlike complex garments, slippers are smaller and quicker to complete, allowing you to see progress fast. This makes them an excellent introduction to wearable crochet while still providing a beautiful and useful end result.
Finally, these slippers are not just about comfort. They also carry a seasonal charm that makes them ideal for fall and holiday projects. When paired with other pumpkin-themed décor or gifts, they create a cohesive handmade collection that reflects the cozy spirit of autumn.
To create the Pumpkin Slippers Free – Crochet Pattern, you will need a few essential materials and tools. Choosing the right supplies can make a big difference in how the final project looks and feels. For slippers, durability and comfort are the main priorities.
Start with yarn. A medium-weight acrylic or cotton blend yarn is an excellent choice. Acrylic yarn provides warmth and durability, while cotton keeps the slippers breathable. For the pumpkin look, orange is the primary color, but you can also add green or brown for the trim or details. Some crafters even use variegated yarn to give the slippers a unique effect.
Next, you will need the right hook size. Typically, a 4.5 mm to 5.5 mm crochet hook works well for slippers, depending on your tension. Always make a small swatch to test your gauge, ensuring the slippers will fit comfortably. Adjusting hook size is a simple way to change the final size without rewriting the pattern.
You should also have a pair of scissors and a tapestry needle. Scissors are necessary for cutting yarn, while the tapestry needle helps with weaving in the ends neatly. Since slippers are wearable, secure finishing is important for both comfort and durability. Loose ends can cause irritation, so taking time with this step is essential.
Optional items include stitch markers to keep track of rounds and foam or felt insoles to make the slippers extra cushioned. Some crafters like to add a non-slip sole by applying fabric paint or special grip pads to the bottom of the slippers, making them safer to wear on smooth floors.
Finally, always have a measuring tape handy. Feet come in all shapes and sizes, and measuring ensures that the slippers will fit perfectly. A quick measurement of length and width can save you from resizing issues later.
By preparing the right materials and tools, you will be ready to create your Pumpkin Slippers Free – Crochet Pattern with confidence and ease.
Now that you have your supplies, it’s time to dive into the step-by-step process of making the Pumpkin Slippers Free – Crochet Pattern. Each stage builds upon the previous one, making it manageable even for beginners.
Begin with the sole. This part is usually worked in rounds or ovals, depending on the design. The sole should match the length of the intended foot size. Adding extra rounds will increase the size, while fewer rounds will keep it small. Make sure the stitches are tight and consistent to create a sturdy base.
Once the sole is complete, move on to the upper section. This is where the pumpkin look begins to take shape. Work upward in rounds, using orange yarn for the main body. To give the slippers a pumpkin-like effect, you can use front-post and back-post stitches to create subtle ridges. These ridges mimic the natural grooves of a pumpkin.
After the body, create the cuff or ankle area. Switching to green yarn for the cuff is a clever way to represent the pumpkin stem. Some crocheters even add small leaf motifs to enhance the pumpkin theme. This simple detail gives the slippers a playful and festive appearance.
When the structure is complete, take time for finishing touches. Weave in all loose ends carefully with a tapestry needle. If you like, you can embellish with buttons or embroidery, though the pumpkin theme already makes the slippers stand out beautifully.
Try on the slippers as you work to check the fit. Crochet is flexible, but making adjustments as you go ensures comfort. If they feel too snug, add a round or two. If too loose, remove stitches gradually. Custom fitting is one of the best advantages of handmade footwear.
By following these steps, you will successfully complete the Pumpkin Slippers Free – Crochet Pattern and have a cozy, festive pair of slippers ready to wear or gift.
To make your Pumpkin Slippers Free – Crochet Pattern as enjoyable and successful as possible, it helps to keep a few tips in mind. These practical suggestions will save time, prevent mistakes, and make the final result even more impressive.
First, always check your gauge before starting. While slippers are more forgiving than fitted garments, size still matters for comfort. A small swatch takes only minutes and ensures your slippers will fit the intended wearer correctly.
Second, use high-quality yarn. Slippers are subject to frequent wear and tear, so durability is important. A blend of acrylic and cotton works well, balancing softness with strength. Avoid delicate yarns that may fray or wear out quickly.
Third, consider adding reinforcement to the sole. Since slippers are used on floors, this part of the project benefits from extra strength. Adding a double sole or sewing on a piece of felt can increase durability and comfort.
Fourth, personalize your slippers. While the pumpkin theme is charming, you can adapt it with different colors or small decorative details. Adding a button shaped like a leaf or a stem accent can enhance the theme while making the slippers unique.
Fifth, take care when finishing. Weaving in ends securely and blocking the slippers lightly can make a big difference in appearance. Even small adjustments can make them look more professional and polished.
Lastly, remember to enjoy the process. The Pumpkin Slippers Free – Crochet Pattern is not just about the final product—it’s also about the joy of creating something by hand. Crocheting is a relaxing, rewarding craft, and slippers are a project where you can see quick results.
Q: Are Pumpkin Slippers difficult to make for beginners?
A: No, the Pumpkin Slippers Free – Crochet Pattern is beginner-friendly. With basic stitches like single crochet and half double crochet, even new crocheters can complete this project successfully.
Q: What is the best yarn for Pumpkin Slippers?
A: A medium-weight acrylic or cotton blend yarn is recommended. Acrylic provides durability, while cotton keeps the slippers breathable.
Q: Can I resize the pattern for children or adults?
A: Yes, simply adjust the number of rounds in the sole or the stitch count in the body to fit different sizes. The pattern is easily adaptable for all ages.
Q: How can I make my slippers non-slip?
A: You can add fabric paint, non-slip pads, or a sewn felt sole to make the slippers safer on smooth floors.
Q: Can I use colors other than orange and green?
A: Absolutely. While traditional pumpkin colors are charming, you can customize the slippers with any color palette to match your style.
Q: How long does it take to make Pumpkin Slippers?
A: On average, it takes a few hours to complete a pair, depending on your crochet speed and level of detail.
The Pumpkin Slippers Free – Crochet Pattern is a fun, cozy, and creative project that blends practicality with festive charm. From choosing yarn to adding decorative touches, every step allows you to personalize your slippers and enjoy the crochet journey. Perfect as a gift or for your own use, these slippers bring warmth and joy to the season.
I would love to know your thoughts! Share your honest opinion and suggestions so we can continue creating tutorials and patterns that inspire and bring comfort to your crochet journey. Would you like me to also create a step-by-step written version of the pattern to go along with this article?


