
Charming Quilt Homes - Pattern
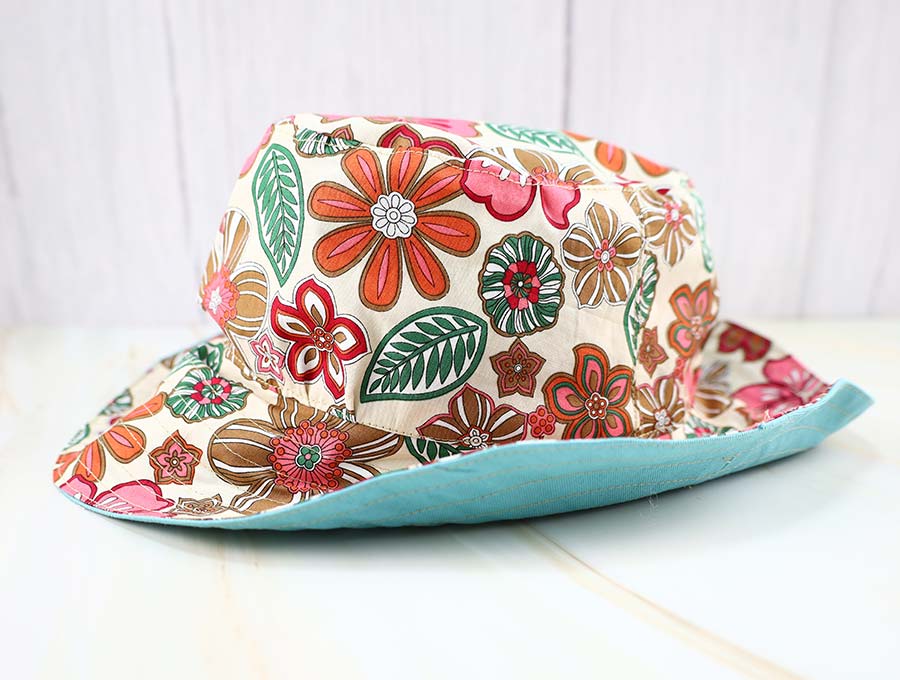
How to make a bucket hat – Quilt Pattern is a fun and creative sewing project that combines style, functionality, and the charm of patchwork quilting. A bucket hat is not only a trendy accessory but also practical, protecting you from the sun and adding a handmade touch to your wardrobe. When you use quilt techniques to design the panels, the result is a unique and colorful piece that stands out.
This project is beginner-friendly, but it also offers room for advanced sewists to play with fabric combinations, stitching details, and finishing techniques. The best part about learning how to make a bucket hat – quilt pattern is that you can personalize it endlessly. From playful scraps of fabric to carefully coordinated quilt blocks, each bucket hat becomes an expression of creativity.
In this article, you will learn the steps, tips, and ideas to successfully create your own quilted bucket hat. We will cover choosing fabrics, preparing your quilt panels, assembling the hat, and finishing with professional touches. By the end, you’ll have both the knowledge and confidence to sew a bucket hat that is stylish, durable, and one-of-a-kind.
The first step in how to make a bucket hat – quilt pattern is selecting the right fabrics. A bucket hat needs to be sturdy yet comfortable, so quilting cotton is often the best choice. It is soft, easy to sew, and allows for creative color play. If you prefer a stiffer hat, consider using interfacing or even light canvas for extra structure.
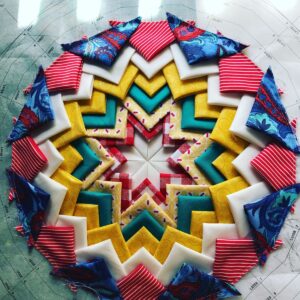
When choosing fabrics, think about the look you want for your hat. Bright colors create a cheerful vibe, while neutrals result in a versatile accessory that matches everything. You can also repurpose fabric scraps, turning leftover quilting pieces into a stylish eco-friendly project.
Preparing the quilt panels involves stitching fabric pieces together to create larger sections. These panels will later be cut into the crown, side, and brim of the hat. The beauty of how to make a bucket hat – quilt pattern is that each section becomes an opportunity for patchwork design.
Make sure to press your seams well after piecing, as flat panels are easier to cut accurately. Quilting the panels with batting and a lining fabric adds texture and structure, making the finished hat more durable. Simple straight-line quilting or free-motion stitches can enhance the look.
If you are new to quilting, start with basic squares or strips. Sew them together, quilt the layers, and then cut out the hat pieces. This method keeps things simple while still giving your hat that quilted charm.
Remember that the quilt panels need to be large enough to cover the template pieces for the hat. Always allow extra space when piecing, so you don’t run short when cutting the curved shapes.
Once your quilt panels are prepared, the next step in how to make a bucket hat – quilt pattern is cutting the crown and side pieces. The crown is a circular top section, while the sides form the body of the hat. You can find printable templates online or draft your own by measuring a hat that fits you well.
Trace the template onto the quilted fabric and cut carefully. Precision is key to ensuring your hat pieces align properly. Make sure all layers are smooth and flat before cutting to avoid uneven edges.
To assemble the crown and sides, place the right sides together and pin securely. Because both pieces are curved, it helps to clip small notches along the seam allowance so the fabric lays flat when sewn. This technique prevents puckering and gives a professional finish.
Sew slowly around the crown, easing the fabric as you go. Once attached, press the seam toward the sides. This step is essential in giving the bucket hat its rounded shape. At this stage, your project is beginning to look more like a real hat.
If desired, you can add a lining inside the crown and sides. This creates a neat interior finish and makes the hat more comfortable to wear. Choose a lightweight cotton for the lining to avoid unnecessary bulk.
Adding topstitching along the crown seam can give extra strength and a polished detail. This small step enhances durability while emphasizing the quilted design.
The brim is one of the most important parts of how to make a bucket hat – quilt pattern because it provides both style and function. A wide brim offers more sun protection, while a narrow brim creates a modern, sleek look.
To begin, cut two brim pieces from your quilted fabric panels. One will serve as the outer brim and the other as the lining. If you want a firmer brim, insert interfacing or lightweight stabilizer between these layers before sewing.
Sew the two brim pieces together along the outer edge, right sides facing. After stitching, trim the seam allowance and turn the brim right side out. Press carefully to create a crisp, smooth edge.
Attach the brim to the side section of the hat, aligning raw edges and pinning in place. Sewing around this circle can be tricky, so take your time to keep the seams even. Clip notches if needed to help the fabric curve smoothly.
Once the brim is attached, finish the inner seam with binding or a lining to prevent fraying. This step also enhances comfort when wearing the hat.
For extra detail, consider quilting decorative lines around the brim. Parallel stitching not only looks stylish but also adds firmness, helping the brim maintain its shape.
The last stage in how to make a bucket hat – quilt pattern is adding finishing touches that elevate your handmade accessory. Small details can make your hat look professionally sewn and uniquely yours.
One common finishing technique is topstitching along the brim where it joins the hat body. This secures the seam, keeps the brim flat, and gives a clean look. Use a thread color that contrasts with your fabric for added flair.
You can also embellish your bucket hat with decorative elements. Consider adding a fabric label, a small appliqué, or even embroidery on the crown or brim. These touches personalize your hat and make it stand out.
Another fun variation is reversible design. By carefully sewing a lining with different fabrics, you can create a hat that works two ways. Simply flip it inside out, and you’ll have a fresh style ready to wear.
Experiment with different quilting techniques for unique textures. For example, diagonal crosshatch quilting gives a modern look, while curved stitching patterns feel playful and dynamic.
Finally, don’t forget to test the fit. Try on the hat before completing the final stitches, adjusting if necessary. A well-fitting bucket hat will be both comfortable and stylish, perfect for everyday wear.
What fabric is best for a quilted bucket hat?
Quilting cotton is ideal because it is soft, breathable, and easy to sew. You can also use canvas for more structure or denim for a casual look.
Do I need batting in the quilt panels?
Batting is optional, but it adds structure and highlights the quilted texture. Without batting, the hat will be lighter and more flexible.
Can I make a bucket hat without a sewing machine?
Yes, but it will take longer. Hand stitching is possible if you use strong thread and small, tight stitches.
How do I size a bucket hat correctly?
Measure the circumference of your head just above the ears. Use this measurement to choose or draft your pattern.
Is a quilted bucket hat washable?
Yes, as long as you prewash your fabrics before sewing. Wash on a gentle cycle and let the hat air dry to maintain its shape.
Can I use scraps for quilting the panels?
Absolutely! Scraps are perfect for creating colorful, eco-friendly bucket hats with lots of personality.
Learning how to make a bucket hat – quilt pattern is a rewarding project that blends quilting skills with practical sewing. From choosing fabrics and piecing panels to assembling the crown, brim, and final details, each step offers creative possibilities. Whether you prefer a simple look or a bold, colorful patchwork style, a quilted bucket hat is a functional accessory that showcases your handmade artistry.
I hope this guide inspires you to try sewing your own bucket hat. If you follow the steps, you’ll have a unique piece that reflects your style and skills. Please share your opinion, feedback, and suggestions—I’d love to hear how your hat turns out and what creative variations you come up with!


