Crocheted Flower Headband - Pattern
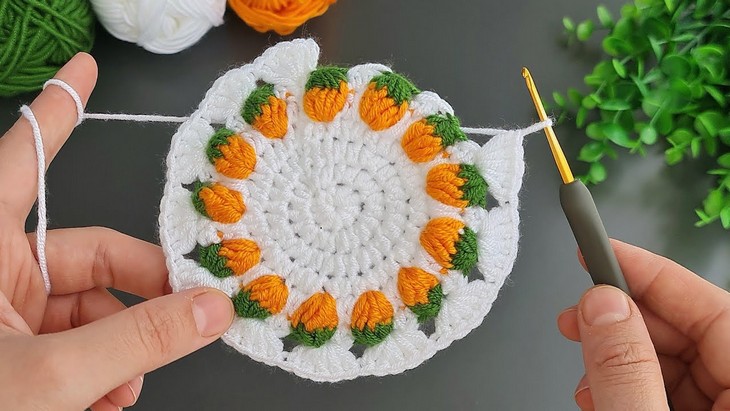
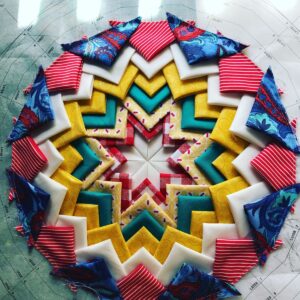
How to Crochet Fall Pumpkin Coaster – Crochet Pattern is the perfect way to add a cozy, autumnal touch to your home décor. With the crisp fall air and the beauty of changing leaves, creating something handmade that reflects the season is both satisfying and relaxing. In this guide, you will learn step by step how to crochet your very own fall pumpkin coaster, turning simple yarn into a charming piece that will brighten your kitchen or dining table.
Crocheting is not only a creative hobby but also a mindful practice. Following How to Crochet Fall Pumpkin Coaster – Crochet Pattern allows beginners and experienced crafters alike to enjoy the process of making something functional yet decorative. Each stitch contributes to a unique autumn design, giving you a sense of accomplishment as your coaster takes shape.
By following this crochet pattern, you will gain insight into color choices, yarn types, and stitching techniques that bring your pumpkin coaster to life. This article will provide you with all the instructions, tips, and insights needed to complete your project successfully while highlighting the main aspects of How to Crochet Fall Pumpkin Coaster – Crochet Pattern for optimal results.
To start your How to Crochet Fall Pumpkin Coaster – Crochet Pattern, gather the right materials. Choosing the appropriate yarn and tools is crucial to achieving the cozy autumn feel.
First, select yarn in fall-inspired colors. Shades like orange, deep green, and brown are ideal for your pumpkin theme. Using cotton or acrylic yarn ensures durability and easy cleaning.
Next, you will need a crochet hook suited to your yarn weight. For most worsted weight yarns, a 4.0 mm to 5.0 mm hook works perfectly. Make sure your hook is comfortable to hold for longer crafting sessions.
Don’t forget basic tools like scissors and a yarn needle for weaving in ends. These small items will make finishing your coaster smooth and professional-looking.
Optional materials include stitch markers, which help keep track of rounds and reduce mistakes in your pumpkin pattern. They are especially useful if you are new to crochet.
Finally, having a pattern printout or digital reference of How to Crochet Fall Pumpkin Coaster – Crochet Pattern ensures you can follow the steps without losing your place. Preparation is key for a seamless crafting experience.
Now that your materials are ready, let’s dive into the step-by-step instructions for How to Crochet Fall Pumpkin Coaster – Crochet Pattern. Each step builds on the previous, creating a beautifully textured pumpkin design.
Begin by forming a magic ring or chain four and join with a slip stitch to create a loop. This loop serves as the foundation for your pumpkin coaster.
Work single crochet stitches into the ring, gradually increasing in each round to shape the pumpkin. Pay attention to stitch counts; consistency is essential for a symmetrical result.
After the base is complete, switch to different shades of yarn to create subtle ridges on your pumpkin. These color changes add dimension and mimic a real pumpkin’s natural lines.
Continue stitching, following the pattern’s increases and decreases. This creates a slightly rounded, 3D effect that makes your coaster stand out as a decorative piece.
Finish the pumpkin by fastening off the yarn and weaving in all ends. This ensures durability and prevents unraveling during use or washing.
Optional: add a small green stem using slip stitches or a short chain with a few single crochets. This final touch completes the autumnal look of your fall pumpkin coaster.
Even with the best instructions, small adjustments can make a big difference in your How to Crochet Fall Pumpkin Coaster – Crochet Pattern. Here are some practical tips to enhance your project.
Maintain even tension throughout your stitches. Uneven tension can distort the shape of your pumpkin coaster and affect the final look.
Use stitch markers to mark the beginning of each round. This prevents accidental increases or decreases and ensures a round, balanced shape.
Experiment with yarn textures. Combining smooth and slightly fuzzy yarns adds a tactile quality and makes your pumpkin coaster feel more realistic.
If you are a beginner, practice the magic ring and single crochet increases before starting the full pattern. Familiarity with these techniques will boost confidence and reduce errors.
Blocking your coaster after finishing helps flatten and shape it. Lightly dampen the piece and pin it to the desired shape, allowing it to dry completely.
Consider creating a set of pumpkin coasters in different sizes or colors. This adds variety to your table décor and provides multiple crafting challenges.
Your How to Crochet Fall Pumpkin Coaster – Crochet Pattern doesn’t have to stay limited to just coasters. There are many creative ways to incorporate these cozy pumpkins into your home.
Use them as individual coasters for cups and mugs during autumn gatherings. Their festive design brings warmth and charm to every table setting.
Combine multiple pumpkin coasters to create a fall centerpiece or table runner. This unique display showcases your handmade talents and brightens any dining area.
Gift them to friends and family. Handmade pumpkin coasters are thoughtful presents for housewarmings, Thanksgiving, or seasonal celebrations.
Pair them with matching crochet placemats or napkin rings. Coordinated pieces elevate your table décor while demonstrating attention to detail and creativity.
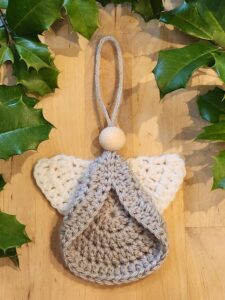
Transform them into ornaments for autumn-themed wreaths. Attach a loop or ribbon to the top of each pumpkin for hanging.
Experiment with different yarn colors to match seasonal themes, like deep red for harvest festivals or gold for a touch of elegance in your autumn décor.
Q1: Can beginners follow this pattern?
Yes, the How to Crochet Fall Pumpkin Coaster – Crochet Pattern is beginner-friendly. Basic stitches such as single crochet and chain stitches are all that is required.
Q2: What type of yarn is best for coasters?
Cotton yarn is ideal because it absorbs moisture and is durable. Acrylic yarn can also be used but may be less absorbent.
Q3: How do I prevent my coaster from curling?
Maintain even tension and follow the stitch counts accurately. Blocking the finished piece also helps flatten it.
Q4: Can I make different sizes of pumpkin coasters?
Absolutely! Adjust the number of stitches and rounds to create smaller or larger pumpkins to suit your needs.
Q5: How do I clean crochet coasters?
Most cotton and acrylic yarns are machine washable on a gentle cycle. Always check the yarn label for care instructions.
Q6: Can I use this pattern for commercial purposes?
It depends on the original designer’s copyright terms. If you want to sell, ensure you have permission or create your own version inspired by the pattern.
Q7: Can I add a stem to my pumpkin?
Yes, adding a green stem using slip stitches or a small crocheted piece enhances the realistic look of your coaster.
Q8: How long does it take to make one pumpkin coaster?
For an average crafter, it can take 1–2 hours per coaster, depending on experience and complexity.
In this article, you learned How to Crochet Fall Pumpkin Coaster – Crochet Pattern from start to finish. From gathering materials, following step-by-step instructions, and applying helpful tips, to exploring creative uses, you now have all the tools to create charming autumn coasters. Crocheting these pumpkin coasters is not only a fun project but also a way to bring warmth and personality to your home décor.
We encourage you to try this pattern, share your experiences, and leave a sincere opinion or suggestions. Your feedback helps improve crafting content and inspires others to join the joy of crochet. Celebrate the season by adding a handmade touch to your home with these adorable pumpkin coasters.


