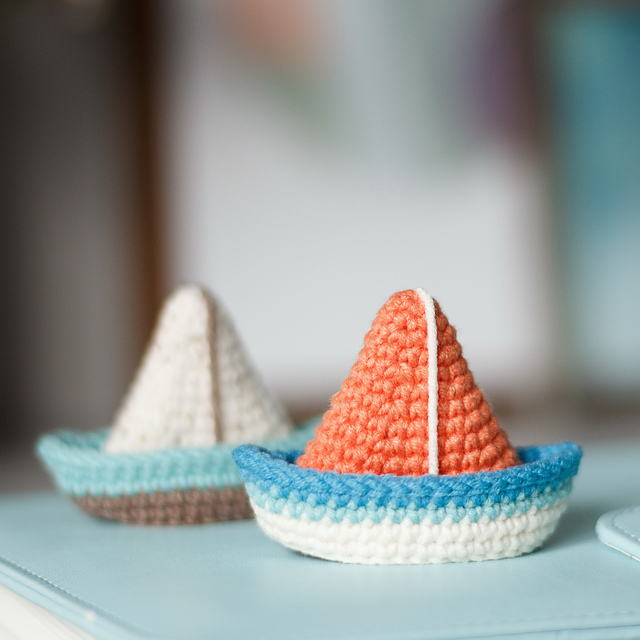
Boat and Sailboat- Crochet Pattern
Amigurumi Jerry Mouse – Crochet Pattern is a delightful project for anyone who loves crochet and wants to bring a touch of nostalgia into their craft. Inspired by the mischievous yet adorable cartoon character, this crochet project combines creativity, patience, and skill to create a soft toy that can be cherished by both kids and adults. Whether you are an experienced crocheter or just starting out, this pattern can help you develop your skills while also giving you the satisfaction of making something unique and fun.
Creating an Amigurumi Jerry Mouse – Crochet Pattern is more than just about making a toy. It is about expressing your love for handmade items, bringing a beloved character to life, and experiencing the joy of crafting something that holds sentimental value. Amigurumi, the Japanese art of crocheting small stuffed creatures, has captured the hearts of crafters worldwide. By choosing to make Jerry Mouse, you connect with a piece of popular culture while also sharpening your crochet techniques.
The popularity of Amigurumi Jerry Mouse – Crochet Pattern continues to grow because of how versatile it is. You can personalize your version with different yarn colors, add accessories, or scale the size to fit your needs. This makes it an excellent gift idea for children, collectors, or anyone who appreciates handmade crafts. In the following sections, we will guide you through the steps, tips, and inspiration needed to create your own Jerry Mouse amigurumi.

When starting your Amigurumi Jerry Mouse – Crochet Pattern, it is important to understand the basic stitches and techniques involved. Amigurumi commonly uses single crochet stitches, worked in continuous rounds. This ensures that the toy has a tight fabric, preventing the stuffing from showing through. If you are new to crochet, practicing single crochet and working in the round will help you prepare for this project.
Materials are also essential to consider. For your Amigurumi Jerry Mouse – Crochet Pattern, you will need yarn in suitable colors such as light brown, cream, and pink, along with safety eyes, stuffing, and a crochet hook that matches the yarn weight. Using high-quality materials ensures that your amigurumi is durable and looks polished.
Gauge is another key aspect. While amigurumi does not usually require strict gauge swatches, it is important that your stitches are tight and consistent. Loose stitches can make the amigurumi look uneven and allow stuffing to peek through. Maintaining a firm tension will give Jerry Mouse his proper shape.
The size of your finished Amigurumi Jerry Mouse – Crochet Pattern depends on the yarn and hook size you choose. Smaller hooks and finer yarns produce a smaller toy, while larger hooks and bulkier yarn create a bigger version. This flexibility allows you to customize the project to your preference.
It is also useful to understand the basic construction of amigurumi. Jerry Mouse will be made up of different parts such as the head, body, arms, legs, ears, and tail. Each part is crocheted separately and then sewn together carefully. Learning how to attach these parts neatly is essential for a professional finish.
Finally, before starting your Amigurumi Jerry Mouse – Crochet Pattern, organize your workspace. Keep your materials within reach, prepare stitch markers for counting rounds, and ensure you have enough stuffing for the project. Preparation makes the crafting process smoother and more enjoyable.
The first step in creating your Amigurumi Jerry Mouse – Crochet Pattern is crocheting the head. This usually begins with a magic ring, which allows you to start with a tight center. Gradually increasing stitches in each round will shape the roundness of Jerry’s head. As you work, insert safety eyes at the correct position before closing the head.
Next comes the body. The body is typically worked from the bottom up, beginning with a wider base and tapering slightly toward the neck. When stuffed, this section gives Jerry Mouse his recognizable chubby appearance. It is important to add stuffing gradually as you work, ensuring the body is firm but not overly hard.
The arms and legs are smaller cylindrical shapes, often made in pairs. They can be left unstuffed at the ends to make them more flexible, giving Jerry a playful look. Attach them symmetrically to maintain balance and proportion in your Amigurumi Jerry Mouse – Crochet Pattern.
The ears are one of Jerry’s most distinctive features. They are large, round, and slightly flat. Crochet two circles in brown and add a pink inner circle for detail. Sew them carefully to the head to give your amigurumi the authentic Jerry Mouse appearance.
The tail is a simple yet important detail. A thin, elongated tube or even a braided piece of yarn can be used to represent Jerry’s tail. This small feature completes the overall look and adds character to your Amigurumi Jerry Mouse – Crochet Pattern.
Once all the pieces are completed, it is time to assemble your Jerry Mouse. Use a yarn needle and matching thread to sew the parts together securely. Take your time with this step, as neat finishing will make your amigurumi look polished and professional.
One of the most valuable tips when working on an Amigurumi Jerry Mouse – Crochet Pattern is to use a stitch marker. Since amigurumi is worked in continuous rounds, it is easy to lose track of where a round begins and ends. A stitch marker ensures you can keep accurate count.
Another helpful technique is to stuff gradually as you go. Waiting until the end to stuff may make it difficult to shape the amigurumi properly. Adding small amounts of stuffing along the way keeps the shape even and prevents lumps.
To achieve an even finish, make sure your tension is consistent. Uneven stitches can distort the shape of the toy. Practice keeping your yarn flow steady, and don’t hesitate to restart a section if it looks uneven. A neat finish is worth the extra effort.
For details like facial expressions, embroidery can be used. A few stitches with black embroidery thread can create a nose, mouth, or eyebrows. These small additions give personality and charm to your Amigurumi Jerry Mouse – Crochet Pattern.
If you want your Jerry Mouse to be unique, consider customizing it. You might add a small bow tie, a piece of cheese, or even change his expression. This personalization makes your handmade toy stand out and adds extra sentimental value.
Lastly, always take your time when assembling the pieces. Rushing this stage can lead to a crooked or uneven toy. By carefully positioning each part before sewing, you ensure that Jerry Mouse looks balanced and adorable.
Choosing the Amigurumi Jerry Mouse – Crochet Pattern is a wonderful decision for several reasons. First, it connects you with the world of amigurumi, an art that emphasizes creativity and patience. Making Jerry Mouse gives you both a challenge and a rewarding result.
This project also allows you to practice a variety of crochet techniques. From working in the round to shaping parts, sewing pieces together, and adding embroidered details, you will strengthen your crochet skills in multiple areas.
The finished product makes a perfect gift. Handmade toys like Jerry Mouse carry a personal touch that store-bought items cannot match. They are thoughtful presents for children, friends, or anyone who appreciates handcrafted creations.
In addition, the Amigurumi Jerry Mouse – Crochet Pattern is a wonderful way to reduce stress. Crocheting is known to have calming effects, helping crafters relax and enjoy the process. Working on a familiar character like Jerry can make the experience even more joyful.
This project also contributes to sustainable living. By creating your own toys, you reduce the need for mass-produced items. Using eco-friendly yarn options makes your amigurumi both fun and environmentally conscious.
Finally, the sense of accomplishment that comes from finishing a Jerry Mouse amigurumi is unmatched. Every stitch brings you closer to completing a recognizable and beloved character, filling you with pride in your handmade achievement.
Q: What skill level is needed for this pattern?
A: The Amigurumi Jerry Mouse – Crochet Pattern is suitable for beginners with some experience. Basic knowledge of single crochet, increasing, and decreasing stitches is enough to get started.
Q: How long does it take to complete Jerry Mouse?
A: The time varies depending on your speed and experience. On average, it may take anywhere from a few days to a week to finish.
Q: Can I use any type of yarn for this project?
A: While you can experiment, it is best to use cotton or acrylic yarn for durability and ease of stitching. Choose yarn that matches the character’s classic colors.
Q: Is safety stuffing important?
A: Yes. Use hypoallergenic stuffing, especially if the toy is meant for children. It ensures comfort, safety, and longevity of the amigurumi.
Q: How do I make sure the parts are evenly attached?
A: Pin the parts in place before sewing. This ensures correct positioning and balance for your Amigurumi Jerry Mouse – Crochet Pattern.
Q: Can I sell the finished product?
A: Yes, handmade amigurumi toys are often sold at craft fairs and online shops. Be mindful of copyright laws if marketing the toy as the official character.
The Amigurumi Jerry Mouse – Crochet Pattern is a charming and rewarding project that combines the joy of crocheting with the nostalgia of a classic cartoon character. From learning the basics to customizing your creation, this pattern offers endless opportunities for creativity. Whether you want to make it as a gift, a collectible, or simply for your own enjoyment, Jerry Mouse is sure to bring smiles.
I would love to hear your thoughts! Share your honest opinion and suggestions about this tutorial. Your feedback helps improve future projects and keeps the crafting community thriving. Would you like me to expand this article with step-by-step stitch counts for each piece, or keep it as a general tutorial?