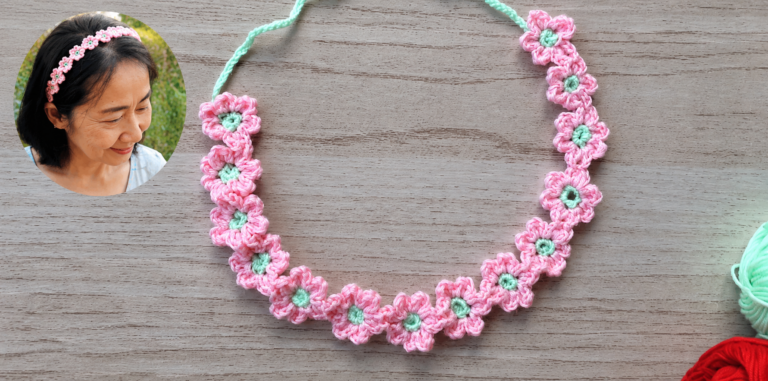
Crocheted Flower Headband - Pattern
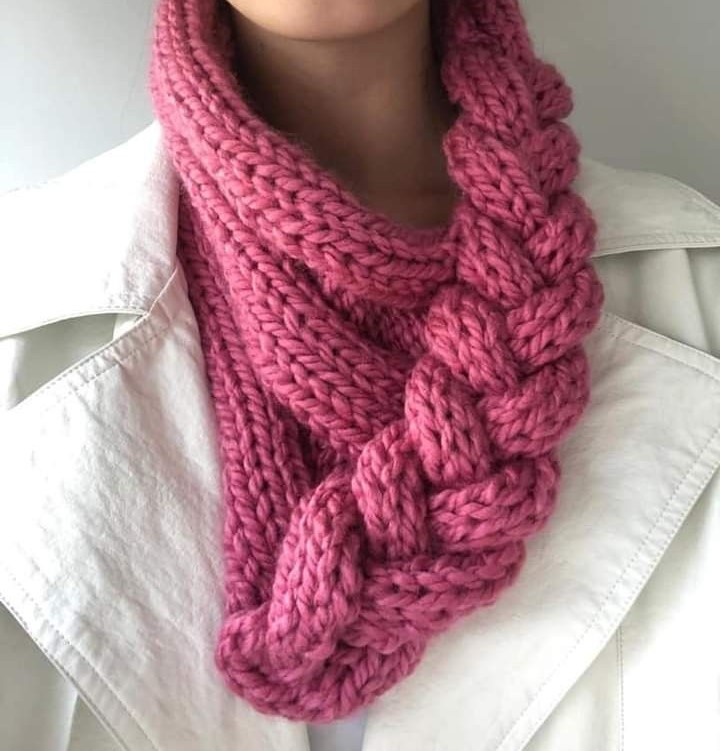
The Tutorial scaldacollo treccia 3D all’uncinetto – Crochet Pattern is a creative and cozy project that has captured the attention of crochet lovers everywhere. If you are looking for a stylish accessory that is both functional and fashionable, this tutorial will guide you step by step. The braid-like texture of the 3D stitch makes this neck warmer stand out from traditional designs, adding depth and elegance to your handmade wardrobe.
Working on a scaldacollo treccia 3D is not only enjoyable but also practical. You can choose your favorite yarn colors, play with thickness, and create a completely personalized look. Whether you are making it for yourself or as a thoughtful handmade gift, this crochet pattern gives you endless creative possibilities. It’s beginner-friendly, yet detailed enough to keep more advanced crocheters engaged.
In this article, we will explore every detail you need to know about the Tutorial scaldacollo treccia 3D all’uncinetto – Crochet Pattern. From materials and techniques to styling tips and project variations, you will learn how to make this beautiful accessory with confidence. Let’s dive into the world of 3D crochet braids and discover how to bring this warm and textured piece to life.
To begin the Tutorial scaldacollo treccia 3D all’uncinetto – Crochet Pattern, you first need to understand the basics of the 3D braid stitch. This special technique creates the raised braid effect, giving your project its unique charm. While it may look complex at first, the stitch is actually repetitive and easy to master with practice.
Start by selecting yarn that is soft yet durable. Wool blends or acrylic yarns work perfectly, especially if you want a warm and cozy scaldacollo for winter. Pair your yarn with a suitable crochet hook, making sure it matches the thickness recommended on the yarn label. This will help your stitches remain consistent and your braid design clean.
When practicing the 3D braid, focus on tension. Keeping an even tension will ensure that your braids look uniform and structured. Beginners might want to practice a small swatch before starting the actual project, which is a smart way to avoid mistakes.
The Tutorial scaldacollo treccia 3D all’uncinetto – Crochet Pattern usually begins with a foundation chain. From there, the stitches are built up to form the braided design. You will be working into front and back loops, which is the secret behind the 3D effect. With a few rows, the raised texture will become visible, motivating you to keep going.
If you are an intermediate or advanced crocheter, you can experiment with different stitch combinations. Adding subtle variations will create depth and make your design even more unique. This project is versatile and can be adapted to different preferences.
Above all, patience is key. Crocheting a 3D braid may take time, but the results are worth it. With consistency, you’ll find the pattern flowing naturally, and the braided scaldacollo will quickly take shape.
The Tutorial scaldacollo treccia 3D all’uncinetto – Crochet Pattern is designed to guide you through the process one step at a time. Start by measuring the length of your foundation chain. This determines the width of your neck warmer, so make sure it’s the right size for comfort and coverage.
Once the foundation is complete, you will begin working rows that create the braid texture. The stitch involves alternating loops, which might feel unusual at first but quickly becomes rhythmic. As you progress, you will notice the braid design forming beautifully across your work.
It’s important to keep track of your rows. Many crocheters use stitch markers or a simple notebook to remember their progress. This prevents uneven braids and helps you maintain symmetry throughout the project.
The scaldacollo is usually worked in flat rows and then sewn together at the end. However, some variations allow you to crochet in the round, eliminating the seam. Both methods are effective, so choose the one that suits your comfort level.
When the piece is long enough to wrap comfortably around the neck, it’s time to finish off. Secure the last stitch and weave in any loose ends with a yarn needle. A neat finish enhances the look of the entire piece.
At this stage, your project will truly reflect the essence of the Tutorial scaldacollo treccia 3D all’uncinetto – Crochet Pattern. You will have a warm, textured, and elegant accessory ready to wear or gift.
The beauty of the Tutorial scaldacollo treccia 3D all’uncinetto – Crochet Pattern lies in its versatility. Once you’ve completed the basic version, you can experiment with endless customization options to match your personal style.
Color choice is one of the most exciting parts. Solid colors highlight the braided texture, while variegated yarns add dynamic patterns. Neutral shades like beige, gray, or cream make the scaldacollo elegant, while bright tones like red or teal give it a bold, playful look.
You can also adjust the size to create different effects. A shorter, snug design works well for layering under coats, while a longer version provides extra warmth and can be styled more dramatically. This flexibility makes the project suitable for all seasons.
Another customization idea is to add decorative elements. Buttons, wooden toggles, or even a simple ribbon can transform your scaldacollo into a statement piece. These small details make your crochet accessory unique and truly one-of-a-kind.
The stitch itself can be modified too. You can alternate between tighter and looser rows, creating a textured pattern that adds depth. Some crocheters even combine the braid with other stitch patterns, giving the scaldacollo a patchwork effect.
Whether you want something minimalistic or eye-catching, this tutorial allows you to explore creativity. The scaldacollo treccia 3D all’uncinetto becomes more than just an accessory; it becomes an expression of your personal style.
Working on the Tutorial scaldacollo treccia 3D all’uncinetto – Crochet Pattern can be simple when you know how to avoid common mistakes. The first tip is to always check your gauge before starting. This ensures your scaldacollo has the right dimensions and won’t turn out too loose or too tight.
A frequent mistake is pulling the yarn too tightly, which can flatten the braid and reduce its 3D effect. On the other hand, overly loose stitches can make the structure floppy. Striking the right balance is essential for a polished look.
Another helpful tip is to choose the right yarn weight. If your yarn is too thin, the braid may not stand out. If it’s too bulky, the stitches can become difficult to work with. Medium-weight yarns often provide the best results for this project.
Blocking your finished scaldacollo is another important step. Lightly dampen the piece, shape it to the desired dimensions, and let it dry flat. Blocking enhances the braid definition and gives your crochet accessory a professional appearance.
If you encounter difficulties with the braid stitch, don’t get discouraged. Take your time and practice slowly until the rhythm feels natural. Sometimes, revisiting the basics of front and back loop crochet helps clear up confusion.
Finally, remember that handmade pieces don’t need to be perfect to be beautiful. Embrace small imperfections as part of the charm of your Tutorial scaldacollo treccia 3D all’uncinetto – Crochet Pattern project.
1. Is the scaldacollo treccia 3D suitable for beginners?
Yes, the pattern looks complex but is actually beginner-friendly with a bit of practice.
2. What type of yarn works best for this project?
Medium-weight yarns, especially wool or acrylic blends, are ideal for achieving a warm and structured braid.
3. Can I crochet the scaldacollo in the round instead of flat rows?
Absolutely. Both methods work, and crocheting in the round avoids a seam.
4. How long does it take to finish the scaldacollo?
On average, it takes a few evenings, depending on your speed and the yarn weight.
5. Can I make this pattern in different sizes?
Yes, simply adjust the foundation chain to create larger or smaller versions.
6. How do I wash and care for my finished scaldacollo?
Hand wash gently in cold water and lay flat to dry to preserve the 3D braid texture.
The Tutorial scaldacollo treccia 3D all’uncinetto – Crochet Pattern offers a rewarding project for crocheters of all levels. With its rich texture, warmth, and versatility, this accessory quickly becomes a favorite in any handmade collection. From learning the braid stitch to adding your personal touches, the process is both creative and enjoyable.
Now that you know how to make your own scaldacollo treccia 3D, we’d love to hear your thoughts. Share your honest opinion about this tutorial and leave your suggestions—your feedback helps make future guides even more inspiring!


