
Charming Quilt Homes - Pattern
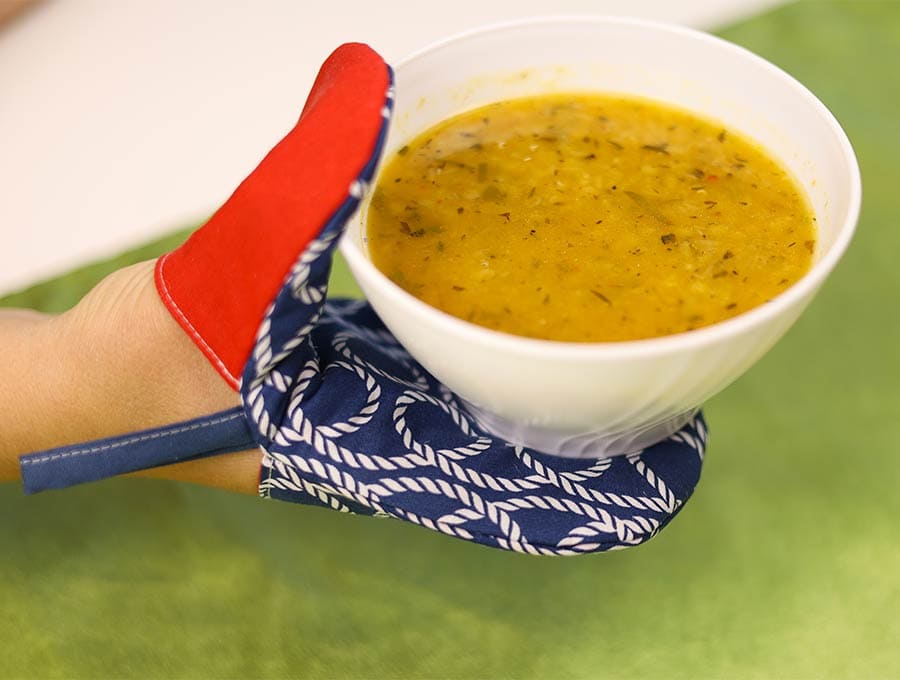
If you have ever wanted to add a touch of handmade charm to your kitchen, learning How to Make Mini Oven Mitts pattern – Quilt Pattern is the perfect project. These little accessories are not only functional but also a creative way to showcase your quilting skills. Making them yourself allows you to choose fabrics that match your kitchen décor, turning a practical item into a personalized treasure.
The beauty of working with a quilt pattern is that it gives structure to your creativity. By following a clear plan, you can achieve beautiful results even if you are a beginner in quilting. The process of crafting mini oven mitts is straightforward, but it also provides room for creativity, as you can mix colors, prints, and textures. With some patience and attention to detail, you’ll end up with a kitchen accessory that feels both stylish and useful.
In this guide, we’ll walk through How to Make Mini Oven Mitts pattern – Quilt Pattern step by step. From choosing your materials to piecing together your quilted design, every stage is explained in a simple way so you can enjoy the process. Whether you are making these mini oven mitts for yourself, as a gift, or even for craft fairs, this project is a delightful way to explore quilting while creating something that will be used daily.
The first step in How to Make Mini Oven Mitts pattern – Quilt Pattern is selecting the right materials. The fabric you choose should be durable, heat-resistant, and visually appealing. Cotton fabric is the most popular choice because it is sturdy and comes in endless patterns and colors. For a quilted look, you can select coordinating fabrics to make the mitts more visually interesting.
Next, you will need batting or thermal lining. Batting provides the thickness and structure that a quilt pattern requires, while thermal lining gives heat resistance, which is essential for oven mitts. Using both together ensures safety and comfort when handling hot dishes. This layer is what transforms your mitts from decorative fabric to a practical kitchen tool.
Don’t forget the thread. A strong cotton or polyester thread is ideal for quilting. Choose a color that blends with your fabric or a contrasting shade for a bold design. Thread quality is often overlooked, but it plays an important role in durability.
Scissors or a rotary cutter will make fabric cutting precise. Precision is key in quilting because every piece must align neatly. If your cuts are uneven, the final mitts may look irregular, so investing in good cutting tools will save you time and frustration.
Pins or fabric clips are also necessary to hold your pieces together before sewing. They help maintain accuracy and prevent slipping as you stitch through multiple layers of fabric and batting.
Finally, you’ll need a sewing machine. While it’s possible to hand-stitch, a machine ensures neat seams and saves a lot of time. Quilting stitches can be decorative as well, so you can choose straight lines or even free-motion stitching for added flair.
Once you have your materials, the next step in How to Make Mini Oven Mitts pattern – Quilt Pattern is preparing the fabric pieces. Start by creating a paper template shaped like a small oven mitt. This template will guide you in cutting out fabric pieces of uniform size.
Trace the template onto your chosen fabric and cut out two pieces for each side of the mitt. Remember that each mitt requires both an outer layer and a lining. For a quilted effect, cut additional fabric strips or blocks that you can piece together before shaping them into the mitt.
After cutting the fabric, cut matching pieces of batting or thermal lining. These layers should fit neatly inside your fabric cutouts. If they are too large, they will bunch up when sewing, and if too small, they won’t provide enough heat protection.
At this stage, you can plan your quilting design. Many crafters enjoy experimenting with geometric stitching lines such as diamonds, squares, or parallel lines. Quilting stitches not only secure the layers but also give the mitts their distinctive quilted appearance.
Pin the batting to the outer fabric pieces to keep everything aligned. This step prevents shifting during sewing. Even small slips can affect the final result, so take your time.
Before moving on, check that all your fabric pieces are even and smooth. This preparation ensures that sewing will be easy and your mitts will come together neatly.
The heart of How to Make Mini Oven Mitts pattern – Quilt Pattern lies in sewing. Begin by quilting the outer fabric to the batting. Use your sewing machine to follow your chosen quilting design, stitching through both layers. This adds texture and strength.
Once the quilting is complete, place the quilted outer fabric piece and the lining fabric right sides together. Pin them securely. Sew around the edge, leaving the wrist opening unstitched. Curved seams can be tricky, so sew slowly and carefully to maintain a smooth line.
After sewing, trim the seam allowance to reduce bulk, especially around the curves. Make small snips along the curved edges to allow the fabric to turn smoothly. Be careful not to cut through your stitching.
Turn the mitt right side out through the opening. Use a blunt tool, like a chopstick, to push out the curves so they look neat. This step reveals the quilted design and the basic shape of your mini oven mitt.
Next, prepare the second side of the mitt in the same way. When both halves are ready, place them together, right sides facing out, and stitch around the edge to join them. This forms the complete mitt.
Finish by adding a small fabric loop at the wrist. This loop is optional but makes it easy to hang your mitts in the kitchen. It’s a small detail that adds both charm and practicality.
The final stage in How to Make Mini Oven Mitts pattern – Quilt Pattern is adding personal touches. This is where you can truly make your project unique. Binding the edges with bias tape is a great way to add color and durability. Choose a contrasting fabric for a bold accent or a matching one for a subtle finish.
Decorative stitching is another option. Some crafters like to add embroidery or applique to personalize their mitts. A small embroidered flower or monogram can turn a simple oven mitt into a thoughtful gift.
Consider making sets of mitts in different colors. These can be themed for holidays, seasons, or special occasions. For example, red and green fabrics for Christmas or bright floral prints for spring can make your kitchen décor festive.
If you enjoy experimenting, try mixing fabrics with different textures. Pair cotton with denim or linen for an interesting look. Combining textures makes your mitts stand out and adds depth to your quilting project.
Mini oven mitts also make excellent gifts. Handmade items carry a special touch of love and care. Wrap them in simple packaging, and they’ll be appreciated by anyone who enjoys cooking or baking.
Finally, remember that practice makes perfect. The more you make, the more skilled you’ll become at quilting and sewing. Each project teaches you something new and boosts your confidence in creating quilted accessories.
Q: What fabric is best for mini oven mitts?
A: Cotton is the most recommended fabric because it’s durable, washable, and available in countless prints. Always pair it with heat-resistant batting or thermal lining for safety.
Q: Can I sew oven mitts by hand?
A: Yes, you can hand-sew, but it will take more time. A sewing machine ensures stronger seams and makes quilting easier.
Q: How thick should the batting be?
A: Use medium to thick batting, ideally paired with a heat-resistant layer. Too thin, and the mitts won’t protect against heat; too thick, and they may be difficult to sew.
Q: Are mini oven mitts safe for handling very hot dishes?
A: Yes, as long as you use proper thermal batting or insulated lining. Regular batting alone is not sufficient for extreme heat.
Q: Can I wash my mini oven mitts in the machine?
A: Absolutely. Just use gentle detergent and avoid very hot water. Line drying is better to maintain the quilted shape.
Q: Do I need a quilting pattern, or can I design my own?
A: You can do both. A quilt pattern provides guidance, but designing your own is a fun way to express creativity.
Learning How to Make Mini Oven Mitts pattern – Quilt Pattern is a rewarding experience for any quilter or sewing enthusiast. From selecting fabrics to adding final decorative touches, each step allows creativity to shine. You end up with a useful kitchen accessory that combines functionality with beauty.
I hope this guide inspired you to try your own mini oven mitts project. Now it’s your turn—share your thoughts, suggestions, or experiences in the comments. Your feedback helps improve future tutorials and connects us through the joy of quilting.


