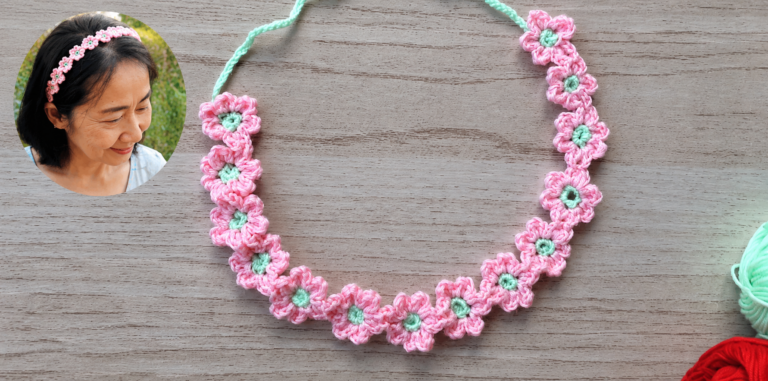
Crocheted Flower Headband - Pattern
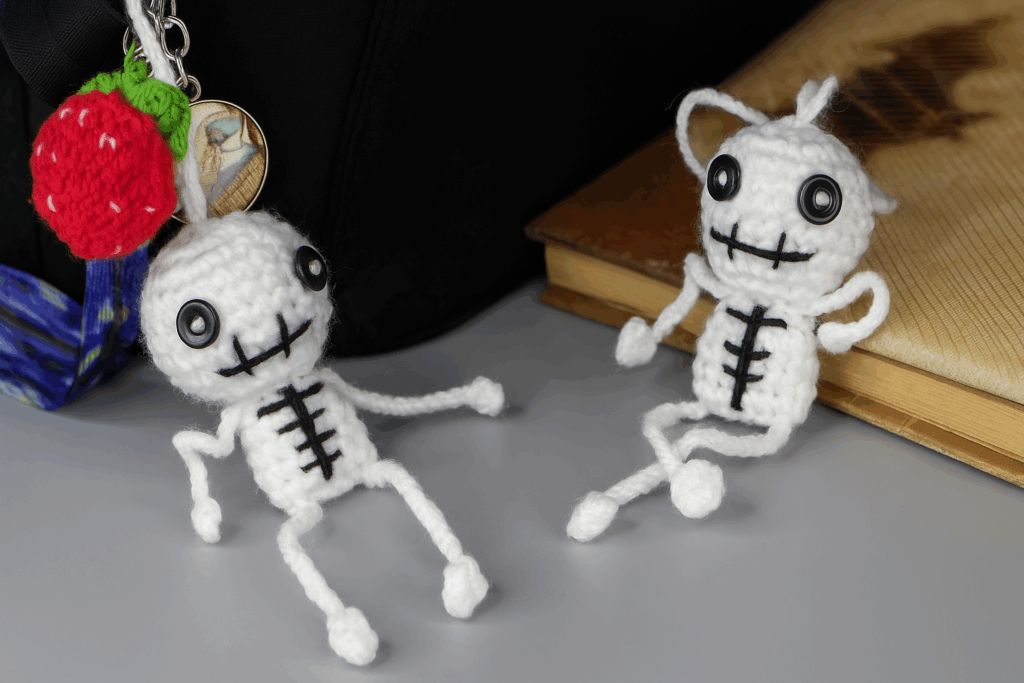
The skeleton keychain – crochet pattern is a fun, quirky, and creative project that combines practicality with style. Crochet enthusiasts are always searching for patterns that are not only enjoyable to make but also unique enough to stand out. This little project checks all the boxes: it’s useful, adorable, lightweight, and perfect as a handmade gift. Whether you’re looking for a quick project to practice your stitches, a seasonal Halloween accessory, or a craft fair item that grabs attention, this crochet keychain is the perfect choice.
By learning how to create a skeleton keychain – crochet pattern, you’ll discover just how versatile small crochet projects can be. Unlike large blankets or clothing items, this design requires little yarn, minimal time, and allows room for plenty of customization. You can create smiling skeletons, spooky ones, or even add tiny accessories like bows or hats to give them personality. Best of all, you’ll have a durable and washable keychain that makes your keys easy to find while showing off your handmade craft.
In this article, we’ll dive deep into everything you need to know about this project. From the supplies you’ll need, the techniques involved, creative variations, and tips for finishing, you’ll have all the guidance to make your own skeleton keychain shine. Along the way, we’ll focus on the keyword skeleton keychain – crochet pattern so you’ll have a clear and easy-to-follow tutorial written in a friendly and approachable way.
To bring the skeleton keychain – crochet pattern to life, having the right materials on hand is essential. Since this is a small project, you won’t need a huge amount of supplies, but using the right tools will help you achieve neat results.
First, you’ll need a small amount of cotton yarn in white or cream, as these colors best represent the skeleton theme. Cotton yarn is recommended because it gives structure and durability, which is perfect for accessories like keychains that are handled daily.
Second, you’ll want a crochet hook that matches the yarn weight. Most crafters find that a 2.5 mm or 3.0 mm hook works well for this kind of miniature project. The smaller the hook, the tighter the stitches, and the more solid your skeleton design will look.
Next, don’t forget about stuffing. A small amount of fiberfill will give your skeleton’s head or body the right shape. Even though the project is tiny, a little stuffing makes a big difference in how polished the finished product looks.
You’ll also need a keychain ring or lobster clasp, which can be found at craft stores. This attachment transforms your crocheted skeleton into a practical accessory. Some people even prefer adding a detachable clasp so it can be hooked onto bags, zippers, or backpacks.
Lastly, a tapestry needle will help you sew all the small pieces together and attach details like eyes, smile, or other embroidered features. If you’d like, you can also use small black safety eyes for a polished finish.
When making the skeleton keychain – crochet pattern, the process is simple but requires attention to detail since the project is small.
Start by crocheting the skeleton’s head. This is usually made in a round using the magic ring technique. Work in continuous rounds with single crochet stitches, increasing until you form a small ball shape. Before closing, insert a bit of stuffing to keep the head firm.
Next, you can create the skeleton’s body. Many crocheters prefer a flat body, shaped with rows of single crochet stitches. Others go for a cylindrical design with minimal stuffing. Both options work well depending on your preference for the finished look.
The arms and legs are typically created with chain stitches followed by slip stitches to give a bony, stick-like appearance. Because this is a skeleton, simplicity works perfectly here. You can even add joints by crocheting tiny oval shapes for hands and feet.
Once all parts are crocheted, use your tapestry needle to assemble them. Attach the limbs evenly to the body and make sure the head is firmly secured.
Details make the skeleton truly come alive. Use black yarn or embroidery thread to stitch on eyes, a mouth, or even little stitches across the skull to give a spooky vibe. For a playful look, some crocheters add pink yarn for rosy cheeks or bows to make the skeleton cute rather than scary.
Finally, attach the finished skeleton to the keychain ring. Make sure it’s secure so it can withstand daily use without falling apart. At this point, you’ll have a completed skeleton keychain – crochet pattern that is both functional and decorative.
One of the best parts of working with the skeleton keychain – crochet pattern is that you can experiment with endless variations. Creativity is what makes crochet so enjoyable.
You can play with colors. Instead of using white, try making a neon skeleton for a funky and modern twist. Black yarn with contrasting white details also looks striking and makes the keychain stand out.
Adding accessories can transform your skeleton into different characters. A tiny crochet hat, scarf, or bow can make your skeleton festive for different seasons or occasions. For Halloween, you might add a pumpkin; for Christmas, a Santa hat.
Another variation is size. You can scale the pattern by changing the hook size or yarn thickness. A smaller version makes a dainty keychain, while a slightly bigger one can double as a bag charm or car mirror decoration.
You can also personalize the face. Some crafters give their skeletons funny expressions, while others stick with the classic spooky look. Experimenting with different embroidery styles allows each skeleton to have its own personality.
If you’re making several skeleton keychains for a craft fair or as gifts, consider turning them into a set. Each one could have a unique accessory or color scheme, encouraging collectors to want more than one.
Finally, advanced crocheters may experiment with glow-in-the-dark yarn. This is perfect for a skeleton theme and makes the project extra fun, especially for Halloween.
While making the skeleton keychain – crochet pattern, a few tips can help you achieve the best results.
First, keep your stitches tight. Loose stitches will make the skeleton look floppy and may allow stuffing to show through. Using a smaller hook than usual helps maintain a neat finish.
Second, pay attention to symmetry. Since this project involves small limbs, placing them evenly is important for a polished look. Using pins to hold pieces in place before sewing can make this step easier.
Third, when adding facial features, less is often more. A simple pair of embroidered eyes and a stitched mouth can already give your skeleton a lot of charm. Overloading details might make it look messy.
Another useful tip is to reinforce the attachment to the keychain ring. Because keychains are handled frequently, the loop or thread holding your skeleton must be sturdy. Double-threading or securing with extra stitches is highly recommended.
Also, don’t be afraid to personalize. The beauty of handmade crafts lies in uniqueness. Whether you want a spooky Halloween vibe or a cute year-round accessory, adapt the pattern to match your taste.
Finally, always block or shape your skeleton lightly after finishing. Even though it’s small, shaping helps the project look more professional and long-lasting.
1. How long does it take to make a skeleton keychain – crochet pattern?
Most crafters can complete one in about one to two hours, making it a quick and satisfying project.
2. What yarn is best for this project?
Cotton yarn is ideal because it’s strong, doesn’t fuzz easily, and keeps its shape well for small accessories like keychains.
3. Can beginners make this skeleton keychain?
Yes, the project is beginner-friendly as long as you’re comfortable with basic stitches like single crochet, slip stitch, and working in the round.
4. Is stuffing necessary?
Stuffing is optional but highly recommended for the head. It gives the skeleton more dimension and a polished appearance.
5. Can I wash the keychain?
Yes, if you use cotton yarn and secure your stitches well, the keychain can be gently hand-washed when needed.
6. How can I make the skeleton look cuter instead of spooky?
Adding accessories like bows, scarves, or pastel colors can give the skeleton a fun and friendly appearance.
The skeleton keychain – crochet pattern is a delightful project that blends creativity, practicality, and personality. With minimal yarn and a few simple stitches, you can create a one-of-a-kind accessory that makes your keys stand out while showcasing your crochet skills. We explored materials, step-by-step instructions, variations, and essential tips to help you master this design.
Now it’s your turn to give this fun pattern a try. Whether you make one for yourself, a friend, or even as part of a themed collection, this tiny skeleton is bound to bring smiles. I’d love to hear your thoughts: what do you think of this project? Share your opinion and suggestions, and let’s keep creating together!


