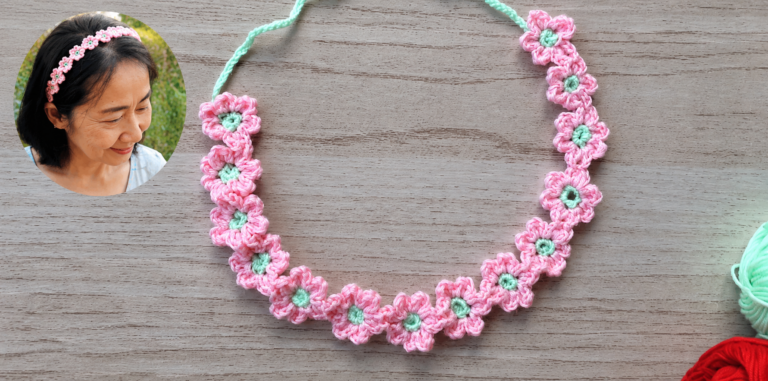
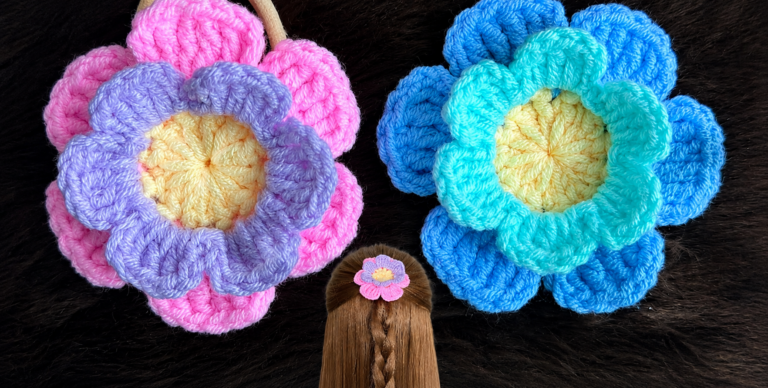
Crocheted Flower Headband - Pattern
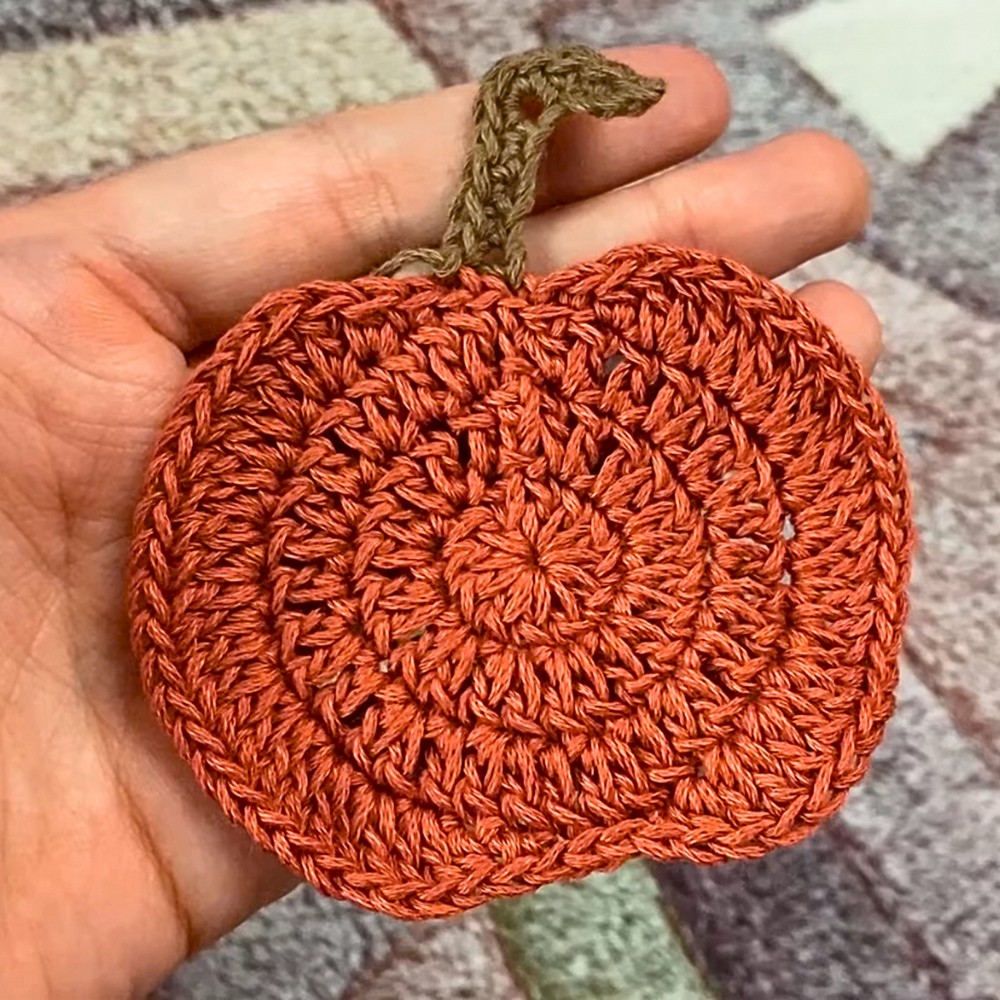
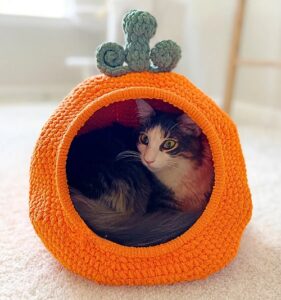
If you love seasonal handmade decorations, the Crochet Pumpkin Coaster – Pattern is the perfect project to add a cozy autumn vibe to your home. This delightful crochet piece is not only functional but also decorative, making it ideal for fall gatherings, Thanksgiving tables, or simply as a cute touch for your coffee table. Working on a pumpkin-themed coaster allows you to practice basic crochet stitches while creating something that is festive and useful.
The great thing about this Crochet Pumpkin Coaster – Pattern is that it’s beginner-friendly, yet it looks polished enough to impress even experienced crocheters. You can create a set of them in different shades of orange, or even experiment with greens and creams to match your personal style. Handmade coasters like this are also perfect gifts—simple, practical, and full of warmth since they carry your personal touch.
In this article, you’ll find everything you need to know about making a Crochet Pumpkin Coaster – Pattern. We will cover the materials, step-by-step instructions, creative variations, and styling ideas to use your coasters during the fall season. By the end, you’ll not only have a beautiful coaster but also the inspiration to make many more for your home and loved ones.
When starting any crochet project, having the right supplies makes all the difference. For the Crochet Pumpkin Coaster – Pattern, the materials are simple, and chances are you already have them in your stash.
First, you will need a good quality cotton yarn. Cotton is the best option because it is absorbent, durable, and resistant to heat, making it perfect for coasters. Choose a pumpkin-inspired orange shade, along with a little green for the stem and leaf.
Next, pick the right crochet hook. Most coasters work well with a 4mm or 5mm hook, but always check the yarn label to match the recommended hook size. Using the correct hook ensures your stitches are neat and the coaster lies flat.
You’ll also need scissors and a yarn needle. Scissors are for cutting yarn ends, while the yarn needle will help you weave in the ends and attach the stem and leaf securely.
If you want to add more structure to your Crochet Pumpkin Coaster – Pattern, you can use a light starch spray or blocking board to help shape it. This step is optional but gives a professional finish.
Finally, don’t forget a stitch marker. Although this pattern is simple, having a marker helps you keep track of rounds and prevents mistakes, especially if you’re a beginner.
Making the Crochet Pumpkin Coaster – Pattern is easy when you break it into steps. The project usually begins with a magic ring or a chain loop to form the round base.
Start with your orange yarn and create a magic ring. Work single or double crochet stitches into the ring to form the first round. Keep your stitches even so the coaster will be smooth and symmetrical.
For the next rounds, you’ll increase evenly to expand the circle. This process is similar to making the base of a hat or a round doily. By adding more stitches in each round, your coaster will grow to the desired size.
Once you reach the right diameter—usually around 4 to 5 inches—you can stop increasing and crochet one or two rounds without increases. This creates a nice flat edge.
After finishing the pumpkin base, switch to green yarn to create a small stem. A few chains and slip stitches are enough to give the impression of a pumpkin stem.
Finally, if you want extra detail, add a little leaf using a chain and some slip stitches or half-double crochets. Attach it near the stem, and your Crochet Pumpkin Coaster – Pattern is complete.
One of the best parts about the Crochet Pumpkin Coaster – Pattern is how versatile it is. You can experiment with colors, shapes, and sizes to make each coaster unique.
Instead of classic orange, try making pastel pumpkins for a more modern farmhouse look. White pumpkins are also very popular in seasonal décor and can match neutral home settings beautifully.
You can also vary the size of your coaster. A smaller version works as a mug rug, while a larger one can serve as a hot pad for dishes or teapots. Adjusting the number of rounds is all you need to scale the project.
Another fun variation is adding texture. Use puff stitches, bobble stitches, or raised stitches to give your pumpkin a more realistic, ribbed look. This small change makes the coaster look even more festive.
For an extra touch, you can crochet a small vine spiraling from the stem. This little detail adds whimsy and charm, making your coaster stand out.
Finally, consider making a full set. Mixing and matching different shades of pumpkins creates a table setting that is playful yet elegant, perfect for holiday dinners or gifts.
Once you’ve completed your Crochet Pumpkin Coaster – Pattern, the fun part is using it in your home décor. These coasters are not just practical but also bring warmth and seasonal cheer.
You can place them on your dining table during fall gatherings. They look wonderful under glasses, mugs, or even small dessert bowls, protecting your table while adding charm.
Another way to use them is as part of a centerpiece. Arrange several coasters along with candles, pinecones, and mini pumpkins for a rustic autumn table decoration.
The coasters also make fantastic gifts. Whether you’re giving them as hostess gifts, teacher appreciation presents, or just a little handmade surprise, they are thoughtful and useful.
If you’re a seller, sets of Crochet Pumpkin Coaster – Pattern are perfect for craft fairs or online shops. Seasonal crochet items often sell quickly, especially when paired with cozy themes like pumpkins.
Lastly, don’t forget to use them in your everyday routine. Placing one under your morning coffee mug can instantly make your day feel more festive and cozy.
1. Is the Crochet Pumpkin Coaster – Pattern suitable for beginners?
Yes! This pattern uses simple stitches like single crochet and double crochet. Even if you’re new to crochet, you can complete it with patience and practice.
2. What type of yarn works best for the Crochet Pumpkin Coaster – Pattern?
Cotton yarn is ideal because it’s durable, absorbent, and heat-resistant, making it perfect for coasters.
3. Can I make the coaster larger for use as a hot pad?
Absolutely. Just keep adding rounds until the piece reaches the size you want. It’s easy to scale up or down.
4. Do I need to block my Crochet Pumpkin Coaster – Pattern?
Blocking is optional, but it helps the coaster lay flat and look polished. A quick steam or light starch can make a big difference.
5. How long does it take to make one Crochet Pumpkin Coaster?
Most people can finish one in under an hour, making it a quick and rewarding project.
6. Can I sell finished Crochet Pumpkin Coasters?
Yes, handmade coasters are great for selling at craft fairs or online. Just be sure to credit the pattern source if required.
The Crochet Pumpkin Coaster – Pattern is a charming project that combines practicality with festive creativity. With simple stitches, a little yarn, and some imagination, you can create coasters that brighten your table and bring a touch of autumn coziness to any space.
I hope this guide gave you both inspiration and clear instructions for making your own set of pumpkin coasters. If you try this project, I’d love to hear your honest opinion and any suggestions you might have. What colors did you choose? Did you add any fun variations? Share your thoughts and experiences—I’d be delighted to know!


