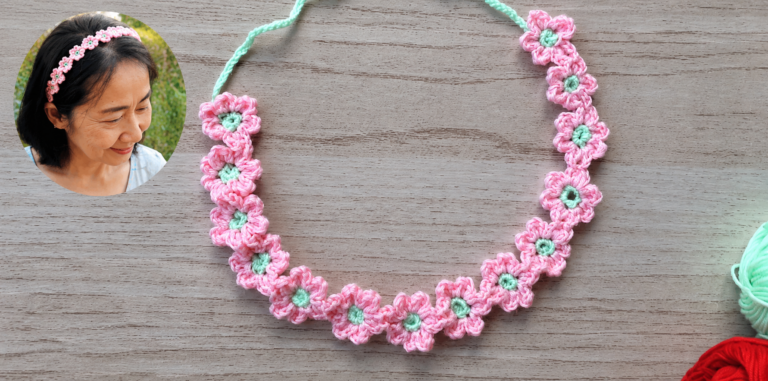
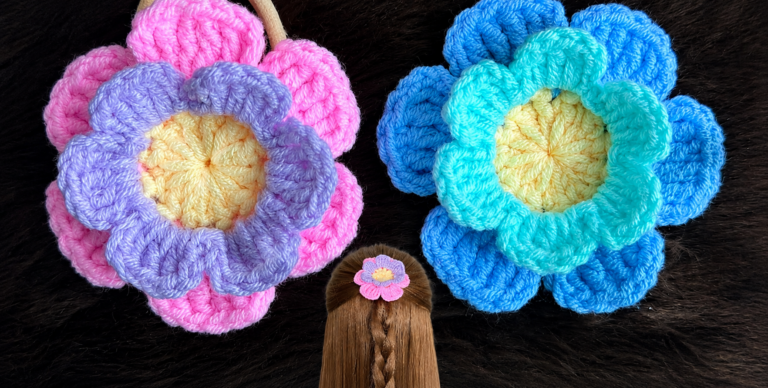
Crocheted Flower Headband - Pattern
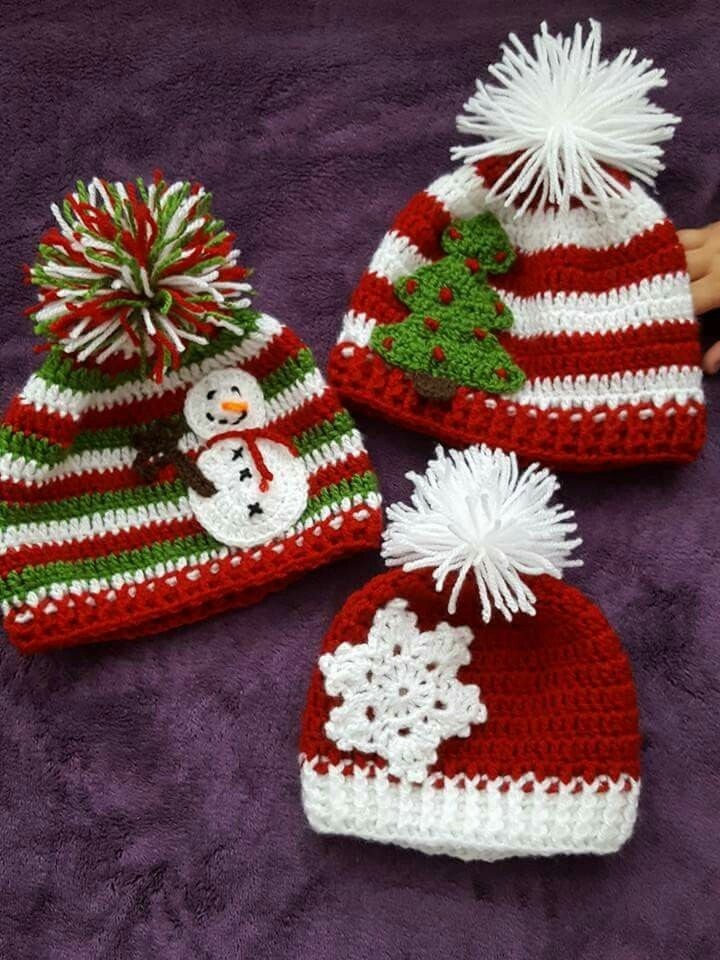
Crochet Mini Holiday Hats – Pattern is a joyful and creative project that brings the festive spirit into your home. These tiny crochet hats are perfect as Christmas ornaments, holiday garlands, or even cute gift toppers. Whether you’re a beginner looking for a fun project or an experienced crocheter wanting to add charm to your seasonal décor, this tutorial will guide you through every step in a simple and inspiring way. With just a few yarn scraps and basic crochet techniques, you can create adorable mini hats that make everyone smile.
Crocheting these little holiday hats is not only relaxing but also a wonderful way to express your creativity. You can make them in classic Christmas colors like red, white, and green, or experiment with different shades to match your holiday theme. Many people love to hang these mini hats on their Christmas tree or attach them to gifts as personalized handmade decorations. The best part is that you can make a whole batch in just one evening.
This Crochet Mini Holiday Hats – Pattern is beginner-friendly and requires minimal materials: some leftover yarn, a small crochet hook, and a bit of stuffing or pom-poms for decoration. You’ll be amazed at how quickly these little creations come together. Once finished, they can be used for all sorts of festive crafts, from holiday cards to table settings. Let’s dive into this pattern and learn how to make your own mini holiday hats step by step.
Before starting your Crochet Mini Holiday Hats – Pattern, it’s important to select the right materials. Since these are small projects, you don’t need much yarn. Use worsted weight or DK yarn depending on how soft and structured you want your hats to be. Cotton yarn gives a more defined look, while acrylic yarn adds a bit of fluffiness.
Choose colors that reflect the holiday season. Traditional hues like red, green, and white work beautifully, but you can also mix in metallic threads or glitter yarns for extra sparkle. Try using leftover yarn from previous projects to make your mini hats eco-friendly and budget-friendly.
Your crochet hook size should match the yarn weight—usually between 3.5mm and 4.5mm. For smaller, tighter stitches that hold their shape, go for a slightly smaller hook. This ensures your mini hats will stay firm and won’t lose their form over time.
You’ll also need scissors, a yarn needle for weaving in ends, and optional decorations such as tiny pom-poms, buttons, or ribbons. These little additions make each hat unique and full of personality.
Another great idea is to use embroidery thread for accent stitching or to create mini snowflakes on your hats. Personal touches like these add a special charm that makes your handmade pieces stand out.
By preparing all your materials before you begin, you’ll make the crocheting process smooth and enjoyable. Having everything ready means you can focus on the creative part—bringing your Crochet Mini Holiday Hats – Pattern to life.
Let’s start crocheting your Crochet Mini Holiday Hats – Pattern! Begin with a magic ring and crochet 6 single crochets into the loop. Pull it tight to close the ring. This forms the top of your mini hat.
In the next round, increase evenly to make the crown of the hat. You can do this by adding one stitch between each single crochet from the previous round. The goal is to gradually widen the circle so that it starts forming the hat’s top portion.
Continue increasing until your circle reaches about 1.5 to 2 inches in diameter, depending on how large you want your mini hat to be. Once you’re happy with the width, stop increasing and crochet straight rounds to build the height of the hat.
To add the hat brim, switch colors if desired and make a round of half double crochets. You can also create a ribbed texture by working in the back loops only. This gives your mini hat a realistic knitted look.
Finish by adding a small pom-pom to the top. You can use store-bought mini pom-poms or make your own using yarn scraps. Secure it tightly so it doesn’t come off.
Repeat these steps to make multiple hats in different colors and styles. Before you know it, you’ll have a collection of charming mini crochet hats ready for holiday decorating or gifting.
Now that your Crochet Mini Holiday Hats – Pattern is complete, it’s time to get creative with how you use them. These little hats are extremely versatile and can be incorporated into your holiday decorations in many delightful ways.
One of the most popular uses is as Christmas tree ornaments. Just attach a small piece of string or ribbon to the top, and you have an adorable handmade ornament that will add warmth to your tree.
Another fun idea is to use them as gift toppers. Attach a mini hat to each wrapped present to give it a personal, crafty touch. Your friends and family will love the extra effort and uniqueness.
You can also make a holiday garland by stringing several mini hats together. Hang it over a fireplace, doorway, or window for a cozy handmade vibe. Add small lights or beads in between for extra sparkle.
These mini hats also work wonderfully as table décor. Place them on napkins or small bottles to create a festive setting during Christmas dinner. They can even double as name card holders by adding small paper tags.
Lastly, consider selling or gifting these mini hats as part of a handmade holiday set. Pair them with crochet snowflakes or stockings for a charming bundle that everyone will adore. The possibilities are endless when it comes to using your Crochet Mini Holiday Hats – Pattern creatively.
To make your Crochet Mini Holiday Hats – Pattern look professional, pay attention to details. Consistent tension is key. Make sure your stitches are uniform to give your hat a clean and polished appearance.
Blocking your hats after finishing helps them maintain their shape. Gently steam or dampen the hats and shape them with your hands before letting them dry. This is especially useful if you used cotton yarn, as it tends to hold its shape better once blocked.
Experiment with different stitch patterns to give each hat a unique texture. Try adding stripes, bobble stitches, or even simple embroidery to create variety. Each design will have its own personality.
If you want to make the hats sturdier for hanging or decorating, you can lightly stuff them with cotton or leftover yarn pieces. This adds dimension and makes them more durable.
Don’t rush the finishing touches. Weaving in ends carefully and securing pom-poms tightly ensures your hats look neat and last longer.
Lastly, enjoy the process! Crocheting these mini hats is meant to be a joyful, stress-free experience. Each hat you make carries your creativity and love, making your Crochet Mini Holiday Hats – Pattern even more special.
1. What yarn is best for Crochet Mini Holiday Hats – Pattern?
Worsted weight or DK yarn works best. Acrylic yarn is soft and easy to handle, while cotton provides structure and definition.
2. Can beginners make these Crochet Mini Holiday Hats?
Absolutely! This pattern is ideal for beginners. The stitches are basic, and the project is small enough to finish quickly.
3. How long does it take to make one mini hat?
On average, each hat takes about 20 to 30 minutes to complete, depending on your skill level and complexity of decoration.
4. Can I sell my finished Crochet Mini Holiday Hats?
Yes, you can sell them as handmade crafts. Just make sure to take clear photos and present them attractively for buyers.
5. How can I make the mini hats more festive?
Add embellishments like sequins, beads, or glitter yarn. Using metallic threads or sparkly pom-poms also enhances their holiday look.
6. What other holidays can these mini hats be used for?
Besides Christmas, you can adapt the pattern for other seasons by changing colors—pastels for Easter, red and pink for Valentine’s Day, or orange and black for Halloween.
Creating your own Crochet Mini Holiday Hats – Pattern is a wonderful way to celebrate the season with creativity and joy. These tiny treasures are quick to make, endlessly customizable, and perfect for decorations or gifts. From tree ornaments to garlands and festive table décor, they bring handmade charm to every corner of your home.
Now that you’ve learned all the steps, materials, and creative ideas, it’s your turn to bring your version of the Crochet Mini Holiday Hats – Pattern to life. I’d love to know how your project turns out—please share your honest opinion and suggestions in the comments!


