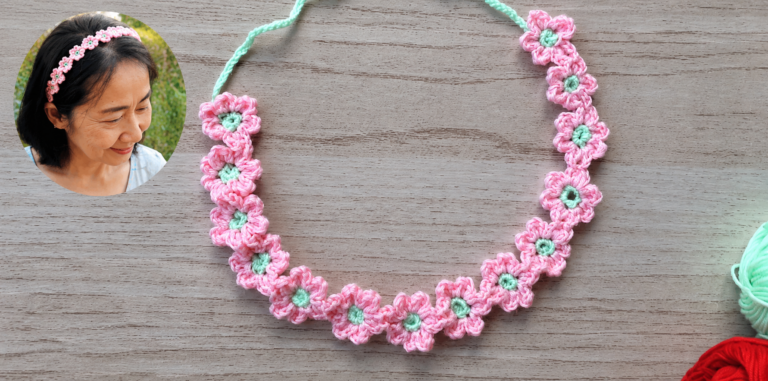
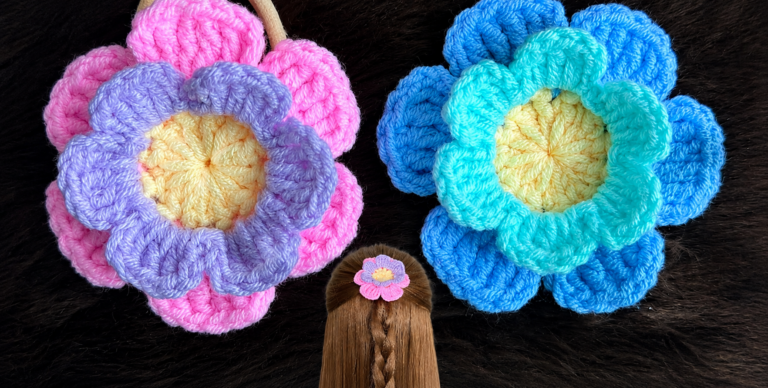
Crocheted Flower Headband - Pattern
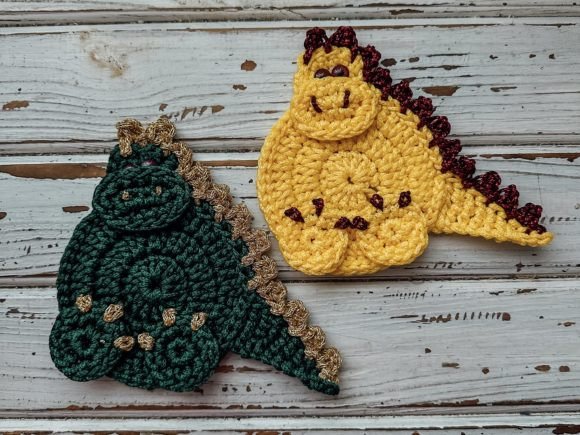
The Crochet Pattern Dragon Coaster – Tutorial is an exciting and creative project that combines functionality with fantasy-inspired charm. If you love crocheting and want to add a touch of mythical beauty to your home, this is the perfect idea. This coaster not only protects your tables from hot or cold drinks but also showcases your crochet skills in a truly unique way. Whether you are a beginner or an experienced crafter, creating this dragon-shaped coaster will bring joy, relaxation, and satisfaction to your crafting time.
When you follow this Crochet Pattern Dragon Coaster – Tutorial, you will learn how to crochet detailed dragon wings, a scaly texture, and an elegant shape that makes your coaster stand out. This project is an excellent way to practice different stitches and improve your technique while working on a small, manageable piece. Plus, it’s a fun conversation starter whenever guests visit your home. A handmade dragon coaster adds character and warmth to your space, reflecting your creativity and love for handmade art.
One of the most wonderful things about this Crochet Pattern Dragon Coaster – Tutorial is that it’s easy to customize. You can use your favorite yarn colors to represent dragons of fire, ice, or nature. Some prefer bold reds and golds, while others go for mysterious blues or greens. With a few adjustments, you can even turn your coaster into a decorative wall piece or a unique gift for fantasy lovers. Ready to start? Let’s dive into this creative crochet adventure!
To begin this Crochet Pattern Dragon Coaster – Tutorial, you’ll need a few basic materials. Gathering everything before you start will make the process smoother and more enjoyable. Choose high-quality yarn to ensure your coaster lasts and looks great after many uses.
First, select cotton yarn in your preferred color. Cotton is ideal for coasters because it’s absorbent, durable, and easy to clean. Acrylic yarn can also be used, but cotton gives a better finish and prevents slipping. You can choose colors like deep red for a fire dragon, silver for an ice dragon, or emerald green for a forest dragon.
Next, pick the appropriate crochet hook size that matches your yarn. Most medium-weight cotton yarns work best with a 3.5 mm to 4 mm hook. The right hook ensures that your stitches are consistent and that your dragon coaster lies flat. Always check your tension before starting to make sure your coaster doesn’t curl or stretch unevenly.
You will also need scissors for trimming yarn ends, a yarn needle for weaving in loose ends, and a stitch marker if you want to keep track of your rounds. A small amount of fabric glue can be helpful for securing loose threads or decorative details, but it’s optional.
Before starting, make sure you have good lighting and a comfortable space to work. A clean, organized workspace helps you focus on each stitch and enjoy the process. Crochet is meant to be relaxing, so take your time and enjoy crafting your unique dragon coaster.
Finally, have a pattern reference or notes to follow along as you crochet. This Crochet Pattern Dragon Coaster – Tutorial will guide you through the essential steps, but keeping track of your progress helps prevent mistakes and keeps your project neat and fun.
Now that you have your materials ready, it’s time to start the Crochet Pattern Dragon Coaster – Tutorial. Begin with a magic ring, which forms the center of your dragon’s head or body, depending on your design. This technique gives a clean, tight start that looks professional.
Start by chaining two and making a series of single crochets into the ring. Tighten it gently and close the circle. This will form the base of your coaster. Continue working in rounds, increasing evenly so that your circle grows without curling.
Once your coaster base reaches the desired size—typically around 4 to 5 inches in diameter—you can start shaping the dragon’s head. Use half double crochets and double crochets to form a slight point at one end. This will become the dragon’s snout. You can adjust the shape by adding or skipping stitches as needed.
After the head, focus on adding dragon wings. To make them, create a chain from the coaster’s edge and work a series of shell stitches along it. This creates a textured, wing-like appearance. Repeat on the other side for balance. The wings should look soft and wavy, resembling the graceful curves of a dragon in flight.
For the final touch, add scales using the crocodile stitch. This decorative technique gives the coaster a realistic dragon-skin effect. Work the scales in a contrasting color to make them stand out. The texture will not only look amazing but also help the coaster grip cups and mugs better.
Once the main design is complete, weave in all ends carefully. Block your coaster gently by shaping it with your hands and letting it dry flat. This ensures that your Crochet Pattern Dragon Coaster looks perfectly polished.
One of the best parts of this Crochet Pattern Dragon Coaster – Tutorial is how easy it is to personalize it. You can create many different versions to match your mood, home décor, or gift-giving needs. Each coaster can tell its own story, inspired by different dragon types from myths and legends.
For a fire dragon, choose vibrant colors like red, orange, and gold. Adding a metallic yarn thread can make it shimmer, representing glowing scales. This version looks great in a cozy living room or as part of a fantasy-themed set.
A water dragon design, on the other hand, can use shades of blue and turquoise. Use a slightly glossy yarn for a shimmering, oceanic effect. The texture of the scales can be softer, giving a flowing, aquatic look.
If you prefer something more elegant, make a white or silver dragon coaster. This minimalist design adds a touch of magic without overwhelming your space. You can add a small bead or pearl for the dragon’s eye to enhance its charm.
Another creative twist is to make mini dragon coasters for small cups or larger ones for teapots or serving dishes. The same pattern can be resized easily by adjusting the number of rounds in the base.
These dragon coasters also make thoughtful handmade gifts. Imagine giving a set of colorful dragon coasters to a fantasy-loving friend—they’ll appreciate the creativity and effort behind each piece. It’s a handmade treasure that shows your care and imagination.
Lastly, you can experiment with different yarn textures—try combining soft cotton with metallic thread or gradient yarn for a stunning effect. Each change you make adds a personal touch, making every coaster unique and memorable.
After completing your Crochet Pattern Dragon Coaster – Tutorial, it’s important to know how to keep your creation in excellent condition. Handmade crochet pieces deserve proper care to maintain their beauty and longevity.
Always hand wash your coasters in cold or lukewarm water using mild detergent. Avoid twisting or wringing the piece; instead, gently squeeze out excess water. Lay the coaster flat on a clean towel to dry naturally. This prevents deformation and keeps the dragon’s details intact.
If your coaster loses shape, you can block it again by lightly dampening and reshaping it. This is especially helpful after multiple washes or when storing your crochet items for long periods.
To avoid fading, keep your dragon coaster away from direct sunlight for extended periods. Bright yarn colors can lose their intensity over time if exposed to strong UV light.
When storing, place the coasters flat or stack them neatly in a drawer. Avoid folding them to prevent creases in the dragon wings or scales. If you’ve used beads or embellishments, handle them with extra care.
You can also use your dragon coaster as decorative art. Frame it or attach it to a fabric backing for display. It’s a fantastic way to showcase your talent and add a handmade touch to your living space.
With the right care, your Crochet Pattern Dragon Coaster will remain a cherished piece for years, reminding you of the joy and creativity that crochet brings into everyday life.
1. Can beginners make this Crochet Pattern Dragon Coaster?
Yes! With patience and step-by-step guidance, beginners can follow this tutorial successfully. The project teaches essential stitches and introduces simple shaping techniques.
2. What is the best yarn for dragon coasters?
Cotton yarn is the best choice because it absorbs moisture and holds its shape. However, acrylic yarn can be used if you prefer brighter colors or a softer feel.
3. How long does it take to complete a dragon coaster?
Most crafters can finish one coaster in two to three hours. The time depends on your crochet speed and the level of detail you include.
4. Can I resize the pattern?
Yes. You can make larger or smaller versions by adding or reducing rounds in the coaster’s base. Adjust your hook size accordingly for the best result.
5. How do I keep my coaster from curling?
Ensure even tension and use proper stitch increases as you work in rounds. Blocking the finished coaster can also help it lie flat.
6. Can I sell coasters made from this pattern?
Absolutely! Handmade coasters make great gifts or craft fair items. Just remember to give credit to the Crochet Pattern Dragon Coaster – Tutorial as your inspiration.
Creating your own Crochet Pattern Dragon Coaster – Tutorial project is both enjoyable and rewarding. You learn new techniques, express creativity, and end up with a functional piece of art. This crochet coaster brings a touch of fantasy to your everyday life and makes a perfect handmade gift.
We hope this detailed guide inspires you to start crocheting your own dragon coasters today. Enjoy the process, experiment with colors, and let your imagination fly! If you tried this pattern, please share your honest opinion and suggestions—we’d love to hear your thoughts and creative ideas!


