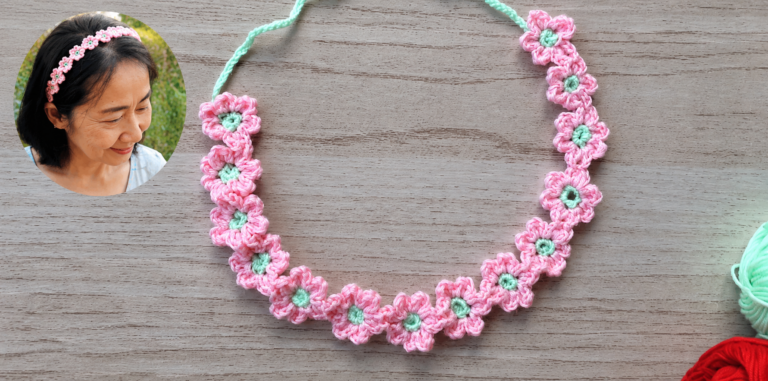
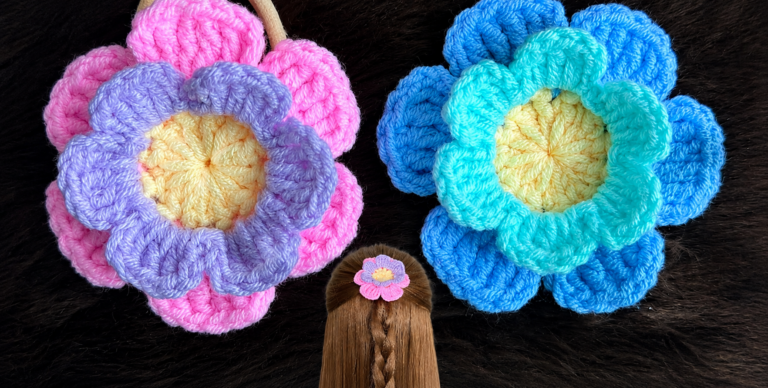
Crocheted Flower Headband - Pattern
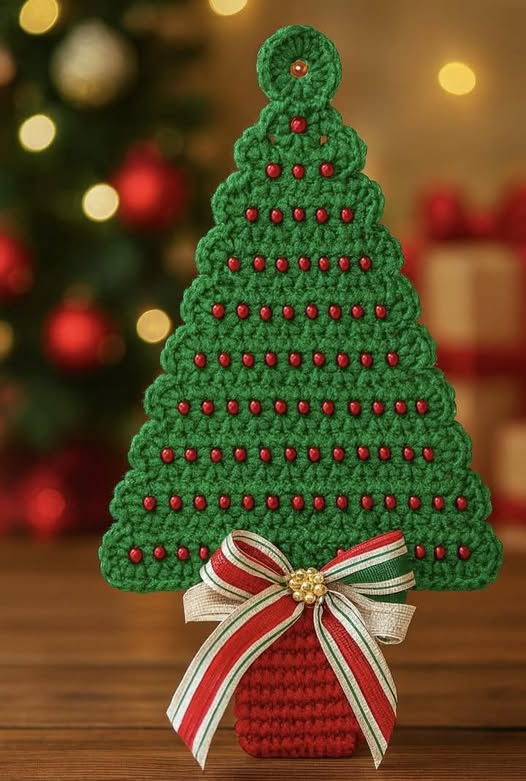
Creating a Christmas tree with pearl balls – Crochet Pattern is a delightful way to add a touch of handmade charm to your holiday decorations. This project beautifully combines traditional crochet techniques with elegant embellishments, resulting in a timeless and festive ornament. Whether you’re an experienced crocheter or a beginner eager to make something special for Christmas, this tutorial will guide you through the process step by step. The soft yarn textures paired with shiny pearls create a stunning effect that will make your holiday décor sparkle.
The beauty of a Christmas tree with pearl balls – Crochet Pattern lies in its simplicity and versatility. You can choose colors that match your theme—classic green, shimmering white, or even pastel tones for a modern twist. The addition of pearl beads gives the tree a luxurious finish, making it an elegant centerpiece or a lovely handmade gift. Crocheting your own decorations not only brings joy but also helps create lasting memories with loved ones.
In this article, we’ll explore everything you need to know about creating your own Christmas tree with pearl balls – Crochet Pattern, from choosing the right yarn and hook to assembling and decorating your finished tree. We’ll also include tips for customizing the design, maintaining your creation, and making it a beautiful part of your festive home décor. Let’s get started on this charming crochet adventure!
Before you start your project, it’s important to select the right materials to ensure your Christmas tree with pearl balls – Crochet Pattern turns out both beautiful and durable. Choosing the right yarn, hook, and embellishments will affect the final look and texture of your creation.
Start with a soft but sturdy yarn, preferably in shades of green, white, or gold. Cotton yarn gives a crisp shape, while acrylic provides flexibility and a cozy feel. You can even mix yarn types to add dimension to your project. Consider using metallic or glitter yarns to give your tree a festive sparkle.
The crochet hook size will depend on your chosen yarn. Generally, a 3.5 mm to 4.5 mm hook works well for this project. Using a smaller hook will make the stitches tighter and the tree more compact, while a larger hook creates a softer, more open design.
Pearl balls or beads are the signature embellishments of this project. Choose small, lightweight pearls that won’t weigh down the crochet stitches. You can sew or glue them onto the finished tree for a polished appearance.
In addition to yarn and beads, you’ll need basic tools such as scissors, a tapestry needle, and a small amount of stuffing if you want your tree to have a 3D effect. Optional decorations include ribbons, miniature stars, or bells for added holiday cheer.
Lastly, prepare your workspace. Having good lighting and an organized table helps you focus and enjoy the crocheting process. This is a project that rewards patience and creativity, so take your time with each detail.
Now that you have all your materials ready, it’s time to begin the exciting part—crocheting your Christmas tree with pearl balls – Crochet Pattern. This section will walk you through the basic structure and shape of the tree.
Start by crocheting the base of the tree. Using green yarn, create a magic ring and work single crochets around it. Gradually increase your stitches in each round to form a circular base. This will give your tree a stable foundation to stand upright.
Next, you’ll build the cone shape by continuing to crochet in rounds, decreasing stitches as you move upward. The goal is to create a tapering triangle that mimics the silhouette of a real Christmas tree. Keep your tension even throughout to maintain a consistent shape.
Once you’ve reached the desired height, it’s time to add texture. Use double crochet stitches or puff stitches to create layers that resemble tree branches. You can experiment with different stitch patterns for a more intricate look.
After completing the main body, attach the pearl balls. You can sew them on strategically across the branches or scatter them randomly for a playful, natural appearance. Make sure the pearls are securely fastened.
For a 3D effect, lightly stuff the inside of the tree before closing the top. This will help it maintain its shape and stand tall when displayed. Finish off by attaching a crocheted or felt star on the top for that perfect festive touch.
Your handmade Christmas tree with pearl balls – Crochet Pattern is now ready to be admired! You can make several of them in different sizes to decorate your home, or even string them together as a garland.
Once you’ve mastered the basic design, you can get creative with your Christmas tree with pearl balls – Crochet Pattern. This project is incredibly versatile, allowing you to experiment with colors, shapes, and accessories to suit your personal style.
Try using non-traditional yarn colors such as silver, blush pink, or deep blue for a modern holiday aesthetic. You can also incorporate variegated yarns to create natural color gradients that mimic real pine needles.
Instead of classic pearl balls, consider using small crystal beads, buttons, or even tiny pom-poms for a fun and whimsical effect. Each option gives the tree a unique personality and reflects your creativity.
If you enjoy working with multiple materials, combine crochet with fabric or felt cutouts. You can crochet the base and then glue on decorative fabric patches shaped like ornaments, snowflakes, or stars.
Another creative twist is to make a mini version of the Christmas tree and use it as a keychain or holiday gift tag. This is a great way to share your handmade craft with friends and family.
To turn your tree into a centerpiece, place it on a wooden base or inside a glass dome for a cozy, elegant holiday decoration. Add battery-powered fairy lights around it to enhance its sparkle and festive appeal.
Lastly, personalize each tree by adding initials, ribbons, or a small handwritten tag. These thoughtful details make your Christmas tree with pearl balls – Crochet Pattern not just a decoration but a meaningful handmade keepsake.
Once your Christmas tree with pearl balls – Crochet Pattern is complete, proper care and display will help keep it beautiful for many Christmas seasons to come. Handmade items deserve a little extra attention, and with the right maintenance, they’ll stay in excellent condition year after year.
First, avoid exposing your crocheted decorations to direct sunlight for long periods, as this can fade the yarn colors. Store them in a cool, dry place when not in use, ideally wrapped in tissue paper to prevent dust buildup.
If your tree becomes dusty, gently shake it or use a soft brush to remove debris. Avoid washing it unless absolutely necessary; if you must, hand wash gently with cold water and let it air dry completely.
When displaying your crochet Christmas trees, choose spots where they’ll be safe from moisture and excessive heat—such as a mantel, side table, or bookshelf. This helps preserve the yarn’s texture and the shine of the pearl balls.
You can create a cozy arrangement by grouping several trees of varying sizes together. Add LED candles, pinecones, or tinsel around them to enhance the festive scene.
Finally, treat your crochet pieces like heirlooms. With proper care, your Christmas tree with pearl balls – Crochet Pattern can become a treasured part of your holiday traditions—one that can be passed down or gifted with love.
1. What type of yarn works best for this project?
A medium-weight cotton or acrylic yarn is ideal. Cotton offers structure, while acrylic adds softness and flexibility.
2. How can I attach the pearl balls securely?
You can sew them using a fine needle and matching thread, or carefully glue them with fabric-safe adhesive for quick results.
3. Can beginners make this project?
Yes! This Christmas tree with pearl balls – Crochet Pattern is beginner-friendly. The stitches used are simple and repetitive, making it perfect for those learning crochet.
4. How long does it take to make one crochet Christmas tree?
Depending on your skill level, it usually takes between 2 to 4 hours to complete one tree.
5. Can I make the tree larger or smaller?
Absolutely. Adjusting your yarn thickness or hook size will easily change the dimensions of your tree.
6. Are there eco-friendly options for materials?
Yes, you can use recycled yarn and biodegradable pearls or wooden beads to make your project sustainable and earth-friendly.
Creating a Christmas tree with pearl balls – Crochet Pattern is a wonderful way to celebrate the season with creativity and warmth. This handmade decoration adds beauty, elegance, and a personal touch to your home while letting your crochet skills shine. Whether you make it for yourself or as a heartfelt gift, it’s sure to spread joy and holiday spirit.
I hope this tutorial inspired you to start crafting your own festive tree. What did you think of this crochet project? Share your honest opinion and suggestions in the comments—I’d love to hear how your Christmas tree with pearl balls – Crochet Pattern turned out and how you made it uniquely yours!


