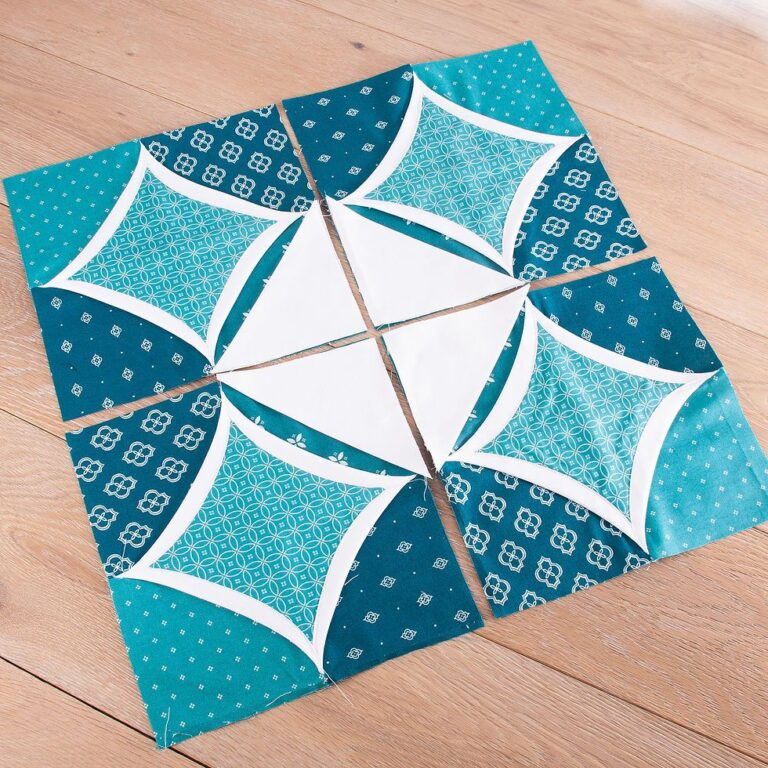
Cathedral Block - Quilt Pattern
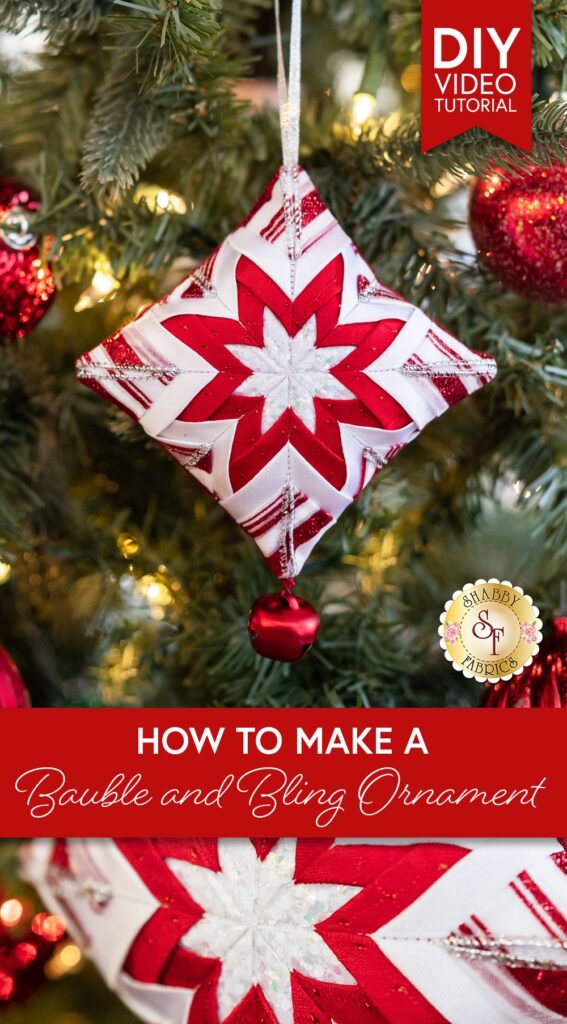
How to Make a Bauble & Bling Folded Ribbon Ornament – Quilt Pattern is a creative and elegant craft project that combines the charm of quilting techniques with the festive sparkle of ribbon and embellishments. This project is perfect for anyone who enjoys making handmade decorations that add personality and beauty to their home. Whether you’re a beginner or an experienced crafter, creating this unique ornament allows you to explore textures, colors, and layering while learning to fold ribbons in a decorative quilt-like pattern.
The idea behind the Bauble & Bling Folded Ribbon Ornament is to transform simple materials—like ribbons, foam balls, and a touch of creativity—into a stunning piece that looks both intricate and professional. These ornaments are ideal for Christmas decorations, gifts, or even as decorative accents for weddings and special occasions. The folding technique creates a quilted appearance without sewing, which makes it accessible and enjoyable for everyone.
In this tutorial, we’ll go step-by-step through the process of how to make a Bauble & Bling Folded Ribbon Ornament – Quilt Pattern, using easy-to-follow methods. You’ll learn how to prepare your materials, fold and pin the ribbons correctly, layer them into a beautiful quilt pattern, and add the finishing bling for that perfect touch of sparkle. By the end, you’ll not only have a gorgeous handmade ornament but also a new creative skill you can apply to other projects throughout the year.
Before beginning your Bauble & Bling Folded Ribbon Ornament – Quilt Pattern, it’s essential to have all your materials ready. The basic supplies are simple and affordable, making this project easy to start with items you might already have at home. You will need a foam or polystyrene ball (typically 3 to 4 inches in diameter), assorted ribbons in different colors and textures, small pins, scissors, and embellishments such as beads, sequins, or charms for extra sparkle.
Choosing the right ribbons will make a big difference in the final look of your ornament. For a luxurious effect, satin or metallic ribbons are ideal, while grosgrain or cotton ribbons can give a more rustic or vintage appeal. Mixing textures adds dimension and makes the quilt pattern stand out beautifully. Select ribbons of varying widths to achieve more intricate folds and contrasts.
When selecting colors, think of harmony and contrast. For example, gold and ivory create an elegant classic look, while red and green are perfect for traditional Christmas themes. If you prefer something modern, try shades of silver and blue. Remember, the folded ribbon ornament should reflect your personal style.
Pins are a vital part of this project since they hold the folded ribbons in place on the foam ball. Choose small, sharp pins with round heads; you can even use decorative pearl-headed pins to add flair. A good pair of sharp scissors will help you cut ribbons cleanly, avoiding frayed edges that can ruin the neatness of your quilt pattern.
For the bling, the sky’s the limit! You can use rhinestones, crystals, or glitter accents to add sparkle. The “bling” element is what makes this ornament truly shine, making it ideal for festive decorations or even as a handmade gift for someone special.
Finally, ensure you work on a flat surface with good lighting. Crafting requires patience and precision, and having your space organized will make the process of how to make a Bauble & Bling Folded Ribbon Ornament – Quilt Pattern smoother and more enjoyable.
The signature look of the Bauble & Bling Folded Ribbon Ornament comes from the way the ribbons are folded and arranged to mimic a quilted design. This technique requires attention to detail, but once you get the hang of it, the process becomes very relaxing and rewarding.
Start by cutting several equal lengths of ribbon, around 2.5 to 3 inches each. These will form the individual folded triangles that you’ll pin onto the foam ball. To make the folds, take one piece of ribbon and fold each side toward the center to form a triangle shape. The edges should meet neatly in the middle, creating a clean and crisp point.
Once you have several folded pieces, it’s time to begin layering them on the ball. Start at the top by pinning one ribbon triangle with its point facing upward. Then, place the next one slightly overlapping the first, creating a circular pattern around the top. This layering effect is what creates the illusion of a quilt pattern.
After completing the first round, move down the ball and begin the second layer, offsetting the ribbons so that the points of the new triangles fall between the previous layer’s folds. Continue this process until you reach the middle of the ball. For the second half, repeat the same process from the bottom upward, so that the layers meet neatly at the center.
Throughout the folding and pinning, keep your ribbons aligned and smooth. Any wrinkles or uneven folds can disrupt the symmetry of the folded ribbon ornament. Taking your time will ensure that your final piece looks professional and beautifully crafted.
Once the main pattern is complete, you can add additional ribbons or contrasting colors to define sections of the ornament. Some crafters like to add a decorative band around the middle to enhance the visual appeal.
Now that your folded ribbon quilt pattern is in place, it’s time to make your ornament truly shine. The “bauble” and “bling” elements are what elevate your project from simple to stunning. This is where you can let your creativity flow and personalize your ornament.
Begin by selecting a ribbon or cord for the hanging loop. This should be sturdy enough to hold the ornament’s weight and coordinate with the overall color scheme. Secure it with pins or a hot glue gun at the top of the ornament. Adding a bow at the top of the loop can create a beautiful finishing touch.
Next, focus on the decorative details. Add small beads or sequins at the tips of the folded ribbons for a touch of sparkle. You can also use metallic thread or fine glitter glue to accentuate the edges of the folds. The goal is to create a balanced and elegant appearance without overloading the ornament.
If you want to emphasize the “bauble” effect, consider attaching small dangling charms or mini bells that move when the ornament is hung. This adds a delightful sound and extra festive charm.
Lighting also plays a significant role in how your ornament will look once displayed. The combination of reflective ribbons and shiny embellishments will catch the light beautifully, making your Bauble & Bling Folded Ribbon Ornament – Quilt Pattern the centerpiece of any decoration.
For those who enjoy themed decor, try creating sets of ornaments in complementary colors. You can make an entire collection of handmade baubles that look cohesive when hung together on a Christmas tree or displayed in a bowl as a table centerpiece.
Lastly, remember that balance is key. Too much bling can overpower the elegant quilt design, so add embellishments thoughtfully to highlight rather than hide your craftsmanship.
Once you’ve mastered how to make a Bauble & Bling Folded Ribbon Ornament – Quilt Pattern, you can start exploring endless variations. The same technique can be used to create different designs and themes depending on the season or occasion.
For Christmas, use traditional reds, greens, and golds with a touch of glitter for a festive sparkle. For weddings, white and silver ribbons with pearls or crystals can create elegant keepsake decorations. You can even make baby-themed ornaments using soft pastel ribbons for nursery decor or baby showers.
Another idea is to experiment with shapes. While the round bauble is classic, you can use egg-shaped foam forms for Easter, heart shapes for Valentine’s Day, or even stars for patriotic holidays. The folding technique remains the same, but the result is entirely different and visually exciting.
Displaying your creations is just as important as making them. You can hang your ornaments on a Christmas tree, use them in wreaths, or place them inside glass bowls for table decor. They also make thoughtful, handcrafted gifts that friends and family will treasure.
If you enjoy selling your handmade crafts, these ornaments are perfect for holiday markets or online stores. Their high visual appeal and customizable nature make them desirable to a wide range of customers.
Most importantly, crafting these ornaments brings relaxation and satisfaction. It’s a mindful activity that lets you focus on creativity, color, and texture, while producing something beautiful and meaningful. Every time you make a Bauble & Bling Folded Ribbon Ornament – Quilt Pattern, you add a piece of your own artistry to the festive season.
1. Do I need sewing skills to make this ornament?
No, sewing isn’t required. The folded ribbon quilt pattern is created entirely with folding and pinning techniques, making it perfect for beginners.
2. What type of ribbon works best for this project?
Satin and metallic ribbons work beautifully because they fold neatly and reflect light. However, grosgrain and cotton ribbons can be used for a textured, rustic effect.
3. Can I use glue instead of pins?
Pins are recommended because they allow easy repositioning if needed. Glue can work for some parts but may make adjustments difficult later.
4. How can I make the ornament look more professional?
Focus on consistent ribbon lengths, neat folds, and balanced layering. Using quality materials and subtle bling will also enhance the professional finish.
5. Are these ornaments durable?
Yes, with careful handling and storage, your Bauble & Bling Folded Ribbon Ornament can last for many years. Store them in dry, cool places to prevent damage.
6. Can I personalize these ornaments?
Absolutely! Add initials, small tags, or custom charms to make each ornament unique and personal.
Learning how to make a Bauble & Bling Folded Ribbon Ornament – Quilt Pattern is not only a fun craft project but also a wonderful way to express your creativity. From folding ribbons into a quilted design to adding dazzling embellishments, each step allows you to create something truly unique and eye-catching. These handmade ornaments bring warmth and charm to any celebration.
Now that you’ve discovered the techniques and ideas for making your own Bauble & Bling Folded Ribbon Ornament, it’s time to put your creativity into action. Try different colors, ribbons, and designs to see what fits your personal style best.
Did you enjoy this tutorial? Please leave your sincere opinion and share your suggestions below! Your feedback helps inspire more creative ideas and future projects for everyone who loves crafting beautiful handmade decorations.


