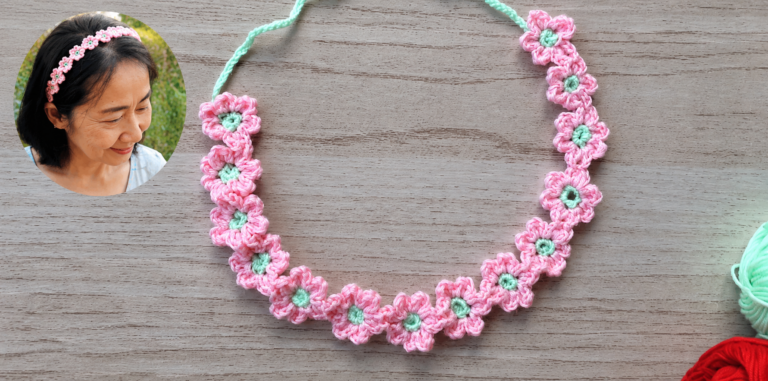
Crocheted Flower Headband - Pattern
The Christmas Crochet Cake – Crochet Pattern is a delightful and festive project perfect for the holiday season. This adorable crochet creation brings together the charm of handmade art and the joyful spirit of Christmas. Whether you’re an experienced crocheter or a beginner eager to try something new, this crochet cake project will help you create a stunning decoration or a thoughtful handmade gift for your loved ones. The best part? You can customize it with colors, textures, and embellishments to match your own festive style.
Crocheting during the holiday season adds warmth and joy to your crafting time. Working on the Christmas Crochet Cake – Crochet Pattern allows you to blend creativity with tradition, crafting a piece that looks good enough to eat—without the calories! Imagine a beautiful crochet cake centerpiece adorned with holly leaves, berries, and maybe even a little snowflake on top. It’s a project that not only decorates your home but also brings smiles to everyone who sees it.
In this article, we’ll walk you through the inspiration, materials, and techniques you need to make your very own Christmas Crochet Cake – Crochet Pattern. You’ll also find tips for customization and creative ways to display your finished piece. Let’s explore how to make this festive crochet cake a memorable part of your Christmas décor!

The Christmas Crochet Cake – Crochet Pattern is inspired by the idea of transforming traditional desserts into cozy handmade art. The soft yarn and detailed stitches replicate the texture and look of a real Christmas cake, often decorated with icing-like crochet layers and festive embellishments. Many crocheters love this project because it’s both charming and relaxing—a way to celebrate the holidays through creativity.
When crafting this crochet cake, you can play with a variety of yarn colors to represent your favorite cake flavors. For instance, brown yarn can mimic a chocolate cake, while creamy white or beige tones can resemble vanilla or sponge cake layers. Adding touches of red, green, and gold enhances the festive vibe, making it perfect as a table centerpiece or a display on your mantel.
Another magical aspect of the Christmas Crochet Cake – Crochet Pattern is its versatility. You can create a small cake to use as an ornament, or make a larger one for decoration. Some even use them as toy props or photo backgrounds. Because it’s made of yarn, it’s long-lasting and doesn’t spoil—so you can bring it out every Christmas for years to come.
To give your crochet cake extra personality, consider adding miniature decorations like crochet berries, candy canes, or snowflakes. These little details transform your project from simple to spectacular. You can even add a little sparkle by using metallic or glittery yarns.
The Christmas Crochet Cake – Crochet Pattern also offers a meaningful opportunity to create handmade gifts. Imagine giving someone a crocheted cake topped with a ribbon—a thoughtful and unique present that symbolizes care and creativity. Each stitch carries love, making it more special than any store-bought item.
Finally, crocheting this festive cake can be a wonderful group activity. Many crocheters enjoy making these cakes together with friends, family, or in local crafting groups during the holiday season. It’s a cozy way to share laughter, creativity, and the joy of giving.
Before starting your Christmas Crochet Cake – Crochet Pattern, it’s important to gather all the materials and tools you’ll need. Having everything ready ensures a smooth crafting experience and allows you to focus on creativity rather than searching for supplies.
The main material, of course, is yarn. Choose medium-weight yarn for most parts of your cake, as it provides structure while remaining easy to work with. Cotton or acrylic yarns work best—they hold their shape and come in a wide range of festive colors. Opt for white, red, green, brown, and gold tones for a truly Christmas-inspired palette.
You’ll also need a suitable crochet hook, typically between 3.5 mm and 4.5 mm, depending on your yarn choice. The hook size affects the final texture and tightness of the stitches. A smaller hook makes firmer stitches—great for structure—while a larger one creates a softer, fluffier cake.
Stuffing material is essential to give your crochet cake volume. Use fiberfill or soft polyester stuffing to shape the body and layers. For stability, some crocheters like to insert a small piece of cardboard at the base before stuffing, helping the cake stand flat.
Don’t forget embellishments! Decorative items such as small buttons, felt holly leaves, or even tiny beads can bring your crochet cake to life. You can also crochet miniature decorations like strawberries or whipped cream swirls to place on top.
A yarn needle will be needed for sewing parts together and weaving in ends neatly. Keeping your stitches tidy enhances the professional look of your Christmas Crochet Cake – Crochet Pattern.
Lastly, it’s good to have a pair of sharp scissors and a stitch marker to help track your rounds, especially if your pattern uses continuous spirals. With your materials in hand, you’ll be ready to start crocheting your festive masterpiece
Now that you have your materials, it’s time to bring your Christmas Crochet Cake – Crochet Pattern to life! This section will help you understand the general process from start to finish, making it easy to follow even if you’re new to crochet.
Start by crocheting the base of the cake, usually made in a flat circular shape using single crochet stitches. You can begin with a magic ring and increase gradually until the desired diameter is reached. This foundation gives your cake a sturdy bottom that can support the upper layers.
Next, crochet the cake sides. These are typically worked in continuous rounds without increasing, forming a tube-like shape. You can alternate colors here to create a layered look—like red and white for a peppermint effect or brown and cream for a chocolate sponge appearance.
Once your base and sides are complete, move on to the top layer. This part often includes textured stitches to simulate frosting or icing. For example, using puff stitches, bobble stitches, or loop stitches can mimic whipped cream or icing drips.
After assembling the cake body, start adding decorations. You might crochet tiny holly leaves, cherries, candy canes, or snowflakes to embellish the top. Attach them securely using your yarn needle. Each detail adds festive charm and makes your piece truly one-of-a-kind.
Then, stuff your cake carefully with fiberfill, making sure it’s evenly shaped and firm. This gives it that realistic, plush appearance. Close the opening neatly using slip stitches or whip stitches.
Finally, admire your creation! Your Christmas Crochet Cake – Crochet Pattern is complete. Place it on a small plate, wrap it as a gift, or add it to your holiday table décor. It’s a wonderful project that combines fun, artistry, and festive cheer.
Once you’ve completed your Christmas Crochet Cake – Crochet Pattern, there are countless ways to display or gift it. One of the most popular ideas is to use it as a table centerpiece during holiday gatherings. Surrounded by candles, pinecones, or fairy lights, your crochet cake will instantly grab attention and spark conversation.
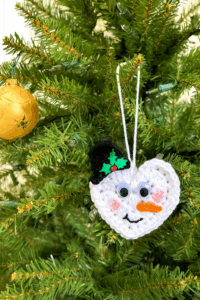
You can also create a set of mini crochet cakes as ornaments for your Christmas tree. These little cakes look adorable when hung alongside other handmade decorations. They can be customized with various colors and toppings, giving your tree a sweet, cozy look.
Another charming idea is to gift your crochet cake as a handmade present. It’s an ideal choice for friends who appreciate crafts or enjoy collecting unique holiday decorations. You could even pair it with a crocheted cup of hot cocoa or a crochet gingerbread man for a themed gift set.
The Christmas Crochet Cake – Crochet Pattern can also double as a fun photo prop. Photographers and craft influencers often use these crochet cakes in festive photoshoots to add a whimsical, cozy touch.
If you enjoy home décor, try placing your crochet cake on kitchen shelves, coffee tables, or even window sills. It’s a soft, colorful piece that brightens any space without requiring maintenance—perfect for those who love festive decorations that last.
Lastly, don’t forget to share your creation online! Posting your Christmas Crochet Cake – Crochet Pattern on social media or crochet groups can inspire others to try it too. It’s a wonderful way to connect with other crafters and spread holiday cheer through handmade art.
1. What type of yarn is best for making the Christmas Crochet Cake?
Medium-weight cotton or acrylic yarns are ideal because they hold their shape well and come in a wide variety of colors suitable for Christmas themes.
2. Can beginners make the Christmas Crochet Cake – Crochet Pattern?
Yes! This project is beginner-friendly, especially if you follow simple stitches like single crochet and half double crochet.
3. How long does it take to finish a crochet cake?
Depending on your skill level, it can take anywhere from 3 to 6 hours for a medium-sized cake. Smaller ones may take less time.
4. Can I wash my crochet cake?
Yes, but only by hand with mild detergent and cold water. Let it air dry to keep its shape intact.
5. What other decorations can I add to my crochet cake?
You can include crochet cherries, ribbons, beads, or even tiny bells to enhance its festive look.
6. Can I resize the pattern to make smaller or larger cakes?
Absolutely! Simply adjust your yarn thickness and hook size to scale the pattern up or down.
The Christmas Crochet Cake – Crochet Pattern is a joyful and imaginative way to celebrate the festive season through handmade art. It combines the beauty of crochet with the warmth of Christmas traditions, allowing you to create something that’s both decorative and meaningful. Whether used as a gift, ornament, or table centerpiece, your crochet cake will surely bring smiles and holiday cheer to everyone around.
We hope this guide has inspired you to try the Christmas Crochet Cake – Crochet Pattern and personalize it with your own festive flair. What did you think of this tutorial? Share your honest opinion and suggestions—we’d love to hear from you!


