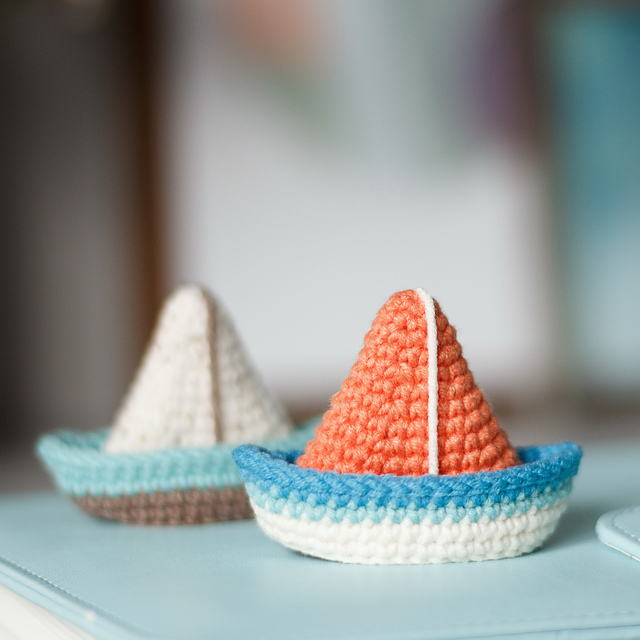
Boat and Sailboat- Crochet Pattern
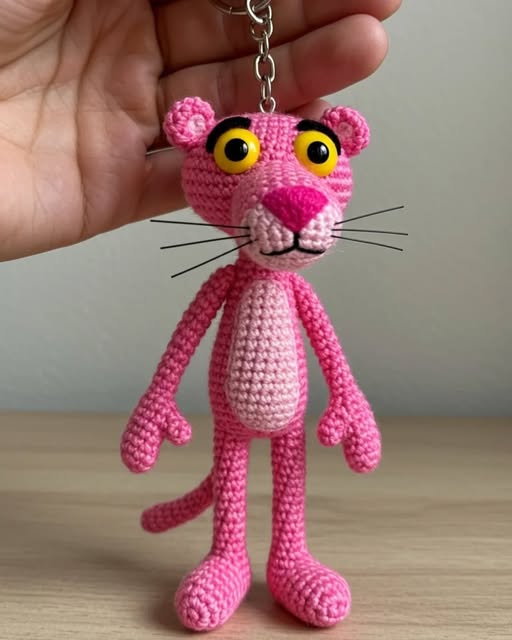
The Pink Panther Amigurumi – Crochet Pattern is a delightful project that combines creativity, nostalgia, and the fun of handmade art. Whether you are a beginner exploring the world of crochet or an experienced crafter looking for your next challenge, this pattern offers the perfect mix of simplicity and detail. Inspired by the classic and charming cartoon character, the Pink Panther Amigurumi is a piece that will bring smiles to both adults and children alike. Its soft colors and playful expression make it a timeless favorite for crochet enthusiasts.
Creating a Pink Panther Amigurumi is more than just following stitches; it’s about capturing personality through yarn. Each round, each loop, and every stitch builds character and charm. With patience and love, you’ll soon see the recognizable silhouette of the Pink Panther emerge — the long limbs, the sleek tail, and the endearing eyes. The Pink Panther Amigurumi – Crochet Pattern allows you to recreate this iconic figure while also adding your unique touch.
In this article, we will explore the essential steps, materials, and techniques to bring your Pink Panther Amigurumi to life. You’ll learn how to prepare your workspace, assemble your materials, and follow a structured crochet pattern that leads to an adorable finished toy. Whether you plan to keep it as a decoration, give it as a gift, or add it to your amigurumi collection, this project promises joy from start to finish.
Before you begin crocheting, it’s essential to gather the right materials and understand the basics. The Pink Panther Amigurumi – Crochet Pattern typically requires a soft pink yarn, black and white yarn for facial details, a crochet hook size that matches your yarn weight, stuffing fiber, a yarn needle, and safety eyes. Choosing high-quality yarn ensures your Pink Panther feels soft and looks vibrant.
To achieve a polished finish, select yarn with a smooth texture that allows for even stitches. Cotton or acrylic yarns are ideal choices for amigurumi projects because they hold their shape well. A consistent tension throughout the project will help your Pink Panther Amigurumi look professional and well-proportioned.
Next, prepare your crochet hook. The recommended size usually ranges between 2.5 mm to 3.5 mm, depending on your yarn type. Remember that using a smaller hook creates tighter stitches, which is perfect for amigurumi, as it prevents the stuffing from showing through.
When you start your Pink Panther Amigurumi – Crochet Pattern, it’s important to read the entire pattern before beginning. Understanding the sequence of body parts—head, body, arms, legs, and tail—will help you visualize the assembly process. Many crocheters prefer to make all parts first and then sew them together at the end.
Use stitch markers to keep track of rounds, especially when working in continuous spirals. Missing a round can distort the shape of your character. Taking your time during this step ensures that your Pink Panther Amigurumi comes together smoothly and accurately.
Finally, find a comfortable workspace. Good lighting, a soft chair, and organized tools make the crocheting experience more enjoyable. The key to a perfect Pink Panther Amigurumi is patience, attention to detail, and a love for crafting something special.
The head is the most expressive part of the Pink Panther Amigurumi – Crochet Pattern. Start with a magic ring, then increase your stitches gradually to form a smooth, rounded shape. As you crochet in spirals, you’ll begin to see the head take form. Keep your tension consistent and count your stitches carefully to maintain symmetry.
Once you’ve achieved the correct head size, insert safety eyes and begin shaping the snout and facial features. The Pink Panther’s face is known for its long snout, distinctive nose, and slightly mischievous smile. Use black yarn for the nose and white yarn for the muzzle. Embroider the details gently to avoid distorting the fabric.
The body is created next, starting from the bottom up. Maintain the same stitch tightness to ensure the head and body proportions match. The Pink Panther’s slim body and long limbs give it a unique silhouette, so pay attention to the shaping instructions in the Pink Panther Amigurumi – Crochet Pattern.
Stuff the head and body firmly but not too tightly. Overstuffing can stretch the stitches and create uneven surfaces. Understuffing, on the other hand, can make your amigurumi floppy. Find the right balance to keep your Pink Panther both soft and stable.
Once the body is complete, sew the head onto it carefully. A well-attached head ensures durability, especially if your amigurumi will be used as a toy. Use invisible stitches for a seamless connection between the two parts.
Take your time with these steps. The head and body form the foundation of your Pink Panther Amigurumi, so accuracy and neatness at this stage will make a significant difference in the final appearance.
The limbs of the Pink Panther Amigurumi – Crochet Pattern bring the character to life. Begin by crocheting the arms and legs using continuous rounds. The arms are usually thinner and slightly shorter than the legs, reflecting the playful pose of the Pink Panther.
When crocheting the limbs, keep your stitches uniform and tight. This prevents the stuffing from escaping and helps the arms and legs hold their shape. You can lightly stuff the limbs or leave them partially soft to allow for flexibility when posing your amigurumi.
The tail is an essential detail in the Pink Panther Amigurumi. Its long, slender shape adds charm and balance to the design. Make the tail slightly curved to capture the character’s elegant and relaxed posture. Attach it securely to the back of the body, making sure it aligns symmetrically.
Sewing the limbs and tail requires precision. Use a yarn needle and match your thread color to the yarn for a clean look. Attach the arms slightly below the head and the legs at the base of the body. Position them evenly to ensure your Pink Panther Amigurumi can sit or stand if desired.
Adding the final touches, such as pink paw pads or embroidered claws, enhances the realism and detail of your project. These small accents make your Pink Panther Amigurumi unique and full of character.
Finally, check your work for loose threads, uneven stitches, or stuffing gaps. Taking a few extra minutes for finishing touches makes your Pink Panther Amigurumi – Crochet Pattern creation truly special and professional.
One of the best parts about the Pink Panther Amigurumi – Crochet Pattern is that you can personalize it. Experiment with different shades of pink, or even add accessories like a tiny scarf, hat, or bow tie. Customization allows you to express creativity and make your amigurumi one of a kind.
If you are making the Pink Panther Amigurumi as a gift, consider personal touches such as embroidering initials or adding a heart-shaped patch. These thoughtful additions turn a handmade item into a cherished keepsake.
Photographing your finished project is another enjoyable step. Use natural light and neutral backgrounds to highlight the soft colors and details of your Pink Panther Amigurumi. Sharing your creation on social media or craft groups is a great way to inspire others and connect with fellow crochet lovers.
For those who sell handmade items, the Pink Panther Amigurumi – Crochet Pattern can be a best-seller due to its recognizable and nostalgic appeal. High-quality photos and clear descriptions help attract buyers who appreciate handmade art.
Proper care is important to maintain your amigurumi’s beauty. Keep it away from direct sunlight to prevent color fading, and clean it gently with a damp cloth if needed. Storing it in a cool, dry place will preserve its softness and shape.
Above all, be proud of your creation. Completing a Pink Panther Amigurumi takes dedication and skill, and each piece reflects the love and effort you’ve put into your craft.
1. What skill level is required for the Pink Panther Amigurumi – Crochet Pattern?
This pattern is ideal for intermediate crocheters, but beginners with patience and basic stitch knowledge can also complete it successfully.
2. What type of yarn should I use for the Pink Panther Amigurumi?
A medium-weight cotton or acrylic yarn works best, providing durability and softness while holding shape.
3. How long does it take to complete the Pink Panther Amigurumi?
Depending on your experience, it can take between 8 to 12 hours spread over a few days.
4. Can I make the Pink Panther in different colors?
Absolutely! While pink is the traditional color, you can experiment with shades like pastel, fuchsia, or even blue for a creative twist.
5. How should I stuff the amigurumi to avoid lumps?
Use small amounts of fiberfill at a time and distribute it evenly. Firm but gentle stuffing gives the best results.
6. Is the Pink Panther Amigurumi suitable as a children’s toy?
Yes, but ensure safety eyes are securely fastened or replace them with embroidered eyes for younger children.
The Pink Panther Amigurumi – Crochet Pattern is a charming and fulfilling crochet project that blends creativity, nostalgia, and fun. From gathering materials to adding personal touches, each step allows you to express your artistry and love for handmade crafts. Whether you make it for yourself or as a thoughtful gift, this project is sure to delight anyone who sees it.
We hope this detailed guide helped you understand how to create your own Pink Panther Amigurumi. If you’ve tried it or plan to start soon, share your thoughts below. We’d love to hear your honest opinion, experiences, and suggestions for future tutorials!
