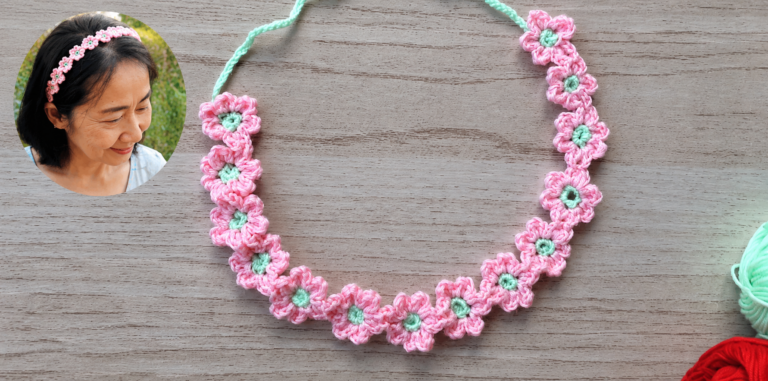
Crocheted Flower Headband - Pattern
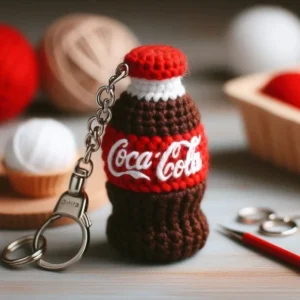
The Crocheted Cookie Keychain – Pattern is a delightful and creative project that combines charm, practicality, and the beauty of handmade crochet. This small but eye-catching accessory can bring a touch of sweetness to your daily life, making your keys or bags stand out with a cozy homemade vibe. Whether you’re new to crochet or a seasoned crafter, this project is both fun and easy to make. The result is an adorable crochet cookie that looks almost good enough to eat — but instead, it’s a stylish piece you can carry everywhere.
Crochet keychains have become incredibly popular because they are quick to make, perfect for using leftover yarn, and ideal as small gifts. The Crocheted Cookie Keychain – Pattern fits perfectly into this trend, as it’s not only cute but also functional. You can attach it to keys, backpacks, purses, or even use it as a decorative element for gift packaging. The best part is that you can personalize it using different colors and yarn textures to create your own unique cookie style.
This project is also an excellent way to practice basic crochet stitches and improve your skills while having fun. By following a Crocheted Cookie Keychain – Pattern, you’ll learn how to create small round shapes, join pieces neatly, and add decorative details that make your design stand out. Whether you’re looking for a relaxing weekend project or a handmade gift idea, this pattern is a perfect choice that will warm hearts and spark smiles wherever it goes.
Before starting your Crocheted Cookie Keychain – Pattern, it’s important to gather all your materials and prepare your workspace. Having everything ready will make the process smooth and enjoyable. You don’t need many supplies for this project, which makes it ideal for beginners or anyone looking for a quick craft session.
You’ll need a small amount of yarn in your chosen cookie colors. Typically, beige, brown, or tan yarn works perfectly for the cookie base, while dark brown or black can be used for the “chocolate chips.” Cotton yarn is an excellent choice because it holds its shape well and gives the cookie a nice, clean finish. You will also need a small amount of stuffing to give your cookie a bit of puffiness.
A crochet hook that matches your yarn weight is essential for achieving a neat texture. Usually, a 2.5 mm to 3.5 mm hook works great for this kind of small project. Don’t forget scissors, a yarn needle for sewing, and a metal keychain ring to attach your finished piece.
Once your materials are set, it’s time to prepare your work area. Choose a comfortable spot with good lighting, especially since this project involves small stitches. Keep a small bowl or box nearby to hold your yarn scraps and tools, ensuring that nothing gets lost.
Before beginning, it’s also helpful to test your tension by crocheting a few practice stitches. Consistent tension helps your Crocheted Cookie Keychain – Pattern look professional and uniform.
Finally, make sure to review your pattern instructions carefully before you begin. Understanding the sequence of stitches and rounds beforehand will help you crochet smoothly without confusion, ensuring a beautiful and accurate result.
Now that your materials are ready, it’s time to begin the fun part — crocheting your cookie! The Crocheted Cookie Keychain – Pattern typically starts with a simple magic ring or chain circle. This forms the center of your cookie and helps create that perfectly round shape we all love.
Start by making a magic ring and crocheting a few single crochet stitches into it. Once you’ve tightened the ring, you’ll begin increasing in each round to form a flat circle. This will be the base of your cookie. Make sure your increases are evenly spaced to keep the circle smooth and prevent curling.
After completing a few rounds, you’ll notice your cookie shape taking form. You can now add texture by alternating between rounds of single crochet and occasional slip stitches. This creates a realistic baked look, similar to the surface of an actual cookie.
Next, it’s time to add the “chocolate chips” or any decoration you prefer. You can embroider them using darker yarn or crochet small circles and sew them onto your cookie base. These little touches bring the Crocheted Cookie Keychain – Pattern to life, adding personality and charm.
Once the front and back sides of the cookie are complete, place them together with the right sides facing out. Use single crochet stitches to join the edges, leaving a small gap to insert a bit of stuffing. This will give your cookie a soft, 3D look that’s both cute and durable.
Finally, attach your metal keychain ring to the top using a small loop of yarn or a jump ring. Secure it tightly, and you’re done! You’ve completed your own Crocheted Cookie Keychain – Pattern — a perfect mix of creativity, style, and practicality.
One of the most enjoyable aspects of making a Crocheted Cookie Keychain – Pattern is the freedom to customize it. You can experiment with colors, shapes, and even themes to make your cookie keychains unique and expressive.
For a classic chocolate chip cookie, stick with beige or tan yarn for the base and dark brown for the chips. If you want a sugar cookie style, try soft pastel shades like pink, mint, or white. Adding a small embroidered smile or eyes can also transform your keychain into a cute character, making it perfect as a gift for children or friends.
You can take it a step further and design different “flavors” of cookies — for example, chocolate cookies with white chips, or a red velvet cookie with cream spots. The possibilities are endless and only limited by your imagination.
Adding small beads, sequins, or buttons can give your cookie an extra decorative touch. Just make sure these additions are securely attached, especially if the keychain will be handled often.
If you’re skilled at embroidery, try stitching small patterns or initials on your cookie for a personalized finish. This is especially charming if you plan to give the Crocheted Cookie Keychain – Pattern as a handmade gift.
Lastly, you can even make matching sets — a cookie, a milk bottle, or a cupcake keychain — for a fun and coordinated collection. These themed sets are popular among crochet enthusiasts and make wonderful craft fair items or thoughtful handmade presents.
After finishing your Crocheted Cookie Keychain – Pattern, there are a few things you can do to make sure it stays looking beautiful for a long time. Handmade crochet items, even small ones, deserve care and attention so they can last and continue to bring joy.
When finishing, check all your seams and stitches carefully. Make sure the yarn ends are securely woven in to prevent unraveling. If your keychain will be used frequently, consider applying a small drop of fabric glue to the knots for extra security.
To keep your crochet cookie looking fresh, avoid exposing it to excessive moisture. Cotton yarn can absorb water, which might distort the shape or cause color bleeding. If it gets dirty, gently spot-clean with a damp cloth and mild soap — never machine wash it.
If you plan to make multiple keychains, consistency is key. Take notes of your stitch counts, yarn types, and hook size so you can easily recreate the same design later. This is especially helpful if you intend to sell your Crocheted Cookie Keychain – Pattern creations.
For a more professional look, you can block your cookie pieces before assembly. Lightly mist them with water, shape them flat, and let them dry completely. This gives your finished piece a neat, polished appearance.
Lastly, store your handmade keychains in a cool, dry place when not in use. Avoid leaving them in direct sunlight for long periods, as it may cause colors to fade. With these simple care tips, your Crocheted Cookie Keychain – Pattern will remain adorable and in perfect condition for years to come.
1. What skill level is required for the Crocheted Cookie Keychain – Pattern?
This pattern is beginner-friendly, making it ideal for those just starting to learn crochet. Basic knowledge of single crochet, increases, and joining pieces is all you need.
2. How long does it take to complete one Crocheted Cookie Keychain?
On average, it takes about one to two hours to make one keychain, depending on your crochet speed and experience.
3. What type of yarn works best for this project?
Cotton yarn is highly recommended because it holds shape well and provides a neat texture, perfect for small items like keychains.
4. Can I sell items made using this pattern?
Yes! Handmade items created from the Crocheted Cookie Keychain – Pattern are wonderful for craft fairs, online shops, or personal gifts. Just make sure to credit the original design if applicable.
5. How do I attach the keychain ring securely?
Use a sturdy loop of yarn or a small metal jump ring to attach the keychain. Make sure it’s tightly fastened to prevent it from coming loose.
6. Can I make this project using leftover yarn?
Absolutely! This is one of the best ways to use small yarn scraps effectively while creating something beautiful and functional.
The Crocheted Cookie Keychain – Pattern is a charming and versatile project that combines creativity, simplicity, and functionality. It’s perfect for beginners and experienced crocheters alike, offering an opportunity to make something quick, fun, and full of personality. With just a few materials and some imagination, you can create adorable cookie keychains that brighten everyday life or make wonderful handmade gifts.
Now that you’ve learned all about the Crocheted Cookie Keychain – Pattern, why not give it a try? Share your thoughts, experiences, and suggestions in the comments — your feedback helps inspire even more crochet enthusiasts around the world!


