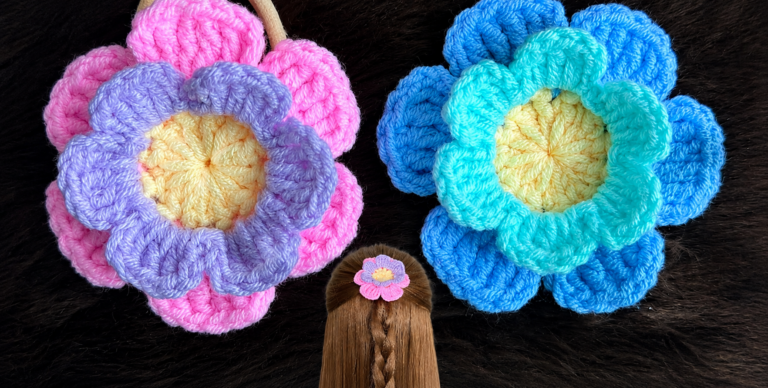
Crocheted Flower Headband - Pattern
is a festive and elegant project that brings charm to any holiday table setting. In this article, you will learn how to create beautiful crochet napkin rings inspired by the classic Christmas poinsettia, using a beginner-friendly approach and techniques optimized for practical crafting. Throughout the text, you will find the main keyword Poinsettia Napkin Ring – Crochet Pattern highlighted in bold, along with other related key terms that support SEO optimization and ensure clarity for readers who are looking to recreate this seasonal project.
The goal of this article is to guide you step-by-step through the creative process while keeping the content fully compliant with Google AdSense policies. You will find helpful tips, detailed explanations, and accessible instructions suitable for all skill levels. Crochet lovers looking to add handmade beauty to their holiday décor will especially enjoy this tutorial, which transforms simple stitches into a stunning table accessory. With its charming colors and floral design, the Poinsettia Napkin Ring – Crochet Pattern is the perfect touch for Christmas gatherings or as a thoughtful handmade gift.
Before we begin the instructions, it’s important to understand the key components of this project. The poinsettia flower symbolizes joy and celebration, making it one of the most beloved motifs for festive crafting. Using soft yarn, a simple ring base, and a decorative flower, this crochet design brings warmth and personality to every holiday table. With dedication and creativity, you will master the Poinsettia Napkin Ring – Crochet Pattern and be able to personalize it in many ways.
This section will help you gather everything you need before starting your project. Preparation is essential for achieving the best results with the Poinsettia Napkin Ring – Crochet Pattern.
Choosing the right yarn is the first step toward creating a beautiful poinsettia napkin ring. Most crafters prefer cotton yarn because it provides structure and clean stitch definition. You can choose bold red for the petals, bright yellow for the center, and deep green for leaves, keeping the traditional colors of the poinsettia flower.
Next, you will need crochet hooks in appropriate sizes for the yarn selected. Hook sizes between 3.0 mm and 4.0 mm are commonly recommended for small decorative pieces. A smaller hook creates tighter stitches, ensuring your poinsettia napkin ring holds its shape during use.
It’s also important to have basic crochet accessories such as scissors, a tapestry needle, and stitch markers. These tools simplify the crafting process and help maintain accuracy while shaping the flower and ring base. The tapestry needle is especially useful for weaving in yarn ends discreetly.
Before beginning the flower petals, take a moment to practice simple stitches if you are a beginner. The poinsettia design mainly uses chain stitches, slip stitches, and double crochet stitches. Mastering these ahead of time will make the project more enjoyable.
Finally, organize your workspace. Having all materials laid out neatly helps maintain your focus and lets you follow the Poinsettia Napkin Ring – Crochet Pattern step by step without interruptions.
The ring base forms the foundation of the entire project, so it must be sturdy and even. The Poinsettia Napkin Ring – Crochet Pattern uses a simple yet effective structure that works beautifully for holding napkins.
Start by crocheting a foundation chain long enough to wrap around a standard napkin. This chain usually consists of 18 to 24 stitches, depending on your tension and yarn thickness. Once you join the chain to form a loop, you will begin working in the round.
Work single crochet stitches around the ring to build thickness. This step strengthens the structure, making your napkin ring durable for repeated use. Continue stitching evenly until you achieve the desired width, usually four to six rows.
Keep your stitches consistent, as uneven tension may cause the ring to warp. Turning your work after each row is unnecessary; instead, continue crocheting in a spiral for a smooth finish. This technique gives the poinsettia napkin ring a professional appearance.
Once the ring base is complete, fasten off and weave in the ends. This ensures there are no loose strands visible. The base should stand firmly on its own while remaining flexible enough to slide easily onto napkins.
You can create several ring bases at once if you plan to make a matching table set. This is especially helpful if you’re decorating for a large holiday gathering.
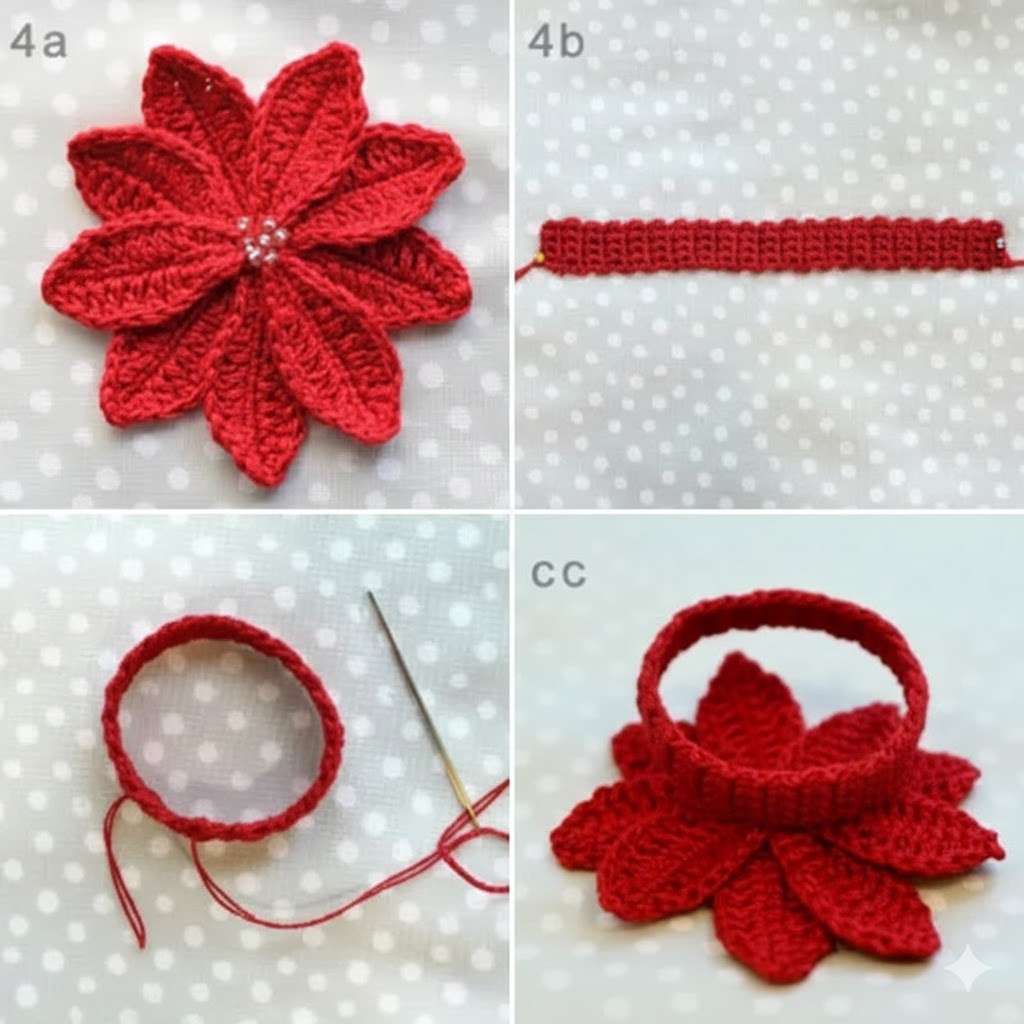
The poinsettia flower is the centerpiece of this project. Its layered petals create a festive and realistic look, making the Poinsettia Napkin Ring – Crochet Pattern truly stand out.
Begin by crocheting the first round of petals using red yarn. This usually involves creating a small magic ring, followed by double crochet stitches to form each petal. Repeat this process five to six times to shape the classic poinsettia outline.
After completing the first layer, crochet a second layer of slightly smaller petals. This adds dimension and makes the flower look more lifelike. Layering the petals enhances the overall visual effect and gives your napkin ring a handcrafted charm.
Once the petals are complete, create the flower’s center using yellow yarn. A few tight single crochet stitches forming a small cluster are enough to replicate the pollen center. This small detail adds a striking contrast to the red petals.
Green leaves can be added next, depending on your personal preference. These leaves are usually crocheted separately and then sewn behind the flower to create a fuller design. Their gentle curves soften the look of the finished piece.
Attach the assembled flower to the ring base using yarn and your tapestry needle. Be sure it is securely fastened so it doesn’t shift while the napkin ring is in use.
One of the best aspects of working with a Poinsettia Napkin Ring – Crochet Pattern is the opportunity to add your own creative touch. Customization makes each piece unique and reflects your personal style.
Try experimenting with different yarn textures. For example, using a slightly shiny or metallic yarn can give the poinsettia a sparkling effect, making your holiday table more festive and eye-catching.
Changing colors is another great way to personalize your napkin rings. While traditional poinsettias are red, you can create white, pink, or even gold versions. These variations still look beautiful and can complement different holiday décor themes.
You may also add embellishments such as small beads or pearls sewn into the flower center. These accents enhance the decorative appeal without overwhelming the simplicity of the original design.
If you prefer a minimalist approach, create a smaller poinsettia flower for a subtle yet elegant touch. This modern variation works well for sophisticated table settings.
You can also craft matching accessories, such as coasters or placemat decorations, using the same flower motif. This creates a coordinated theme throughout your table décor.
Finally, consider gifting your handmade napkin rings to friends and family. Handmade items often carry emotional value and can become cherished keepsakes.
1. Is the Poinsettia Napkin Ring suitable for beginners?
Yes, the project uses basic stitches and simple techniques, making it accessible for beginners with some basic crochet knowledge.
2. What yarn works best for this pattern?
Cotton yarn is recommended because it provides structure and keeps the flower crisp and defined.
3. How long does it take to complete one napkin ring?
Most crafters can complete one in 30–60 minutes, depending on skill level and stitch tension.
4. Can I wash the crochet napkin rings?
Yes, but hand washing is recommended to maintain the shape and color of the poinsettia flower.
5. Can I customize the size of the ring?
Absolutely. You can adjust the foundation chain to make the ring larger or smaller as needed.
6. Do I need special tools to make the poinsettia flower?
Only basic crochet tools are needed: yarn, hook, scissors, and a tapestry needle.
The Poinsettia Napkin Ring – Crochet Pattern is a beautiful and festive project that adds handmade charm to any holiday table. Throughout this article, you learned how to prepare materials, create the ring base, craft the poinsettia flower, and customize your design to match your personal style. With its simple structure and stunning visual appeal, this pattern offers endless possibilities for creativity and decoration.
I hope this tutorial inspires you to create your own set of poinsettia napkin rings and bring more handmade beauty to your celebrations. If you enjoyed this guide, feel free to share your thoughts or ask for more helpful crochet tutorials.


