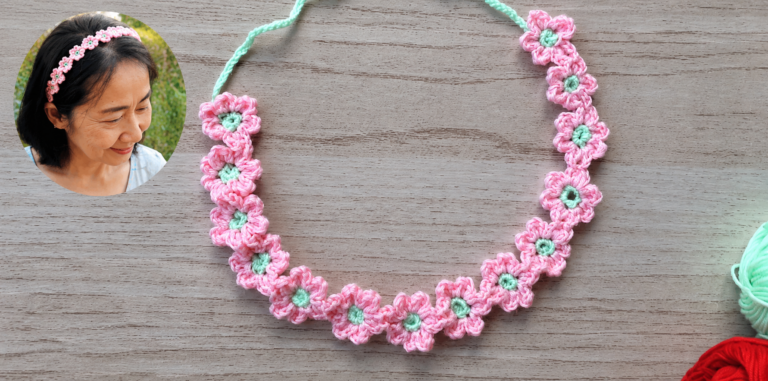
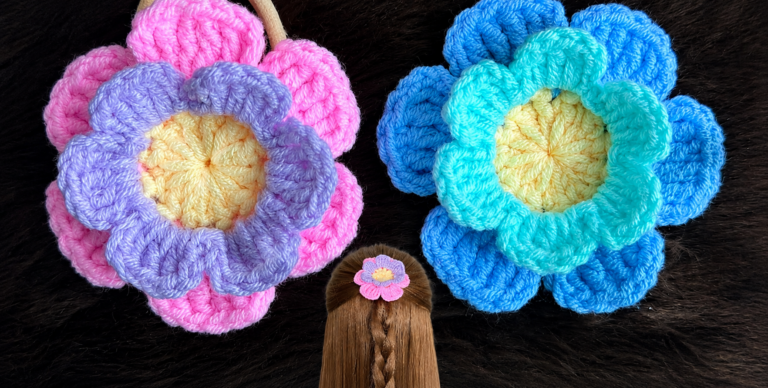
Crocheted Flower Headband - Pattern
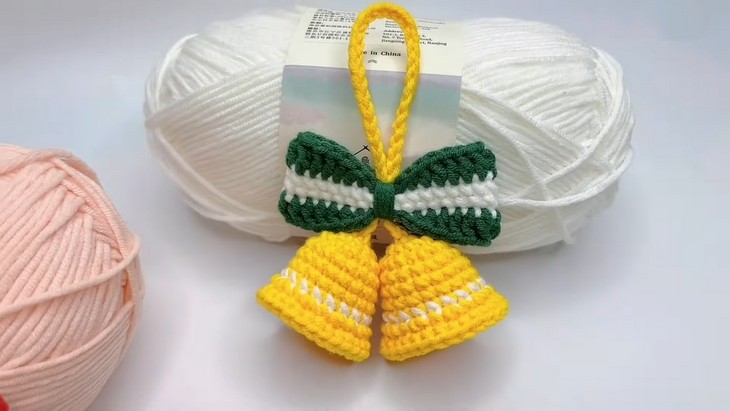
is a delightful and festive project that brings the warmth of handmade décor into your holiday celebrations. In this article, you will learn how to create charming crochet bells using simple techniques, accessible materials, and a humanized step-by-step explanation designed for beginners and experienced crafters alike. Throughout this guide, the keyword Crochet Christmas Bells Tutorial will appear naturally to help optimize your reading experience and support SEO best practices. This ensures your crafting journey is both inspiring and easy to follow.
Creating crochet Christmas decorations is a heartwarming tradition that many families cherish during the holiday season. Whether you’re crafting for your own home, gifting handmade ornaments, or preparing items for a local Christmas market, this Crochet Christmas Bells Tutorial offers a simple yet elegant project suitable for all skill levels. The charm of these bells lies in their versatility—you can use them as ornaments, garlands, table décor, or even to embellish gift wrapping.
Before diving into the first steps, remember that working with holiday yarns and festive colors can elevate your crochet bells to a new level of charm. Even if you choose a classic red, green, gold, or white palette, your handmade bells will carry your personal touch. Now, let’s begin this Crochet Christmas Bells Tutorial, exploring each step with clarity, creativity, and plenty of helpful tips.
To start this Crochet Christmas Bells Tutorial, gathering the right materials is essential. You don’t need luxury tools or specialized equipment; simple, accessible items are all it takes to create beautiful handmade bells. Below, you will find a detailed explanation of the best yarns, hooks, and accessories to use so your bells look professional and festive.
Choosing the ideal yarn is the first step toward achieving the perfect texture. Cotton yarn works wonderfully because it offers structure and crisp stitch definition. Acrylic yarn is also a great option, especially if you prefer softer bells or want to incorporate sparkly fibers for a more festive look. No matter your choice, make sure the yarn feels comfortable in your hands.
Selecting the appropriate hook size is equally important. Most crocheters find that a 3.0 mm to 4.0 mm hook works well for small holiday ornaments. A smaller hook produces a tighter stitch, which helps the bell maintain its shape. If your bell appears too soft or collapses, try downsizing your hook.
You may also want to prepare additional accessories such as ribbon, small jingle bells, or beads to enhance your final project. These little additions can transform your crocheted bell into a charming and eye-catching decoration. Your personal style and holiday theme will inspire the finishing touches.
With all materials in hand, it’s time to arrange your crafting space. A well-lit area, comfortable seating, and organized tools help make the crocheting process enjoyable. This Crochet Christmas Bells Tutorial aims to guide you step by step, so being prepared ensures a smooth crafting experience.
Finally, before beginning your first stitch, take a moment to review your yarn tension. Practicing a few slip stitches or single crochets will help you achieve consistent tension throughout the project. This small preparation step ensures your bell will form neatly and evenly from top to bottom.
The base is the foundation of your bell, and this section of the Crochet Christmas Bells Tutorial guides you through the essential beginning steps. Creating a well-shaped base ensures your bell hangs beautifully and maintains its form when displayed.
To begin the base, you’ll typically start with a magic ring or chain circle. The magic ring is an excellent technique for ornaments because it creates a tight, closed center that looks polished. If you’re a beginner and prefer chaining, that works too; simply close your chain into a small loop and work your stitches into it.
Once you establish your ring, you will start increasing stitches to form a circular base. Increasing evenly is crucial; otherwise, your circle may ripple or curl. Slow and steady is key here. The increases will create the fullness your bell needs at the bottom.
As you continue to crochet, you’ll notice the circle expanding. This part of the Crochet Christmas Bells Tutorial helps shape the bell’s lower edge. The circle should remain flat without waves or bumps. If it waves, reduce increases; if it curls, add more increases in your next round.
After completing the base, you’ll prepare for the upward shaping of the bell. This transition is done by working rounds without increases, which allows the crochet piece to start bending inward like a dome. This step transforms your flat circle into a recognizable bell shape.
Before moving on to shaping the top, take a moment to inspect your base. It should be even, smooth, and symmetrical. Good craftsmanship at this stage ensures that the rest of your bell will form beautifully.
Shaping the bell is one of the most enjoyable stages in this Crochet Christmas Bells Tutorial. As you crochet upward, you will see your ornament take on its classic bell silhouette. This section focuses on helpful techniques for achieving structure and elegance.
To start shaping the body, work continuous rounds of single crochet or half-double crochet. These stitches provide density and structure, ensuring that the bell maintains its shape. As you progress, the sides should gently curve inward without collapsing.
The number of rounds you complete will determine the height of your bell. Shorter bells look more playful, while taller bells appear traditional and refined. Feel free to experiment with different heights until you achieve your desired style.
If you want a stiffer bell, consider lightly starching your piece after finishing. Alternatively, you can crochet with metallic or stiff yarn that naturally holds its shape. Both methods enhance the professional appearance of your Christmas décor.
At this point, you may incorporate color changes or decorative stripes. This enhances the visual appeal of your project while keeping the design festive. Holiday colors like gold, red, silver, and green are timeless choices.
Next, you’ll begin reducing stitches slightly to form the top of the bell. Reductions must be done gradually to achieve a rounded and smooth finish. This section of the Crochet Christmas Bells Tutorial emphasizes the importance of slow shaping for symmetry.
Once the shaping is complete, your bell should stand upright when placed on a flat surface. This is a great indicator that your tension, stitch placement, and shaping have been successful.
The finishing details are what bring your Crochet Christmas Bells Tutorial project to life. This is your chance to personalize your bell and make it truly unique for your holiday celebrations.
To complete the top, create a small loop or chain to hang your bell on the Christmas tree. This loop should be secure and firm, ensuring your decoration hangs smoothly without twisting or falling.
Next, consider adding a real jingle bell inside your crochet piece. This is a charming touch that adds movement and sound to your ornament. Simply sew or tie the small bell to the interior before closing the top.
Decorating your bell is optional but highly encouraged. Small ribbons, bows, buttons, pearls, and beads make beautiful additions. Choose embellishments that complement your holiday theme and color palette.
You may also crochet a tiny clapper to hang from inside the bell. A small sphere or teardrop shape crocheted in a contrasting color adds an adorable handmade touch.
Once all decorations are added, weave in any remaining yarn ends carefully. Hidden yarn tails give your work a clean and polished look.
Finally, display your bell proudly! Whether hanging on the tree, arranged in a garland, or given as a thoughtful gift, your handmade creation will bring festive charm wherever it goes.
How long does it take to make a crochet Christmas bell?
Most crafters can finish one bell in 30 to 60 minutes, depending on their skill level and chosen design.
What yarn is best for crochet Christmas bells?
Cotton yarn offers excellent structure, while acrylic provides softness. Both work well depending on your preferred texture.
Can beginners follow this Crochet Christmas Bells Tutorial?
Yes! The tutorial is written for all skill levels and uses basic stitches that beginners can easily learn.
Do I need to use a specific hook size?
A 3.0 mm to 4.0 mm hook is ideal, but you may adjust depending on your tension or yarn thickness.
How can I make my bells stiffer?
You can lightly starch them, use firmer yarn, or insert a small internal support like a foam shape.
Can I customize the size of the bell?
Absolutely. Add or reduce rounds at the base and body to make your bell larger or smaller.
This Crochet Christmas Bells Tutorial has guided you through every step of creating charming and festive crochet bells. From choosing materials to shaping and decorating, each stage allows you to personalize your project and enjoy the creative process.
Handmade holiday décor carries sentimental value that lasts for years, and your crochet bells are sure to become cherished pieces in your seasonal collection. Enjoy your crafting journey and let your creativity shine throughout the holiday season!


