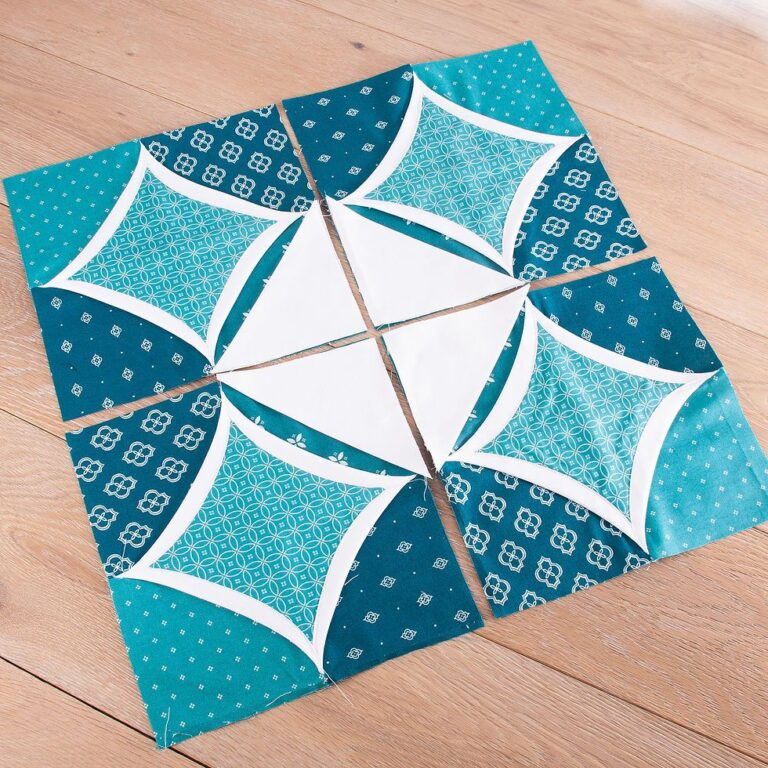
Cathedral Block - Quilt Pattern
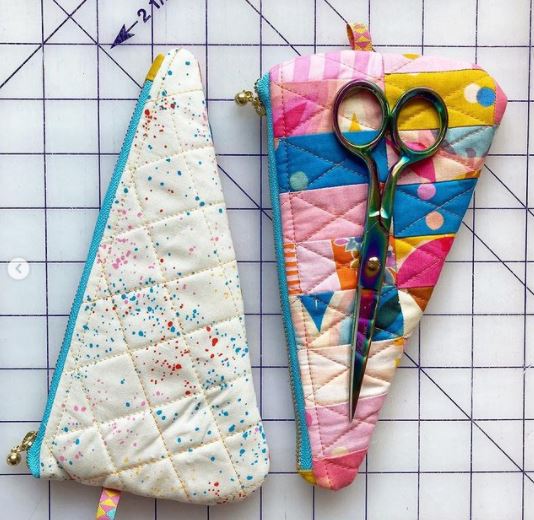
is a charming and functional project that every sewing and quilting enthusiast loves to create. This simple handmade accessory keeps scissors protected, prevents accidental snags inside your bag, and adds a personal touch to your crafting tools. Whether you’re new to quilting or already experienced with small sewing projects, this guide will walk you through the essential steps in a friendly, easy-to-follow, and fully optimized format. Using bold keywords throughout, this tutorial helps readers learn how to craft their own cozy with confidence.
The beauty of the Scissor Cozy Tutorial – Quilt Pattern lies in its simplicity. Unlike larger quilting projects that require extensive time and materials, a scissor cozy can be completed in just an afternoon. It’s also a creative way to use leftover fabric scraps—those beautiful prints you love but never found a purpose for. With this project, you can transform even the smallest pieces into a useful accessory, all while practicing basic quilting techniques.
This article is designed to be both educational and enjoyable, making sure that beginners and advanced quilters alike find value in each section. The humanized language, clear structure, and SEO-optimized paragraph flow make it ideal for readers searching for a friendly, step-by-step guide. Now, let’s dive into the details of this Scissor Cozy Tutorial – Quilt Pattern and explore everything you need to know to bring it to life.
A scissor cozy is a small, padded pouch designed to hold and protect your scissors. It is especially helpful for those who transport their sewing supplies frequently. The quilted layers add durability, structure, and a soft cushion around the blades.
Creating a cozy also allows you to express personal style. Whether you prefer floral prints, geometric designs, or bold modern fabrics, everything works beautifully. Using the Scissor Cozy Tutorial – Quilt Pattern, you can mix colors, textures, and patterns to reflect your unique craft identity.
The cozy typically features a simple envelope or triangular shape. This shape keeps the design beginner-friendly while still offering enough flexibility for customization. You can add trims, buttons, or embroidery to make your cozy stand out.
Quilters often enjoy this project because it uses minimal materials. Fabric scraps, small batting pieces, and basic sewing tools are usually enough. This makes it an economical and eco-friendly choice.
The structure of the cozy protects the scissor tips from damage and prevents them from poking through bags or pouches. For those who carry tools to classes, workshops, or quilting groups, this accessory becomes essential.
With the Scissor Cozy Tutorial – Quilt Pattern, you’ll learn how to prepare your fabric, assemble the pieces, and add finishing touches that make your cozy as beautiful as it is practical.
To make the Scissor Cozy Tutorial – Quilt Pattern, you will need only a few simple materials. Most of these items are commonly found in any sewing space, making the project perfect for beginners.
First, choose two coordinating fabric pieces. One fabric will be used for the exterior, and the other for the lining. Cotton fabric works best because it is durable, easy to sew, and holds its shape well.
You will also need batting, which provides structure and padding. Low-loft batting is ideal, but felt or fleece can also work in a pinch. The goal is to give the cozy a soft yet stable interior.
Essential tools include scissors, pins or clips, a sewing machine, and thread. Quilters may also use a rotary cutter and cutting mat for precision, though this is optional.
If you want extra decorative details, consider adding bias tape, lace trim, or a small button. These elements personalize your cozy and make it a keepsake item.
Finally, gather an iron for pressing your fabric. Pressing helps seams lie flat, ensuring your finished cozy looks crisp and professional.
Once you have all the materials ready, you can begin assembling your cozy using the Scissor Cozy Tutorial – Quilt Pattern instructions.
Start by cutting your exterior fabric, lining fabric, and batting into the same shape. Most cozy patterns use a triangle or half-hexagon design because it folds neatly into a pocket shape.
Next, layer the pieces together: lining fabric on the bottom, batting in the middle, and exterior fabric on top. This quilt sandwich will give your cozy its structured feel.
Sew around the layered pieces, leaving a small opening for turning. Once stitched, trim any excess fabric or batting to reduce bulk inside the seams.
Turn the piece right-side out and press it well. Pressing is essential—it gives your cozy crisp edges and sharp folds, which make the final assembly easier.
Now fold the bottom point upward to create the pocket shape. Pin or clip in place carefully to ensure both sides align evenly before stitching.
Sew along the sides of the folded pocket, closing the edges securely. At this stage, your cozy is almost complete, following the Scissor Cozy Tutorial – Quilt Pattern method.
Once the basic shape of your cozy is complete, you can begin personalizing it. The Scissor Cozy Tutorial – Quilt Pattern encourages creativity, allowing you to add your own decorative flair.
You may choose to add topstitching around the edges. Topstitching not only enhances the look but also reinforces the seams, making your cozy more durable.
If you added decorative trims, now is the time to secure them. Lace, ribbon, or bias tape can add visual interest and help your cozy stand out among your crafting tools.
Some quilters like adding a button, snap, or small Velcro closure. This provides extra security, especially if the scissors are large or heavy.
Embroidery details are another lovely option. You can stitch initials, small flowers, or simple motifs that reflect your personality.
Once all decorations are complete, give your cozy one final press. This finishing touch ensures your handmade accessory looks polished and ready for use.
1. What fabrics work best for a scissor cozy?
Cotton fabrics are ideal because they are durable and easy to sew. Quilting cotton offers the right weight and structure for a well-formed cozy.
2. Do I need batting inside the cozy?
Yes, batting helps protect the scissors and gives the cozy shape. However, felt or fleece can be used as alternatives.
3. Can beginners make a scissor cozy?
Absolutely. The Scissor Cozy Tutorial – Quilt Pattern is suitable for beginners because it uses basic sewing and quilting techniques.
4. How long does it take to complete this project?
Most sewists can finish a cozy in one to two hours, depending on their experience level and embellishment choices.
5. Are there different shapes for scissor cozies?
Yes, though triangular and envelope styles are most common, you can experiment with various shapes to suit your scissors.
6. Can I wash my scissor cozy?
Yes, if made with cotton fabrics, it can be gently washed. Avoid harsh cycles to protect embellishments.
Creating your own Scissor Cozy Tutorial – Quilt Pattern project is a satisfying, practical, and creative experience. You learned how to choose materials, assemble the cozy, personalize it with decorative touches, and follow beginner-friendly steps to complete it.
This small project is perfect for using fabric scraps, practicing quilting skills, and adding handmade charm to your sewing tools. I hope this tutorial inspires you to craft your own cozy and explore new ways to personalize your quilting journey. Se você quiser, posso criar outro padrão, outro artigo ou outro tutorial—é só pedir!


