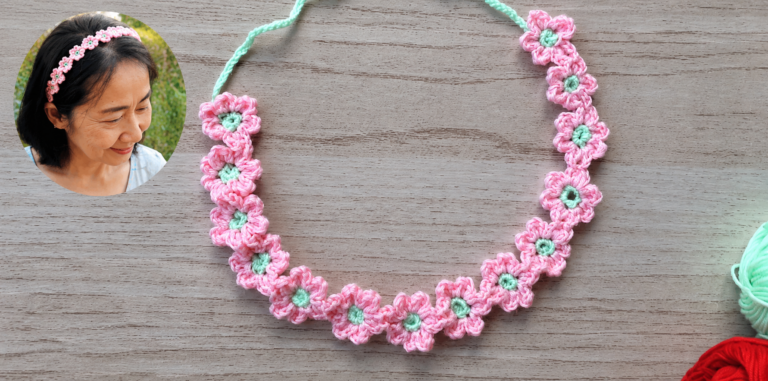
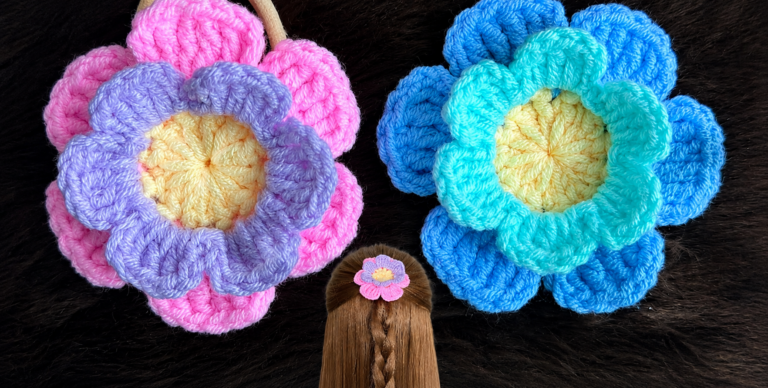
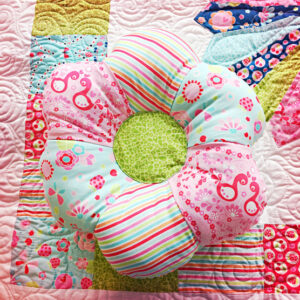
Crocheted Flower Headband - Pattern
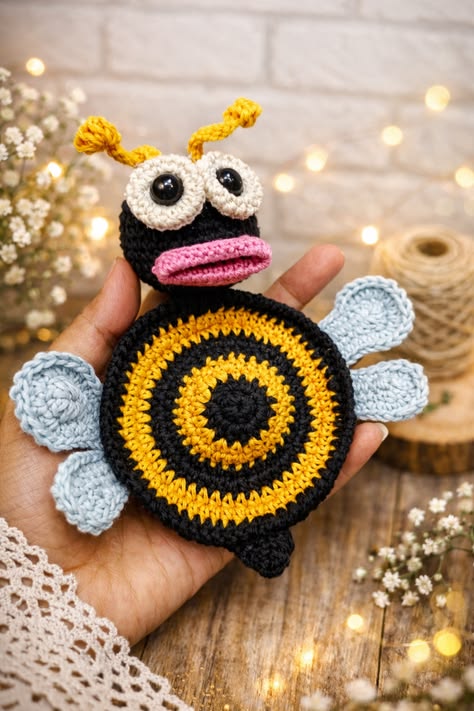
The Crocheted bee coaster – Pattern is one of the most charming and creative projects you can add to your crochet collection. Combining functionality with adorable design, this pattern is perfect for those who love handmade decor that brings warmth and personality into any space. Whether you are a beginner or an experienced crocheter, creating a bee-themed coaster can be both relaxing and rewarding, allowing you to explore textures, colors, and small details.
Working on a Crocheted bee coaster – Pattern also offers a wonderful opportunity to practice essential crochet techniques in a manageable project. Because coasters are relatively small, they are ideal for learning new stitches, improving tension, and experimenting with color changes. The bee design adds a playful touch that makes the final piece not only useful but also visually delightful, perfect for gifting or decorating your home.
In addition, the popularity of the Crocheted bee coaster – Pattern continues to grow thanks to its versatility and aesthetic appeal. These coasters can match rustic, modern, or even whimsical decor styles. By using bold yellow and black yarns along with creative embellishments, you can easily personalize each piece. This pattern is also a fantastic way to use leftover yarn, making it both eco-friendly and budget-conscious.
Before starting your Crocheted bee coaster – Pattern, it is important to understand the foundational techniques involved. Most patterns rely on basic stitches such as chain, single crochet, and slip stitch. These stitches create a solid and durable base, which is essential for a coaster that will be used daily.
Another key aspect of the Crocheted bee coaster – Pattern is working in rounds. This technique helps you achieve the circular shape that is typical for coasters. Beginners may find working in continuous rounds a bit challenging at first, but with practice, it becomes second nature and results in a seamless finish.
Color changes are also central to achieving the bee look. Alternating between yellow and black yarn creates the iconic striped pattern. Learning how to switch colors neatly will significantly enhance the overall appearance of your project and give it a polished, professional look.
Tension control plays a crucial role in the success of your Crocheted bee coaster – Pattern. If your stitches are too tight, the coaster may curl. If they are too loose, the coaster may not hold its shape well. Practicing consistent tension ensures your coaster lies flat and looks even.
Choosing the right yarn is equally important. Cotton yarn is often recommended for coasters because it is absorbent and heat-resistant. This makes your Crocheted bee coaster – Pattern not only decorative but also highly functional.
Finally, understanding pattern reading is essential. Crochet patterns often include abbreviations and specific instructions. Taking the time to familiarize yourself with these terms will make the entire process smoother and more enjoyable.
Selecting the right materials is a key step when working on a Crocheted bee coaster – Pattern. High-quality cotton yarn in yellow, black, and white is typically used to create the bee’s body and wings. Cotton is preferred due to its durability and ability to absorb moisture.
A suitable crochet hook is also necessary. Most Crocheted bee coaster – Pattern designs recommend a hook size between 3.5 mm and 5 mm, depending on your yarn choice. Using the correct hook size helps maintain proper stitch definition and ensures the coaster holds its shape.
You will also need a yarn needle for weaving in ends. This step is essential for giving your finished coaster a clean and neat appearance. Loose ends can make even the most beautiful project look unfinished.
Stitch markers can be incredibly helpful, especially when working in rounds. They allow you to keep track of the beginning of each round, which is particularly useful in more detailed Crocheted bee coaster – Pattern designs.
Scissors are, of course, a basic but necessary tool. Keeping a sharp pair nearby ensures clean cuts and makes your workflow more efficient.
Optional embellishments such as small buttons or embroidery thread can be used to add facial features to your bee. While not required, these details can bring your Crocheted bee coaster – Pattern to life and make it even more unique.
To begin your Crocheted bee coaster – Pattern, start by creating a magic ring. This technique allows you to form a tight center, which is ideal for circular projects like coasters. If you are not comfortable with a magic ring, you can use a chain loop as an alternative.
Next, work your initial round of stitches into the ring. Typically, this involves a set number of single crochet stitches. This forms the foundation of your coaster and determines its overall size and shape.
As you move forward, begin increasing stitches in each round. This is necessary to keep the coaster flat. The Crocheted bee coaster – Pattern usually includes specific instructions for increases to maintain symmetry.
Once the base is established, start incorporating color changes to create the bee stripes. Alternate between yellow and black yarn every few rounds. This step is where your coaster starts to take on its distinctive bee appearance.
After completing the main body, you can add details such as wings. These are often made separately using white yarn and then sewn onto the coaster. The wings give the Crocheted bee coaster – Pattern its recognizable and adorable character.
Finally, finish your coaster by fastening off the yarn and weaving in all ends. Make sure the coaster lies flat and adjust if necessary. Blocking your finished piece can also help improve its shape and overall presentation.
One of the best things about the Crocheted bee coaster – Pattern is how customizable it is. You can experiment with different shades of yellow or even add glitter yarn for a fun twist. Small changes can make each coaster feel unique.
You can also adjust the size of your coaster by adding or reducing rounds. This flexibility allows you to create coasters for different types of cups, mugs, or even small teapots.
Adding texture is another creative option. Using stitches like half double crochet or puff stitches can give your Crocheted bee coaster – Pattern a more dimensional and interesting look.
For those who enjoy themed decor, consider making a full set of bee coasters. Pair them with other nature-inspired crochet items such as flowers or leaves to create a cohesive and charming collection.
These coasters also make wonderful gifts. A handmade Crocheted bee coaster – Pattern set can be a thoughtful present for birthdays, housewarmings, or holidays. Adding a personal touch always makes gifts more meaningful.
Lastly, don’t be afraid to experiment. Crochet is a creative process, and each project is an opportunity to learn and grow. Your version of the Crocheted bee coaster – Pattern can reflect your personal style and creativity.
1. Is the Crocheted bee coaster – Pattern suitable for beginners?
Yes, most versions of the Crocheted bee coaster – Pattern are beginner-friendly and use basic stitches. It’s a great project for learning and practicing crochet fundamentals.
2. What type of yarn is best for this pattern?
Cotton yarn is highly recommended for the Crocheted bee coaster – Pattern because it is absorbent, durable, and heat-resistant.
3. How long does it take to make one coaster?
Depending on your experience level, a Crocheted bee coaster – Pattern can take anywhere from 1 to 2 hours to complete.
4. Can I wash crocheted coasters?
Yes, most coasters made with cotton yarn can be machine washed. However, it’s best to follow the yarn’s care instructions to maintain quality.
5. How do I keep my coaster from curling?
Maintaining consistent tension and following the increase pattern correctly will help your Crocheted bee coaster – Pattern stay flat.
6. Can I sell coasters made from this pattern?
In most cases, yes. Handmade items created using a Crocheted bee coaster – Pattern can be sold, but always check the specific pattern’s usage terms if applicable.
The Crocheted bee coaster – Pattern is a delightful and practical project that combines creativity with functionality. Throughout this article, you learned about the essential techniques, materials, and steps needed to create your own beautiful bee-themed coaster. From understanding the basics to exploring creative variations, this pattern offers endless possibilities for personalization and skill development.
By working on a Crocheted bee coaster – Pattern, you not only improve your crochet abilities but also create something useful and visually appealing. Whether for personal use or as a thoughtful handmade gift, these coasters are a wonderful addition to any crochet repertoire.
Now it’s your turn to try this pattern and make it your own. I would love to hear your honest opinion about this article and your experience with the project. Feel free to share your suggestions and ideas for future patterns!


