Crochet Sunflower – Amigurumi Flower Wand - Pattern

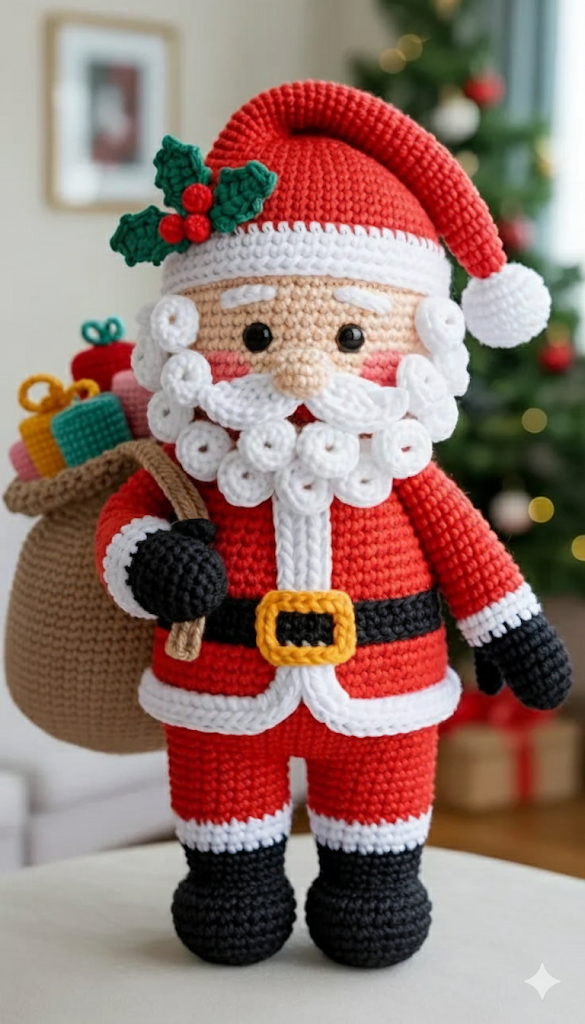
The Amigurumi Santa with Gift – Crochet Pattern is a festive project that brings holiday cheer into your home while allowing crafters to showcase their creativity. Crochet enthusiasts love working on amigurumi designs because they combine the magic of handmade toys with the joy of seasonal decorations. This specific pattern captures the warmth and tradition of Christmas, featuring a jolly Santa holding a gift, ready to spread joy to everyone.
When crocheting an Amigurumi Santa with Gift Sack – Crochet Pattern, beginners and advanced crafters alike can enjoy the simplicity of step-by-step stitches while also appreciating the charm of making a character that embodies the spirit of giving. Handmade amigurumi has become a favorite for holiday crafts, as it allows families to create lasting keepsakes or thoughtful handmade presents.
In this article, you will learn the benefits of making your own Amigurumi Santa with Gift – Crochet Pattern, the essential supplies needed, helpful techniques for shaping your toy, and creative ways to personalize it. This tutorial-style guide is not only about instructions but also about inspiring you to enjoy the process of crocheting, keeping it beginner-friendly while still appealing to advanced crocheters.
The Amigurumi Santa with Gift – Crochet Pattern is not just another crochet project. It’s a handmade decoration that immediately brings out the festive mood. Unlike store-bought items, amigurumi figures hold sentimental value because they are made with love and patience.
Crocheting your own Santa makes your Christmas décor unique. Instead of identical mass-produced figurines, you can craft a special character that reflects your personal style. Whether you choose bright red yarn for a classic look or pastel shades for a modern twist, your Amigurumi Santa with Gift Sack – Crochet Pattern will stand out.
This project also offers flexibility. Some crafters prefer making a large Santa to place under the Christmas tree, while others make smaller versions as stocking stuffers or gifts for friends and family. The pattern is adaptable for different yarn sizes and hook dimensions.
Beyond decoration, the project doubles as a heartfelt handmade present. Giving someone a crocheted Santa carrying a gift is symbolic—it represents thoughtfulness, effort, and tradition. For families, it becomes a cherished keepsake that is taken out each year as part of holiday celebrations.
Another reason this pattern is so appealing is its beginner-friendly design. With simple stitches like single crochet, increases, and decreases, anyone can follow along. Even if you are new to amigurumi, this project offers a manageable learning curve with rewarding results.
Lastly, making an Amigurumi Santa with Gift – Crochet Pattern connects you with a larger crafting community. Many crocheters share their creations online or within local groups, creating opportunities for inspiration, support, and encouragement.
Before starting, it’s important to gather the right supplies for the Amigurumi Santa with Gift Sack – Crochet Pattern. Having everything ready ensures a smooth and enjoyable crafting process.
First, you’ll need yarn. Red, white, black, and flesh-toned yarns are essential for creating Santa’s clothing, beard, boots, and face. Acrylic yarn is often recommended because it’s affordable, durable, and easy to work with. For the gift sack, you might choose green, gold, or any festive shade you prefer.
Next, a suitable crochet hook is necessary. Most amigurumi patterns call for smaller hooks than recommended for the yarn weight to ensure tight stitches that prevent stuffing from showing through. A 2.5mm–3.5mm hook size is commonly used.
Stuffing is another essential material. Polyester fiberfill is lightweight, washable, and keeps the figure’s shape well. Ensure you use enough stuffing to give Santa a firm but squeezable body.
You’ll also need safety eyes or embroidery thread to create Santa’s facial details. Many crafters choose safety eyes for a professional look, while others prefer embroidered features for younger children’s toys.
A yarn needle is crucial for sewing pieces together, weaving in ends, and adding details like Santa’s mustache or the straps of his gift sack.
Lastly, stitch markers can be helpful when working in continuous rounds, as they keep track of where each round begins and ends. This small tool saves time and ensures accuracy in shaping your amigurumi figure.
Working on the Amigurumi Santa with Gift Sack – Crochet Pattern requires patience and attention to detail, but the process can be broken down into easy-to-follow steps. Here are helpful tips for each stage.
Start with the head. Many amigurumi figures begin with a magic ring and gradually expand with increases. This forms a smooth, rounded head for your Santa. Choose a skin-toned yarn to make the base before attaching the beard and hat.
The body comes next. Using red yarn, you’ll crochet a cylinder that tapers slightly at the bottom to form Santa’s suit. Adding black yarn at the waistline creates the belt effect, and a small buckle detail can be embroidered with yellow thread.
For the arms and legs, consistency is key. Work in pairs to ensure both sides match in size and shape. White cuffs at the ends of sleeves and pant legs complete Santa’s traditional look.
The beard and hat are defining features. Use white yarn for the beard, attaching strands individually for texture, or crochet it directly as part of the pattern. The hat is worked in red, often as a cone shape, with a white pom-pom on top.
Once the main figure is complete, focus on the accessories. The gift sack is made separately and can be crocheted as a pouch. You may add little embroidered stars or crochet a drawstring for extra detail.
Finally, assembly requires patience. Carefully sew each part onto the body using a yarn needle. Attach the sack securely to Santa’s hand, ensuring it looks natural. Once complete, adjust stuffing and smooth out stitches for a polished finish.
Once you’ve finished your Amigurumi Santa with Gift Sack – Crochet Pattern, the fun doesn’t stop. There are countless creative ways to display and use your handmade piece.
Place Santa as part of your holiday décor. He can sit on the mantle, on bookshelves, or beside the Christmas tree. Because he’s lightweight and soft, he’s safe for families with children and pets.
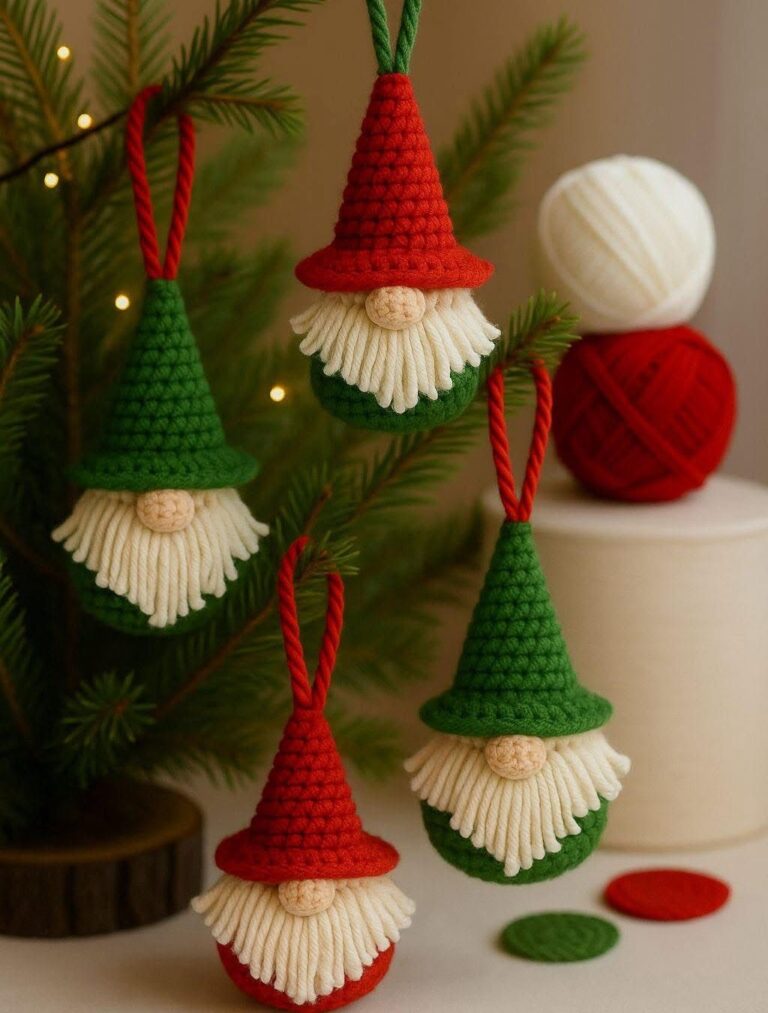
You can also make smaller versions of the pattern as ornaments. Simply reduce the yarn and hook size, and add a loop at the top of Santa’s hat. These mini amigurumi ornaments look charming on the Christmas tree.
For gifting, the amigurumi Santa is perfect. Handmade gifts hold more sentimental value, and recipients often treasure them for years. Whether given to children, friends, or family, your creation becomes a lasting reminder of your thoughtfulness.
Another idea is to use the amigurumi Santa as part of holiday photo sessions. Families love incorporating handmade crafts into their seasonal pictures, and your Santa figure will add a touch of handmade charm.
If you enjoy teaching, this project is excellent for workshops or crochet meetups. Because the pattern is relatively simple, you can guide beginners through the steps while still challenging experienced crafters with details and personalization.
Finally, think about starting a collection. Along with the Amigurumi Santa with Gift – Crochet Pattern, you could make a reindeer, elf, or snowman. Displayed together, they create a festive handmade village that delights everyone who sees it.
1. Is the Amigurumi Santa with Gift – Crochet Pattern suitable for beginners?
Yes, the pattern is beginner-friendly, using simple stitches like single crochet, increases, and decreases. With patience, even new crocheters can complete it.
2. How long does it take to make the Amigurumi Santa with Gift Sack – Crochet Pattern?
Time varies by skill level and size. On average, it may take 10–15 hours spread over a few days.
3. What type of yarn works best for this project?
Acrylic yarn is most recommended for its durability and affordability, though cotton yarn can also be used for a firmer texture.
4. Can I customize the Santa figure?
Absolutely. You can change colors, adjust the size, or add details like glasses, buttons, or different sack decorations.
5. Is stuffing important in amigurumi projects?
Yes, stuffing gives shape and firmness to the figure. Without it, Santa would not hold his form properly.
6. Can I make this project child-safe?
Yes, by replacing safety eyes with embroidered eyes and securely sewing all parts, your amigurumi Santa becomes safe for young children.
The Amigurumi Santa with Gift – Crochet Pattern is a delightful project that combines creativity, tradition, and holiday spirit. From gathering materials to assembling the final details, each step allows you to enjoy the art of crochet while making a meaningful decoration or gift.
Whether displayed at home, given as a present, or turned into ornaments, your Santa will carry the warmth of handmade charm. This pattern is approachable for beginners yet engaging enough for advanced crafters to explore new details and personal touches.
Now that you know how to create your own Amigurumi Santa with Gift Sack – Crochet Pattern, we’d love to hear from you. Share your thoughts, opinions, and suggestions—your feedback helps inspire more creative projects and keeps the joy of handmade traditions alive.

