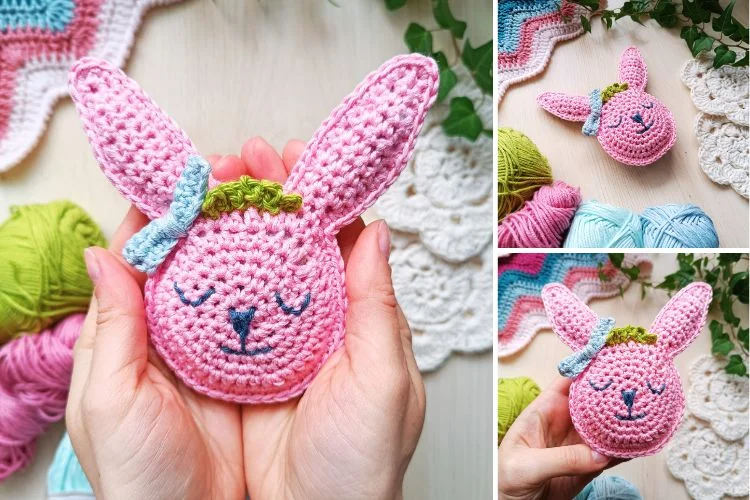
Ragdoll Bunny Amigurumi - Crochet Pattern
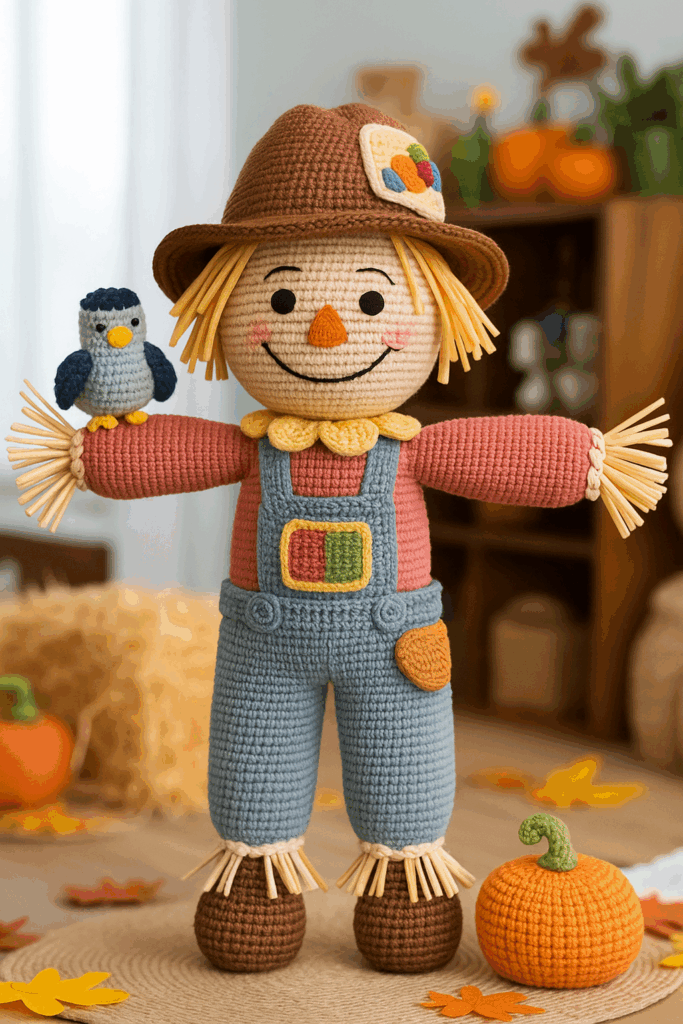
The Amigurumi Scarecrow – Pattern – Crochet Pattern is a charming project that blends creativity, tradition, and the cozy feeling of handmade crafts. Amigurumi, the Japanese art of crocheting small stuffed figures, has become a worldwide sensation, and when combined with the seasonal charm of a scarecrow, it becomes an irresistible idea for crochet enthusiasts. Whether you are looking for a fall decoration, a farm-inspired toy, or simply a unique handmade gift, this design is both fun and rewarding.
Working with an Amigurumi Scarecrow Crochet Pattern gives you the chance to experiment with colors, textures, and accessories. A scarecrow is often associated with autumn, harvest festivals, and Halloween, making it a versatile figure to display around your home. From the hat and patchy clothes to the adorable facial details, every stitch tells a story. Beginners and experienced crocheters alike can enjoy making this project by following clear instructions and using basic techniques.
In this article, you will discover how to make an Amigurumi Scarecrow Crochet Pattern step by step, including what materials you need, how to crochet the main body, how to add clothing and details, and how to assemble everything together. With patience and creativity, you will end up with a delightful handmade piece that will bring warmth to any space.
When starting your Amigurumi Scarecrow Crochet Pattern, the first step is
gathering all the necessary supplies. Choosing the right yarn and hooks will determine the look and durability of your finished scarecrow.
You will typically need medium-weight cotton or acrylic yarn. Cotton yarn offers a neat and smooth finish, while acrylic is softer and often easier to handle for beginners. For an authentic scarecrow look, select earthy tones such as browns, oranges, yellows, and greens. A pop of color can be added with patches or accessories to make your scarecrow extra cheerful.
The recommended hook size is usually between 2.5 mm and 3.5 mm, depending on your yarn choice. A smaller hook helps ensure that your stitches are tight enough so that stuffing will not show through. Keeping your tension consistent is crucial for an evenly shaped doll.
Apart from yarn and hooks, you will also need polyester fiberfill for stuffing. This ensures your Amigurumi Scarecrow Crochet Pattern has a soft but firm shape that holds up well. Safety eyes or embroidered eyes are also required, depending on your preference. Embroidery thread can be used for the nose and mouth to give personality to your scarecrow.
Additional accessories like felt, small buttons, or tiny fabric pieces can be added as decorative patches on the scarecrow’s clothes. These details make your scarecrow unique and playful, capturing the whimsical charm of this pattern.
Lastly, always prepare a set of stitch markers and a tapestry needle. Stitch markers will help you keep track of rounds, which is especially important when working in continuous spirals common in amigurumi. A tapestry needle will be essential for sewing all parts together neatly.
The body is the foundation of your Amigurumi Scarecrow Crochet Pattern, and it is typically made in separate sections: head, torso, arms, and legs. Each part is crocheted in the round using single crochet stitches, which are the backbone of amigurumi.
The head usually begins with a magic ring, gradually increasing stitches to form a smooth round shape. It is important to stuff the head gradually as you go along to maintain an even fill. Placing safety eyes early in the process, before closing the head, ensures a clean look.
The torso can be made as a continuation of the head or as a separate piece. Some crafters prefer to crochet the head and body as one continuous shape for added stability. The torso should be firm but not overly stuffed to allow flexibility when attaching arms and legs.
For the arms and legs, crochet two identical pieces each. The arms can be kept simple, while the legs may include color changes to mimic pants or boots. Adding a little stuffing in the lower parts while keeping the upper parts softer allows for more natural movement.
Once you have crocheted these sections, they can be stitched together using your tapestry needle. Take care to align them properly, as symmetry is key to making your scarecrow look balanced. At this stage, your Amigurumi Scarecrow Crochet Pattern will begin to take shape.
Adding patches or simple embroidery to the body before final assembly is a great way to incorporate extra details. For example, a few cross stitches in contrasting yarn can resemble rustic stitching on the scarecrow’s clothing.
One of the most exciting parts of working with an Amigurumi Scarecrow Crochet Pattern is designing its clothing and accessories. These small details bring the character to life and allow you to add your personal creative touch.
The scarecrow’s hat is often the centerpiece. A floppy brimmed hat in brown or black is classic, but you can experiment with brighter colors for a playful twist. The hat is usually crocheted separately and then sewn or lightly attached so it can tilt to one side for a whimsical look.
Clothing for the scarecrow typically includes a shirt and pants. Striped or color-blocked designs look wonderful in crochet, and you can even add crocheted suspenders for a fun farm-style detail. Patches can be created using small squares of contrasting yarn and sewn onto the clothes.
Scarves or little bandanas can add warmth and personality to your scarecrow. A small crocheted flower or leaf stitched onto the hat can give it an autumn harvest feel. Every tiny accessory adds to the charm of your finished amigurumi.
Buttons, beads, or fabric pieces are optional but recommended. They provide texture and dimension, making your scarecrow look more handmade and unique. Just ensure that small embellishments are securely attached if your amigurumi will be used by children.
Finally, embroidery work such as a stitched smile or rosy cheeks made with blush adds a heartwarming finishing touch. These small details transform your scarecrow from a simple doll into a delightful character full of personality.
The last stage of your Amigurumi Scarecrow Crochet Pattern involves assembling all the parts and perfecting the finishing touches. This step requires patience and precision but is also the most rewarding.
Begin by sewing the head securely onto the body, making sure it is centered and firmly attached. Next, attach the arms at equal heights on both sides of the torso. The legs should be sewn in place so the scarecrow can sit if desired, or they can be left slightly flexible for posing.
When all main parts are connected, position the hat on top of the head. It can be stitched on permanently or left removable if you want the option to style your scarecrow differently. Make sure the hat tilts slightly for extra character.
Now it’s time to add stuffing adjustments. Check if any part feels too soft or uneven and carefully add more fiberfill where needed. This ensures your scarecrow maintains its shape over time.
Once everything is assembled, inspect the seams and stitches for neatness. Any loose yarn ends should be woven in carefully to keep the design clean and professional-looking. Your scarecrow is now almost complete.
The final step is styling. Place your Amigurumi Scarecrow Crochet Pattern in your desired spot, whether it’s a shelf, table centerpiece, or part of a seasonal display. Adding a small bale of hay or pumpkin beside it can make a wonderful decorative scene.
Your handmade scarecrow will not only be a symbol of your creativity but also a keepsake that can be cherished year after year.
1. What skill level is required to make an Amigurumi Scarecrow Crochet Pattern?
Most patterns are beginner to intermediate friendly. Basic knowledge of single crochet, increases, and decreases is needed.
2. How long does it take to complete an Amigurumi Scarecrow?
Depending on your speed, it can take anywhere from 6 to 12 hours, spread over a few days.
3. Can I customize the size of my Amigurumi Scarecrow?
Yes, using thicker yarn and a larger hook will make a bigger scarecrow, while thinner yarn will create a smaller one.
4. Is safety stuffing necessary?
Polyester fiberfill is the best choice, as it keeps the shape while remaining lightweight and washable.
5. Can children play with an Amigurumi Scarecrow?
Yes, but avoid small embellishments that may be choking hazards. For children, embroider details instead of using buttons or beads.
6. Do I need to follow the pattern exactly?
Not at all. Amigurumi is highly customizable. You can change colors, accessories, and clothing to suit your taste.
Creating an Amigurumi Scarecrow Crochet Pattern is a delightful project that combines fun, creativity, and the joy of handmade crafts. From gathering materials to assembling and styling, each step allows you to express your personality and crochet skills. The scarecrow, with its rustic charm, makes the perfect seasonal decoration or heartfelt gift.
Now that you have learned how to make this cozy project, I would love to hear your thoughts. Have you ever tried making an amigurumi scarecrow? What details would you add to make yours unique? Please share your sincere opinion and suggestions—I’d be thrilled to read them!