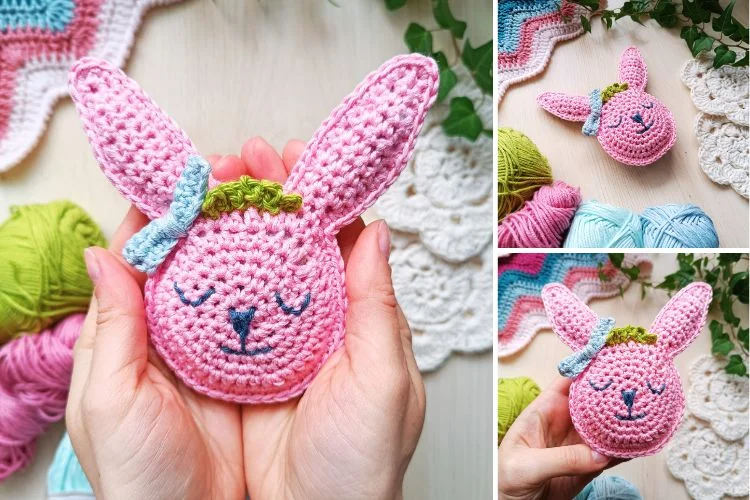
Ragdoll Bunny Amigurumi - Crochet Pattern
The Tasmanian Devil Amigurumi – Crochet Pattern is a playful and creative project for crochet enthusiasts who love to bring animals to life through yarn. This adorable design takes inspiration from the unique and wild Tasmanian devil, turning it into a fun, soft, and handmade character that you can proudly display or gift to someone special. Whether you are new to amigurumi or already experienced, this project offers an enjoyable mix of challenge and creativity.
When we think about crochet, we often imagine cozy blankets, delicate doilies, or stylish wearables. But amigurumi brings an entirely different charm: it allows us to turn thread and yarn into whimsical figures filled with personality. Creating the Tasmanian Devil Amigurumi – Crochet Pattern is more than just following stitches – it’s about crafting a little friend that captures the essence of this fascinating animal.
In this article, we’ll explore how to approach this project, the best techniques to use, tips for selecting materials, and ideas for customization. By the end, you will feel ready to take on your own Tasmanian Devil Amigurumi – Crochet Pattern and enjoy every step of the creative journey.
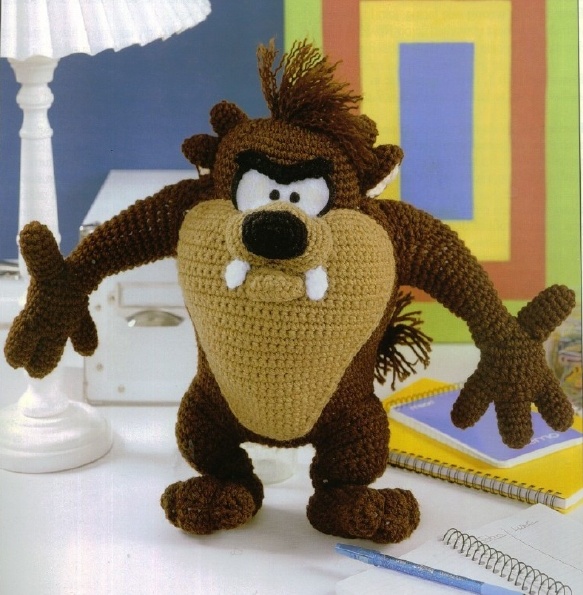
The Tasmanian Devil Amigurumi – Crochet Pattern is inspired by the real Tasmanian devil, an animal known for its strong personality and distinctive appearance. Translating this creature into crochet form requires attention to detail, especially in features like the rounded body, expressive face, and characteristic ears.
When working on this type of amigurumi, you’ll notice that shaping is everything. Unlike flat crochet projects, amigurumi focuses on building three-dimensional structures. That means every increase, decrease, and stitch placement plays a role in giving your Tasmanian devil its unique shape.
Another important element is balance. Amigurumi figures must be properly stuffed to hold their form without looking too rigid or too floppy. For the Tasmanian Devil Amigurumi – Crochet Pattern, a moderate amount of fiberfill will help achieve the ideal firmness while keeping it cuddly.
The charm of this pattern lies in the details. Adding small accents like embroidered eyes, a stitched smile, or felt pieces for ears can enhance the final look. It’s these little touches that make your handmade Tasmanian devil stand out as a one-of-a-kind creation.
Moreover, the project is flexible. You can follow a step-by-step Tasmanian Devil Amigurumi – Crochet Pattern or adapt it according to your preferences. If you want a cartoonish version, exaggerate the features. If you prefer a realistic one, choose darker yarns and keep the proportions closer to nature.
By learning the foundation of this pattern, you’ll discover how to balance creativity with technique, making the Tasmanian Devil Amigurumi – Crochet Pattern a project suitable for both beginners and advanced crocheters.
The materials you choose will determine the final appearance and quality of your Tasmanian Devil Amigurumi – Crochet Pattern. Yarn type, hook size, and accessories all contribute to the outcome, so making thoughtful selections is key.
Start with yarn. Acrylic yarn is a common choice for amigurumi because it’s durable, affordable, and easy to find. Cotton yarn, however, offers a cleaner stitch definition, which can be perfect for detailed work like facial features. Choose colors like black, dark brown, or charcoal for the body, and a touch of pink or beige for the ears and nose.
The crochet hook size will also influence your results. A smaller hook than recommended for your yarn weight ensures tight stitches that prevent stuffing from showing. For most Tasmanian Devil Amigurumi – Crochet Patterns, hooks between 2.5 mm and 3.5 mm work best.
Next, consider stuffing. Polyester fiberfill is the most common option, but you can also use fabric scraps for an eco-friendly choice. The goal is to evenly stuff the body so your Tasmanian devil holds its shape without bulging.
Accessories are equally important. Safety eyes add a polished look, while embroidery thread allows you to stitch unique expressions. A small piece of felt can be used for ears, enhancing the lifelike appearance of your project.
Don’t forget basic tools: a yarn needle for sewing pieces together, scissors for trimming, and stitch markers to help you track rounds. With the right toolkit, your Tasmanian Devil Amigurumi – Crochet Pattern becomes easier and more enjoyable.
Finally, organizing your materials beforehand ensures smooth progress. Gather everything you need before starting, so you can focus on the joy of crocheting without interruptions.
Approaching the Tasmanian Devil Amigurumi – Crochet Pattern step by step makes the process manageable and enjoyable. Breaking down the project into smaller parts helps you stay motivated and confident throughout.
Start with the body. Typically, you’ll work in continuous rounds, beginning with a magic ring. Increases shape the rounded body, while decreases help taper off areas like the neck or limbs. The goal is to maintain symmetry so the devil looks well-proportioned.
The head often requires extra attention. This is where personality comes alive. By carefully placing safety eyes and shaping the muzzle with increases and decreases, you’ll create a charming face that gives your Tasmanian devil its character.
Ears are another highlight. Small semi-circular pieces stitched separately and attached to the head can make the design more authentic. Using a lighter shade of yarn or felt adds contrast and makes the figure more visually appealing.
Once the main body parts are complete, assembling them neatly is essential. Use a whip stitch or mattress stitch to connect limbs, making sure everything is securely attached. Balance is key—misaligned legs or arms can affect how the amigurumi stands or sits.
After assembly, embroidery adds finishing touches. A stitched nose, a little smile, or even whiskers can bring warmth and charm. This stage personalizes your Tasmanian Devil Amigurumi – Crochet Pattern, ensuring no two creations look exactly alike.
Patience is important throughout the process. Take your time with each step, and don’t rush. Enjoy the rhythm of stitching and celebrate the progress as your Tasmanian devil gradually comes to life.
One of the joys of the Tasmanian Devil Amigurumi – Crochet Pattern is the freedom to add personal variations. Even if you follow the same base design, you can make yours stand out with creative details.
Color variation is the simplest way to customize. While black or dark brown are classic, experimenting with playful colors like purple, blue, or even multicolored yarn can give your amigurumi a whimsical touch.
Accessories also enhance the charm. Imagine your Tasmanian devil wearing a tiny scarf, holding a mini crochet carrot, or sitting on a crocheted log. These add-ons turn your amigurumi into a storytelling piece.
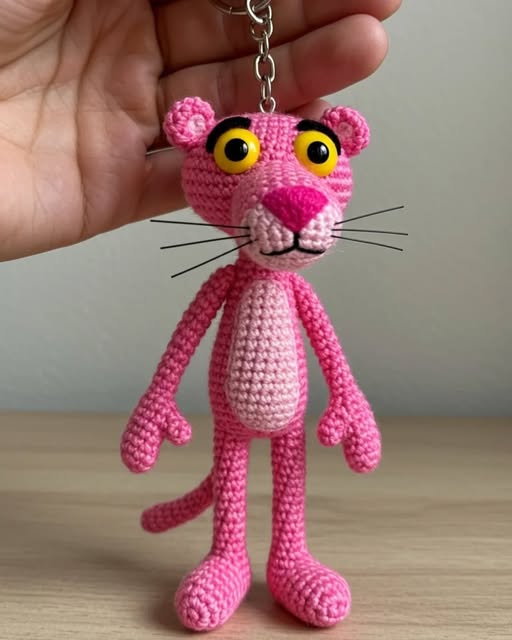
Size adjustments are another creative path. Using bulky yarn and a larger hook results in a bigger plush, while fine yarn and smaller hooks create a mini version perfect as a keychain or bag charm.
Mixing textures is also exciting. Pairing cotton yarn with fuzzy yarns for certain areas can give a realistic fur-like appearance. Experimenting with stitch types, like adding bobbles for texture, can elevate your design.
Don’t forget emotional expression. By slightly adjusting the eye placement or mouth embroidery, you can give your Tasmanian devil different personalities—playful, curious, sleepy, or mischievous.
Ultimately, these variations allow you to take the Tasmanian Devil Amigurumi – Crochet Pattern beyond a step-by-step guide and transform it into a unique piece of art that reflects your style.
1. Is the Tasmanian Devil Amigurumi – Crochet Pattern suitable for beginners?
Yes, this pattern can be adapted for beginners by simplifying details. Starting with the body and head shapes provides a great foundation for learning amigurumi.
2. How long does it take to complete the Tasmanian Devil Amigurumi?
The time depends on your skill level and pace. On average, it may take between 6 to 12 hours, spread across several days, to complete.
3. What kind of yarn works best for this project?
Cotton yarn provides crisp stitches and detail, while acrylic yarn is softer and easier for stuffing. Both work well for this pattern.
4. Can I make the Tasmanian Devil Amigurumi larger or smaller?
Yes, adjusting yarn weight and hook size will change the final size. Bulky yarn creates a bigger toy, while thinner yarn makes a smaller version.
5. How do I make the amigurumi safe for children?
Use embroidered eyes instead of safety eyes for young children, and make sure all parts are securely stitched to avoid loose pieces.
6. Can I sell my finished Tasmanian Devil Amigurumi?
Yes, many crocheters sell their finished handmade toys. Just ensure you credit the design if you followed a specific Tasmanian Devil Amigurumi – Crochet Pattern.
The Tasmanian Devil Amigurumi – Crochet Pattern is more than just a crochet project—it’s an opportunity to transform yarn into a fun, expressive character. From choosing the right materials to adding personal details, every step contributes to making a piece that’s both creative and rewarding. Whether you’re making it for yourself, as a gift, or even to sell, this project highlights the joy of amigurumi and the endless possibilities of crochet.
I’d love to hear your thoughts! Have you tried making a Tasmanian Devil Amigurumi – Crochet Pattern before? Share your opinion, your experiences, and any suggestions for future tutorials. Your feedback helps keep this craft alive and inspiring for everyone.