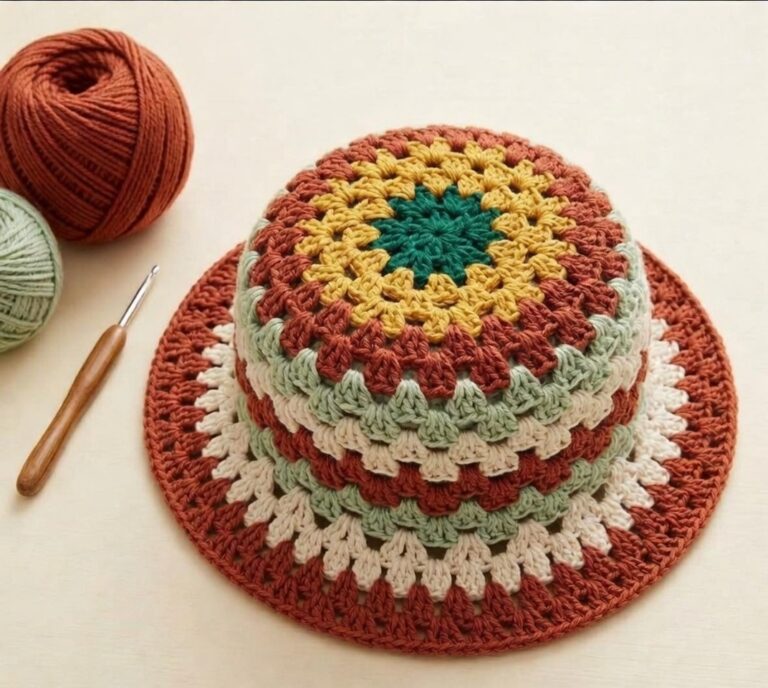
Crocheted Sun Hat Pattern
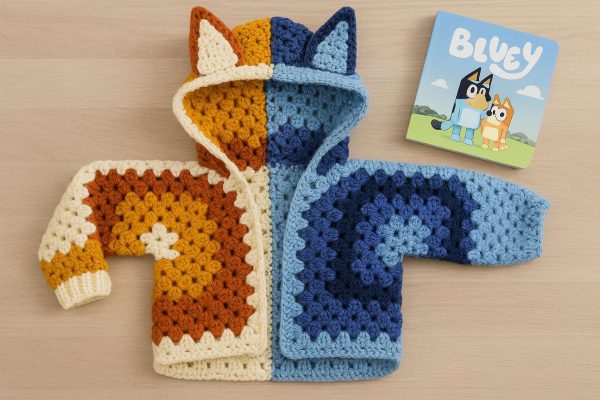
If you’ve been dreaming of a cozy and fun garment to make this season, the Bluey Hexi Cardigan Free Crochet Pattern crochet pattern is the perfect project to spark your creativity. Inspired by the playful tones of Bluey, the beloved animated character, and the clever design of hexagon construction, this cardigan is both stylish and enjoyable to create. Whether you’re crafting it for yourself, a child, or as a gift, this pattern brings warmth and charm in every stitch.
The Bluey Hexi Cardigan Free Crochet Pattern is built on a fascinating method using hexagons that fold magically into sleeves and body. It’s an excellent project for crocheters looking to expand their skills while creating a wearable, cozy, and modern garment. One of the best features is its adaptability—you can easily resize or recolor this pattern to suit any age or taste.
In this article, we’ll guide you through everything you need to know: the tools and yarn required, how to crochet the hexagons, how to join them into a cardigan shape, and finally, how to add finishing details to make it truly special. Each section is designed to help you succeed with your crochet pattern, even if you’re new to garment making.
To begin your Bluey Hexi Cardigan Free Crochet Pattern, you’ll need the right supplies. Choosing quality yarn and the appropriate tools will ensure your final piece is comfortable, durable, and attractive.
Start with medium-weight yarn—worsted or Aran is ideal. Look for soft fibers like acrylic, wool blends, or cotton, depending on the climate and purpose. Bluey’s character colors (shades of blue, white, and soft greys) work beautifully, but feel free to get creative with your own palette.
A 5.0 mm (H-8) crochet hook typically works well with worsted weight yarn. However, always check your gauge and adjust the hook size if needed to match the pattern’s dimensions. Keeping consistent tension is key for proper assembly of the hexagons.
You’ll also need scissors, a yarn needle for weaving in ends, and stitch markers. Markers are especially useful when folding and joining hexagons into the cardigan shape. They help keep your work aligned as you transition from hexagons to sleeves and body.
Optional materials include buttons, toggles, or even a zipper if you wish to make your cardigan closeable. For an extra neat look, consider adding a soft fabric lining to the inside of the cardigan.
When working for children, always choose machine-washable, hypoallergenic yarns that are gentle on the skin. Safety and comfort go hand in hand with handmade items.
The core of the Bluey Hexi Cardigan Free Crochet Pattern lies in the simple yet versatile hexagon. Each cardigan begins with two large hexagons that form the entire structure of the garment—sleeves, front, and back.
Begin by making a magic ring and working double crochet stitches into it to form the center of the hexagon. The pattern increases evenly at six points every round, giving the piece its six-sided shape. Continue adding rounds until your hexagon reaches the desired size for your cardigan.
Make sure each side of your hexagon is the same length. You can count stitches across each side to double-check. Using stitch markers to identify increase points helps maintain symmetry and makes it easier to keep track of rounds.
For a child-size cardigan, five to seven rounds may be sufficient. For adults, continue increasing until the hexagon measures from mid-back to mid-forearm. The size of your hexagons will directly determine the fit of the cardigan.
Once both hexagons are complete, you’ll fold each in half to form an “L” shape. These will become the sleeves and sides of the cardigan. Line them up to check that they match and adjust your stitches if needed.
If you want to add Bluey-inspired stripes or color blocking, change colors every few rounds. Be sure to carry or weave in your ends neatly to avoid bulkiness inside the garment.
Now that your two hexagons are ready, it’s time to assemble your Bluey Hexi Cardigan Free Crochet Pattern into a wearable piece. This step is both magical and logical as you fold and seam the shapes together.
Lay both hexagons flat and fold them into an “L” shape. Join the corresponding sides of each folded piece using slip stitch or single crochet. This forms the shoulder seam and the sleeves. Always align stitch by stitch to avoid uneven joins.
After seaming the sleeves and back, try the garment on or place it on a mannequin to check fit. You may need to add a few extra rounds to the sleeves or sides to make it longer or wider depending on your size preference.
To create a more shaped body, you can crochet panels between the two hexagons at the back or along the front opening. This gives more coverage and structure, especially if you’re making an adult-sized cardigan.
If you desire a hood, crochet a rectangle large enough to cover the back of the head and sew it to the neckline. You can even continue the hexagon motif into the hood for visual continuity and style.
Once all seams are joined, you can block your cardigan to smooth out the edges and allow the stitches to relax. Use a steam block or wet block depending on the yarn fiber.
This is a great point to add embellishments, pockets, or even a decorative edge. Shell stitches, picot borders, or a simple ribbed trim can elevate the final look of your crochet pattern.
Your Bluey Hexi Cardigan Free Crochet Pattern is nearly complete—now it’s time to add those extra details that take your creation from great to stunning. The finishing touches are where your personality can truly shine.
Start with a border around the sleeve cuffs and bottom hem. A ribbed or shell stitch border not only looks pretty but also helps the cardigan sit properly and stay in shape. Choose a contrasting color to make the borders pop.
If your cardigan will have a front closure, now is the time to sew on buttons or add a zipper. Make buttonholes along the edge or leave the cardigan open-fronted for a relaxed fit.
Add pockets if desired. Small square or rounded pockets can be crocheted separately and stitched onto the front panels. They are great for little hands or simply as a cozy design feature.
Weave in all yarn ends neatly using a yarn needle. Pay special attention to any color changes to ensure that ends are hidden and won’t work loose during wear or washing.
If you want to make the cardigan look more playful—especially for kids—add Bluey-themed appliqués or patches. Crochet dog ears, paws, or even a tail for a fun effect. These additions make your cardigan truly unique and whimsical.
Once finished, wear your cardigan with pride or gift it to someone special. It’s a handmade treasure that’s not only functional but filled with love and creative energy.
Q1: Is the Bluey Hexi Cardigan suitable for beginners?
A: Yes! The Bluey Hexi Cardigan Free Crochet Pattern is beginner-friendly. If you’re comfortable with basic crochet stitches like double crochet and slip stitch, you can follow this project easily.
Q2: How do I resize the cardigan?
A: Resizing is simple—just make the hexagons larger or smaller depending on the desired size. The number of rounds determines the fit.
Q3: Can I use different yarn weights?
A: You can, but you’ll need to adjust the number of rounds and hook size accordingly. Always check your gauge to maintain proper proportions.
Q4: How long does it take to make one cardigan?
A: Depending on the size and your crochet speed, it can take anywhere from 6 to 12 hours spread over a few days to complete the cardigan.
Q5: Is a lining necessary for this cardigan?
A: Not necessarily. However, if you’re using loosely spun yarn or want a more finished interior, you can sew in a fabric lining.
Q6: Can I sell cardigans made from this pattern?
A: Yes, handmade items made using the Bluey Hexi Cardigan Free Crochet Pattern can be sold. Just ensure to credit the pattern inspiration when required.
The Bluey Hexi Cardigan Free Crochet Pattern crochet pattern is a delightful project for any season. From selecting cheerful yarns to learning the clever hexagon construction, every step is fun and fulfilling. This cardigan isn’t just cozy—it’s a conversation piece, a heartfelt gift, and a wearable work of art.
We hope this detailed guide has helped you feel confident and inspired to start your own cardigan. If you’ve tried this pattern, we would love to hear from you. Please leave your honest opinion, share your experience, and offer suggestions for future tutorials. Your feedback means the world to us and helps make our crochet community even stronger!


