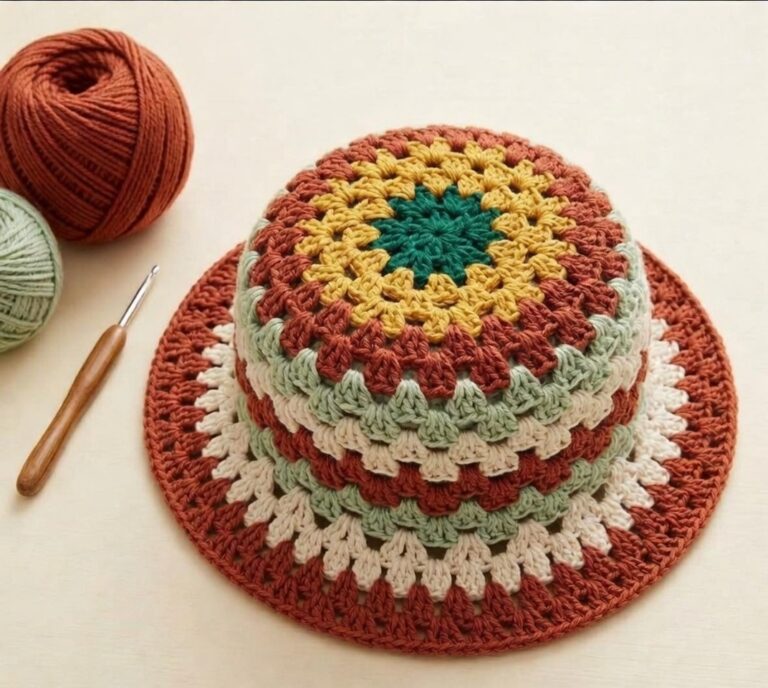
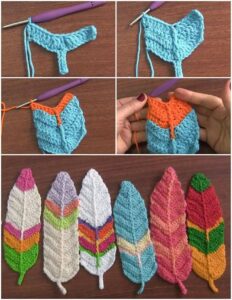
Crocheted Sun Hat Pattern
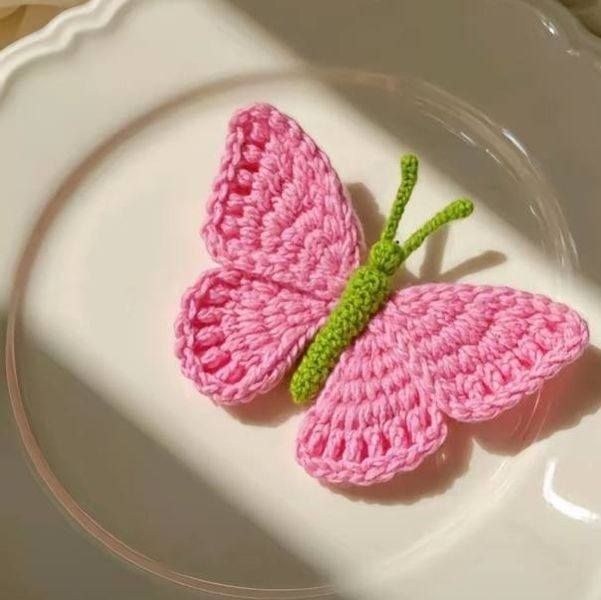
Starting your journey with Butterfly Crochet Tutorial – Crochet Pattern is a wonderful way to combine creativity and relaxation while making something beautiful with yarn. Crochet butterflies are charming, versatile, and can be used in many different projects, such as blankets, scarves, decorations, and even home accessories. This article will guide you step by step with a detailed explanation so you can master the art of crocheting your very own butterfly. Whether you are new to crochet or an experienced maker, this guide will provide clear instructions and inspiration.
Learning a Butterfly Crochet Tutorial – Crochet Pattern not only improves your crochet skills but also brings a sense of accomplishment. Many crafters enjoy these small yet elegant designs because they can be made quickly, using leftover yarn, and adapted in countless ways. They are perfect for adding a playful or elegant touch to your work, depending on the colors and stitches you choose.
Before we dive into the details, remember that this Butterfly Crochet Tutorial – Crochet Pattern is beginner-friendly but can also be modified for more advanced stitchers. By following the instructions carefully and practicing with patience, you will soon have a collection of colorful butterflies that will enhance your crochet projects.
When starting with any Butterfly Crochet Tutorial – Crochet Pattern, the first step is to understand the essential materials and stitches you’ll need. Generally, these small designs require minimal yarn, making them perfect for leftover scraps. Cotton yarn is often recommended because it provides structure and allows the butterfly wings to hold their shape beautifully.
Another important aspect is choosing the right hook size. A smaller hook typically works best for Butterfly Crochet Tutorial – Crochet Pattern projects, as it ensures that the stitches remain tight and the final butterfly looks neat. For beginners, using a medium-weight yarn with a hook that feels comfortable is the easiest way to start.
Learning the foundational stitches is also key. Most Butterfly Crochet Tutorial – Crochet Pattern guides use basic stitches like chain, slip stitch, single crochet, and double crochet. Mastering these simple techniques will allow you to follow patterns with confidence. Don’t worry if you are still practicing – butterflies are a great project to gain confidence in these stitches.
Another great benefit of working on Butterfly Crochet Tutorial – Crochet Pattern projects is that they are quick to complete. You can usually finish one in under an hour, making them ideal for gifting, decoration, or just practicing your crochet skills without a long-term commitment.
Colors play a big role in how your crochet butterfly turns out. Bright, bold shades can give your butterfly a cheerful look, while soft pastels can make them look delicate and elegant. Many crafters enjoy experimenting with variegated yarns, which naturally create unique and colorful patterns on the wings.
Finally, always remember to relax and enjoy the process. The purpose of a Butterfly Crochet Tutorial – Crochet Pattern is not just to create a beautiful object but also to give you a mindful, calming experience while crafting something with your hands.
To begin your Butterfly Crochet Tutorial – Crochet Pattern, start with a magic ring or a simple chain loop. This circle forms the center of the butterfly and will be where all the wings are built around. Creating a secure ring ensures the butterfly keeps its shape once you add the wings.
Once the base is made, you will begin working on the upper wings. These usually require larger stitches such as double or treble crochet. By creating several tall stitches into the circle, you form rounded shapes that resemble butterfly wings.
The lower wings are typically smaller and made with fewer stitches. They are often formed using half double crochet or single crochet to create a contrast in size and shape with the upper wings. This balance is what gives the butterfly its recognizable outline.
After completing both upper and lower wings, you can define the shape more clearly by adjusting the stitches with slip stitches in between. Many Butterfly Crochet Tutorial – Crochet Pattern instructions recommend tightening the center with yarn to create the butterfly’s body. This step not only secures the wings but also makes the butterfly look more realistic.
The antennae can be made by leaving two yarn ends at the top of the body and trimming them to the desired length. Some crocheters like to add a knot at the ends for extra detail. While optional, antennae add a delicate finishing touch to your butterfly.
At this point, your crochet butterfly is complete. However, you can always add extra details like embroidery, beads, or sequins to make it unique. This step is optional but fun for anyone who enjoys customizing their Butterfly Crochet Tutorial – Crochet Pattern projects.
One of the best things about learning a Butterfly Crochet Tutorial – Crochet Pattern is the endless ways you can use your finished butterflies. They are incredibly versatile and can add beauty and charm to many different items.
For example, you can use them as appliqués on blankets, scarves, or hats. A plain project can instantly look more decorative by sewing a crochet butterfly onto it. This is a great way to personalize gifts or add seasonal flair to your creations.
Crochet butterflies also make wonderful decorations for the home. You can attach them to a string and create a garland, use them as wall art, or even add them to cushions. Their small size makes them easy to arrange in creative patterns that suit your style.
Another popular use is turning crochet butterflies into accessories. By attaching a pin or hair clip to the back, you can create brooches or hair accessories. These can be customized with different colors and embellishments, making them unique handmade items.
Crochet butterflies can also be used in children’s crafts. They make charming decorations for kids’ rooms or can be added to clothing and blankets as playful accents. Since they are quick to make, they are a great option for busy parents who enjoy crafting.
Finally, many crafters enjoy giving crochet butterflies as small gifts. They are thoughtful, handmade tokens of appreciation that show care and creativity. Using your Butterfly Crochet Tutorial – Crochet Pattern, you can create sets of butterflies in different colors and gift them to friends and family.
To make the most of your Butterfly Crochet Tutorial – Crochet Pattern, it’s helpful to keep a few tips in mind. First, always choose yarn that suits the purpose of your butterfly. If you plan to use it for appliqué, lightweight cotton yarn is best. If you’re making larger decorative butterflies, you can experiment with thicker yarns.
Another tip is to practice tension control. Keeping your stitches even will ensure that your butterfly looks symmetrical. Uneven tension may cause the wings to look lopsided. Practicing on scrap yarn can help you improve before working on your final design.
Blocking your butterfly is another useful technique. By lightly wetting and pinning your finished butterfly into shape, you can make the wings lie flat and crisp. This step is especially useful if you want to use your butterfly in home décor projects.
Experimenting with different stitches is also a fun way to grow your skills. While many Butterfly Crochet Tutorial – Crochet Pattern guides use basic stitches, you can try adding picots, clusters, or puff stitches for a more textured look. This allows you to create butterflies with unique personalities.
If you are a beginner, don’t hesitate to start small and simple. Focus on mastering one butterfly pattern before experimenting with variations. Once you feel confident, you can scale your projects and even design your own butterfly crochet pattern.
Lastly, always enjoy the process. Crocheting is not only about the final product but also about the joy of creating. By working on your Butterfly Crochet Tutorial – Crochet Pattern, you are combining skill, creativity, and mindfulness in one rewarding hobby. – Butterfly Crochet Tutorial – Crochet Pattern
Q1: Is the Butterfly Crochet Tutorial – Crochet Pattern suitable for beginners?
Yes, this tutorial is beginner-friendly. It uses basic stitches and simple steps, making it accessible to anyone learning crochet.
Q2: What type of yarn is best for crochet butterflies?
Cotton yarn is often recommended because it holds its shape well. However, you can experiment with any yarn you have available.
Q3: How long does it take to make a crochet butterfly?
Most crochet butterflies can be completed in under an hour, depending on your skill level and the size of the design.
Q4: Can I use crochet butterflies in clothing projects?
Absolutely. They can be sewn onto hats, scarves, sweaters, and other garments as decorative appliqués.
Q5: Do I need special tools for making a butterfly crochet pattern?
No special tools are required beyond a crochet hook, yarn, and scissors. Optional extras include beads, pins, or embroidery thread for decoration.
Q6: How can I make my crochet butterfly look more professional?
Practicing even tension, blocking the finished piece, and experimenting with different color combinations will help improve the final look.
In this Butterfly Crochet Tutorial – Crochet Pattern, we explored the materials, steps, and creative ways to use crochet butterflies. You learned how to start from a simple circle, build the wings, and finish with decorative touches. We also covered tips and techniques to help you improve your crochet skills and make unique designs.
Now that you have all the guidance you need, it’s time to create your own collection of crochet butterflies. I would love to hear your opinion about this tutorial – please share your thoughts and suggestions to help improve future guides. What did you enjoy the most, and what would you like to learn next?


