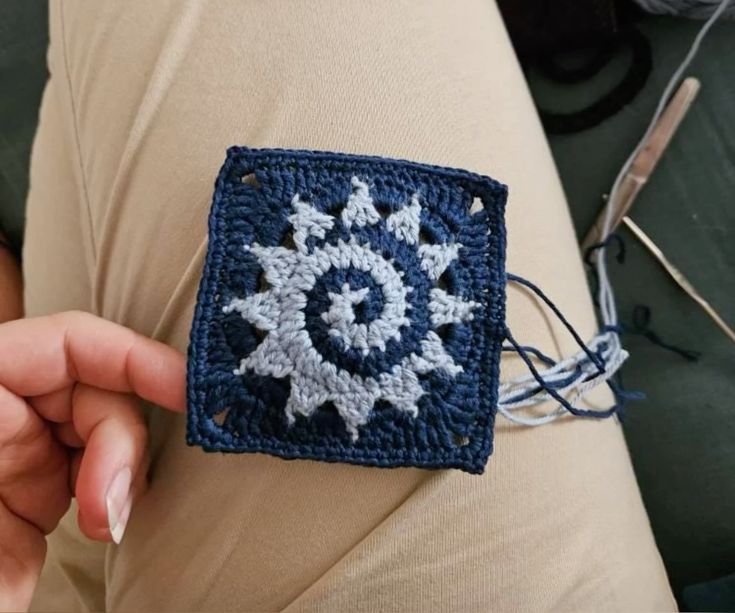
Crochet Spiral Sun Granny Square - Pattern
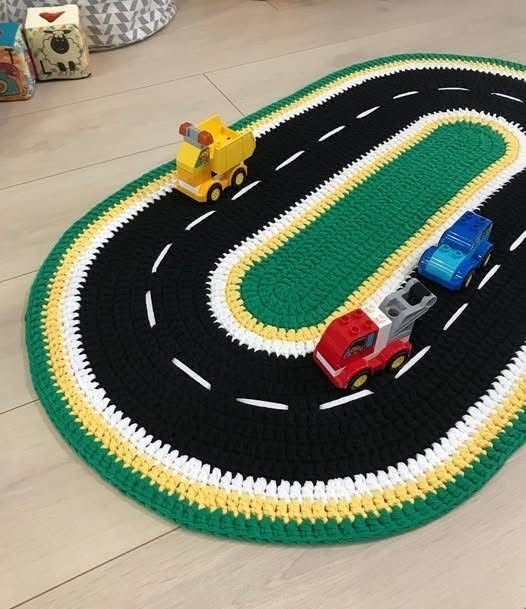
If you are looking for a creative and educational crochet project that children will absolutely love, the Crochet Car Track Mat – Pattern is the perfect idea. This fun and interactive design combines the beauty of handmade crafts with imaginative play. Whether you are making it for your child, grandchild, or as a thoughtful handmade gift, this crochet project is sure to become a family favorite. The best part? It’s a versatile piece that can be customized with different colors, textures, and designs to make it truly unique.
The Crochet Car Track Mat – Pattern allows you to crochet a play mat featuring roads, intersections, and parking areas, perfect for toy cars and trucks. It’s not only an enjoyable project to make but also a great tool to encourage imaginative play and storytelling for kids. Plus, this mat can be rolled up or folded for easy storage, making it practical for small spaces. Whether you’re a beginner or an experienced crocheter, this pattern provides endless opportunities to showcase your creativity while crafting something useful and delightful.
In this guide, we’ll walk you through the essential steps and tips to create your own Crochet Car Track Mat – Pattern, discuss the materials needed, explore design ideas, and share helpful techniques to make your mat durable and eye-catching. Let’s dive into this exciting crochet journey and discover how to bring this playful world of roads and imagination to life with yarn and hook!
Before you begin your Crochet Car Track Mat – Pattern, it’s important to gather all the right materials. The quality of your yarn, the size of your hook, and your color choices will have a big impact on the final result. Choosing sturdy, washable yarns ensures that your mat can handle frequent playtime without losing shape or color.
For this project, medium-weight acrylic yarn is ideal because it’s durable, easy to care for, and comes in many colors. You’ll need basic shades like black or dark gray for the roads, green for grass, blue for water areas, and various bright colors for the surrounding details. The mat can be as large or as compact as you wish, depending on how many “roads” or “town areas” you want to include.
A 5.0 mm crochet hook is usually perfect for this project, though you can adjust depending on your tension and yarn thickness. Remember to have scissors, a yarn needle, and a stitch marker ready. These simple tools make the process smoother and more enjoyable.
Another great idea is to use felt or fabric patches for small details such as trees, lakes, or signs. These can be stitched or glued onto the mat to add texture and visual interest. Always ensure any additions are safely attached if the mat is for children.
Lastly, plan your layout before you start crocheting. Sketching your road map design on paper helps you visualize the project and avoid unnecessary unraveling later. Think of it as designing your own mini town — a mix of roads, parking areas, houses, and parks.
With everything prepared, you’re ready to start creating your first base rows and bring your Crochet Car Track Mat – Pattern to life.
To begin your Crochet Car Track Mat – Pattern, start with a sturdy foundation chain that determines the mat’s width. For example, if you want a small mat for tabletop play, you can chain around 60–80 stitches. For a larger floor mat, go beyond 100 chains. Once you’ve chosen your foundation, work in rows using single crochet (sc) stitches for a dense and strong texture.
The base of the mat is typically made in green or gray to represent grass or pavement. This is where your roads and play areas will be added later. After you complete the base, you can begin crocheting the road sections using black or dark gray yarn. Work these in straight or curved lines, depending on the layout you designed.
To make the roads stand out, you can use surface slip stitches or tapestry crochet to add lane markings. White or yellow yarns work perfectly for this detail. You can also create intersections, roundabouts, or parking spots by adjusting the width of your stitches.
When you’ve completed the main roads, move on to adding fun details such as parking lots, buildings, or even little lakes. These details give your Crochet Car Track Mat – Pattern personality and make it even more enjoyable for kids. Use different yarn textures to give dimension to the landscape.
If you want to make your mat portable, consider crocheting it in modular sections. You can connect several squares — each featuring a different part of the town — with whip stitches or single crochet borders. This modular approach also allows for easy washing or rearranging later.
The beauty of the Crochet Car Track Mat – Pattern lies in its customizability. You can make your mat as simple or as elaborate as you want. Think of it as a canvas for your imagination — every road, building, and landscape detail adds charm and character.
For instance, you can add tiny crocheted houses, trees, and ponds to make your mat feel like a little village. These elements can be stitched onto the surface or crocheted separately and attached later. For even more fun, you can add a gas station, a park, or a bridge to make the playtime more interactive.
If you’re making this for a specific child, personalize it! Crochet their name into the border or add features that reflect their interests — like a race track, a construction site, or even a small airport. Kids love seeing their favorite things represented in handmade creations.
You can also experiment with different crochet techniques such as tapestry crochet or intarsia to create smoother color transitions and intricate patterns. These techniques allow you to “draw” your design directly into the crochet fabric without sewing pieces on later.
Another beautiful touch is to add a crochet border around the entire mat. A simple single crochet or crab stitch border will keep the edges neat and give the project a polished finish. You can even make the border in bright, playful colors to make it more cheerful.
Don’t be afraid to play with color and texture. The best Crochet Car Track Mat – Pattern designs are those that reflect creativity, personality, and love.
Once your Crochet Car Track Mat – Pattern is complete, it’s time to give it a few finishing touches. Start by weaving in all loose ends using your yarn needle to keep the mat clean and secure. This step is essential for durability and ensures that small hands won’t pull any yarn loose during play.
If your mat tends to curl, gently block it. Dampen it slightly, then pin it flat on a towel until it dries. Blocking helps even out stitches and makes the mat look professional and smooth.
You can also choose to line the back of the mat with non-slip fabric or felt, especially if it will be used on hard floors. This will keep it in place during play and protect the crochet from excessive wear.
Cleaning your mat is simple if you used acrylic yarn — most can be machine washed on a gentle cycle. Just remember to air dry it flat to maintain its shape. Avoid high heat or harsh detergents.
If you made modular sections, you can detach and wash each part separately. This is a big advantage for families with young kids who love messy playtime adventures.
Finally, store your mat rolled up instead of folded to prevent creases. With a little care, your Crochet Car Track Mat – Pattern will remain vibrant and beautiful for years to come, providing endless hours of imaginative fun.
1. Is the Crochet Car Track Mat suitable for beginners?
Yes! The pattern is flexible and can be adapted for any skill level. Beginners can start with simple straight roads, while experienced crocheters can add more detailed designs.
2. What is the best yarn to use for this project?
Acrylic yarn is highly recommended for its durability, affordability, and ease of washing. It holds up well to frequent use and play.
3. Can I customize the size of my Crochet Car Track Mat – Pattern?
Absolutely! The pattern is easily adjustable. Simply increase or decrease the number of stitches in your foundation chain and rows to achieve your desired size.
4. How can I add extra features like houses or trees?
You can crochet small appliqués separately and stitch them onto the mat or use tapestry crochet to include them in the main design.
5. Can the mat be made in sections?
Yes, crocheting in modular squares is a great option. It makes the project more manageable and allows easy washing or rearrangement later.
6. How do I clean and maintain the mat?
Wash it gently by hand or in a machine on a low cycle with mild detergent. Lay it flat to air dry to preserve its shape.
Creating a Crochet Car Track Mat – Pattern is a rewarding project that combines fun, functionality, and creativity. It offers endless opportunities to experiment with colors, shapes, and textures while crafting something children will truly enjoy. With just yarn, a hook, and your imagination, you can design a beautiful play mat that inspires storytelling and adventure.
We hope this guide has inspired you to start your own Crochet Car Track Mat – Pattern. If you enjoyed this tutorial, please leave your honest opinion and suggestions — your feedback helps make every crochet journey even more special!