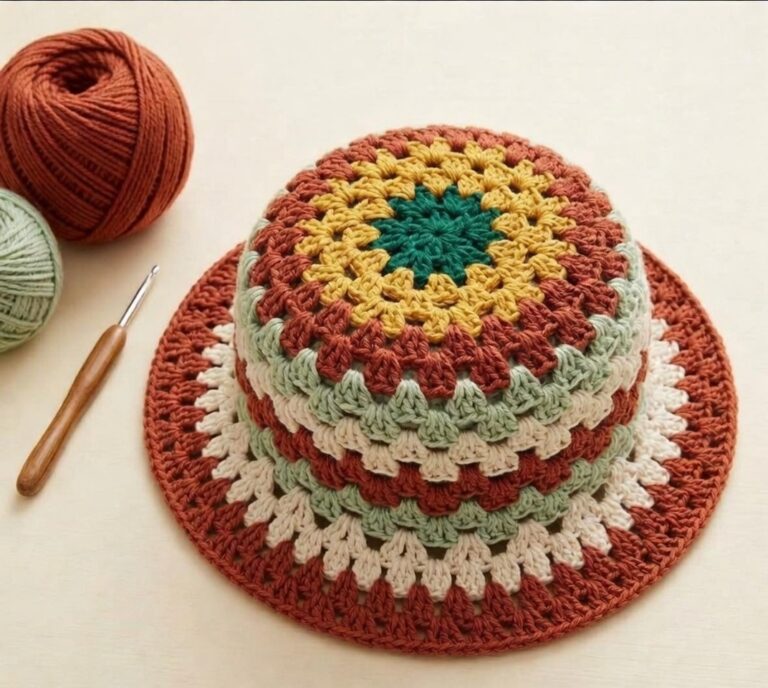
Crocheted Sun Hat Pattern
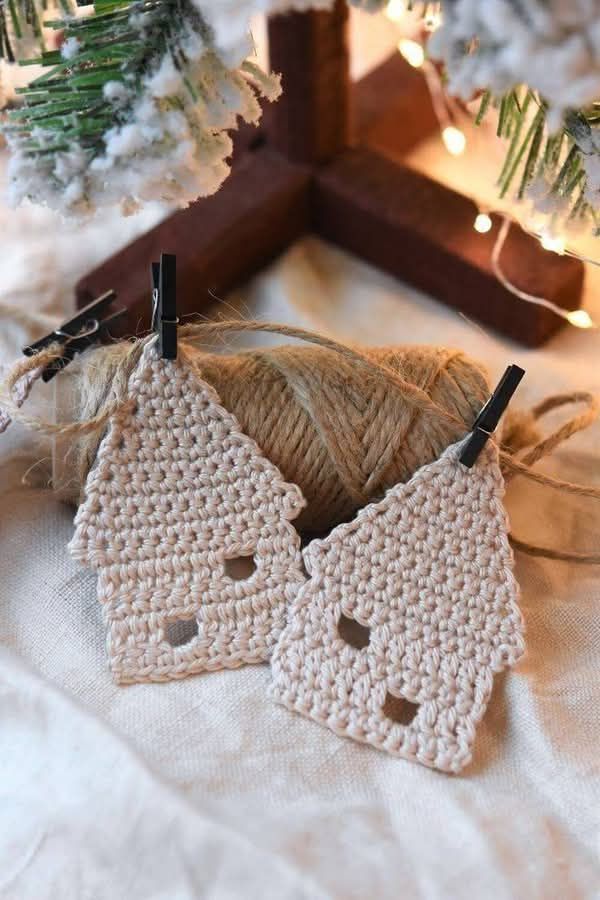
Crocheted House Hanging – Tutorial is a beautiful and creative way to bring handmade charm into your home while learning new crochet techniques. This guide is designed for beginners and experienced crafters who want a relaxing project that also makes a lovely decorative piece. Throughout the article, we will explore step-by-step instructions, tips, and variations using the main keyword Crocheted House Hanging – Tutorial naturally and strategically for SEO optimization.
Creating a crocheted house hanging is not only an enjoyable craft but also a unique way to personalize your décor. Whether you plan to gift it, display it on your wall, or add it to a seasonal collection, this tutorial will guide you through all the essential steps. By focusing on the structure, stitches, and assembly, you will feel confident shaping your small crocheted house from beginning to end.
Before we move into the detailed sections, it is important to highlight that this project requires only simple materials and basic stitches. This makes the Crocheted House Hanging – Tutorial perfect for crafters of all levels who want a project that is both relaxing and rewarding. Let’s dive into the step-by-step instructions and explore all the possibilities this fun idea offers.
To begin this Crocheted House Hanging – Tutorial, it is essential to gather all the materials so your process will be smooth and enjoyable. Most of these items are common in any crocheter’s toolbox, making this project accessible even for beginners. Choosing the right materials will help your house hanging look neat and vibrant.
You will typically need a medium-weight yarn, but feel free to select any color palette that matches your home décor. Soft cotton yarn works wonderfully because it provides structure while keeping the final piece lightweight. Having multiple colors will help add dimension to the roof, windows, and door of your crocheted house.
A standard crochet hook size suitable for your yarn, such as 4.0 mm or 4.5 mm, will help create tight and consistent stitches. If your tension tends to be loose, consider using a smaller hook to keep the house’s shape firm. Maintaining consistent tension is one of the key elements when making a decorative wall piece.
You will also need safety scissors to cut yarn ends cleanly. Dull scissors can fray or damage the fiber, which makes weaving ends more difficult. A good pair of scissors ensures a polished and professional finish for your Crocheted House Hanging – Tutorial project.
A tapestry needle is essential for sewing parts together, weaving in ends, and adding finishing touches. This tool will help attach decorative elements such as the roof, windows, and door. Even if this is your first time using a needle in crochet, this tutorial will make it simple and stress-free.
Finally, you may want to add small embellishments such as buttons, beads, or embroidered details. These extras are optional but can add a unique personality to your wall hanging. Using embellishments is a fun way to make each version of your Crocheted House Hanging truly one of a kind.
The next step in this Crocheted House Hanging – Tutorial is to create the main body of the house. This part forms the structure and determines the final size. You can customize the dimensions to make your house small and cute or larger for a bold decorative piece.
Start by crocheting a simple rectangle using single crochet stitches. This stitch creates a firm and consistent fabric, ideal for a decorative hanging. Work back and forth in rows until the rectangle reaches your desired height. Keeping edges straight will help your house look neat and symmetrical.
Choose a main color for the house’s walls. Light shades such as beige, pastel blue, or soft yellow give the piece a cozy and welcoming look. You can also experiment with bold colors if you prefer a more modern or playful style. The best part of this tutorial is that there is plenty of room for creativity.
Once the rectangle is complete, it is time to shape the roofline. Decrease stitches at the top to form a triangular point. This subtle shaping will help your crocheted house resemble a real home, adding charm to the overall design.
Blocking the finished base is optional but recommended. Lightly flattening your work ensures that the shape stays even. This improves the final appearance and helps the embellishments attach more smoothly later in the process.
At this point, your house base is ready, and you can move on to adding smaller decorative elements. The next steps in this Crocheted House Hanging – Tutorial will show you how to bring this simple shape to life with doors, windows, and roof details.
Decorative elements are what truly bring the Crocheted House Hanging – Tutorial project to life. These small pieces allow you to personalize the house and create visual interest. Adding decorative details is also a fun way to use leftover yarn from previous projects.
The door can be made by crocheting a small rectangle in a contrasting color. Choose a shade that complements the main house color for a balanced look. Sew the door onto the lower center part of the house, ensuring it is aligned and securely attached.
Windows add another charming detail. You may create one or two windows depending on the desired style. These can be made with small square or round shapes. Light-colored yarn will help the windows stand out against darker walls.
The roof is an essential part of the design. You can create a separate triangle piece using double crochet stitches to give it a slightly textured appearance. Attach the roof just above the walls, making sure the edges align cleanly. This step completes the iconic look of a small crocheted home.
For those who enjoy extra embellishments, consider embroidering tiny flowers, vines, or patterns around the windows and door. These finishing touches give character to your piece. Buttons or beads can also act as simple accents that give the house a whimsical and decorative style.
Once all decorative elements are attached, take a moment to admire your work. Each piece you add gives your Crocheted House Hanging a unique personality, and no two creations will ever be exactly the same. This makes the craft incredibly rewarding.
Now that all the pieces are ready, the next step in the Crocheted House Hanging – Tutorial is assembling and preparing it for display. Proper assembly ensures that the final product looks neat and stays in good condition over time.
Lay the base of the house on a flat surface and position each decorative piece before sewing. This helps you visualize the final arrangement and make adjustments if needed. Taking this extra step ensures balance and symmetry in your wall hanging.
Use a tapestry needle and matching yarn to sew each element firmly. Secure stitching prevents pieces from loosening, especially if the house hanging is displayed in a high-traffic area. Careful attachment ensures long-lasting durability.
To turn your house into a wall hanging, add a small loop at the top of the roof. This can be made with a simple chain of stitches or a piece of yarn folded and tied securely. The loop allows easy hanging on a nail, hook, or decorative peg.
If you prefer more structure, attach a wooden dowel or small stick behind the top of the piece. This helps the house hang flat against the wall and gives a professional finish. Make sure it is lightweight so that it doesn’t pull on the stitches.
Once everything is assembled, your crocheted house is ready to be displayed. Hang it in a cozy corner, a craft room, a child’s bedroom, or even a seasonal décor setup. The final piece reflects the time, creativity, and love you invested into your Crocheted House Hanging – Tutorial project.
1. Is the Crocheted House Hanging beginner-friendly?
Yes! This Crocheted House Hanging – Tutorial is ideal for beginners. The stitches are basic, and the project is worked in small sections, making it easy to follow.
2. What yarn is best for this project?
Cotton yarn is recommended because it gives structure, but any medium-weight yarn works well.
3. Can I customize the size of the house?
Absolutely. You can adjust the number of stitches and rows to make the house larger or smaller.
4. How can I attach embellishments securely?
Use a tapestry needle and stitch each piece firmly. Avoid using glue, as it may not hold well over time.
5. Do I need to block the finished piece?
Blocking is optional, but it helps maintain a neat shape and ensures your house hangs flat on the wall.
6. Can this project be a gift?
Yes! Many crafters make crocheted house hangings as personalized gifts for birthdays, housewarmings, and holidays.
This Crocheted House Hanging – Tutorial provides everything you need to create a charming and personalized decorative piece for your home. From gathering materials to crafting the base, adding beautiful details, and assembling the final piece, every step is simple and enjoyable.
Whether you are a beginner or an experienced crocheter, this project allows you to express creativity and craft something meaningful. I hope this guide inspires you to make your own unique version and explore more fun crochet ideas. If you enjoyed this tutorial, feel free to share your thoughts or ask for more patterns!


