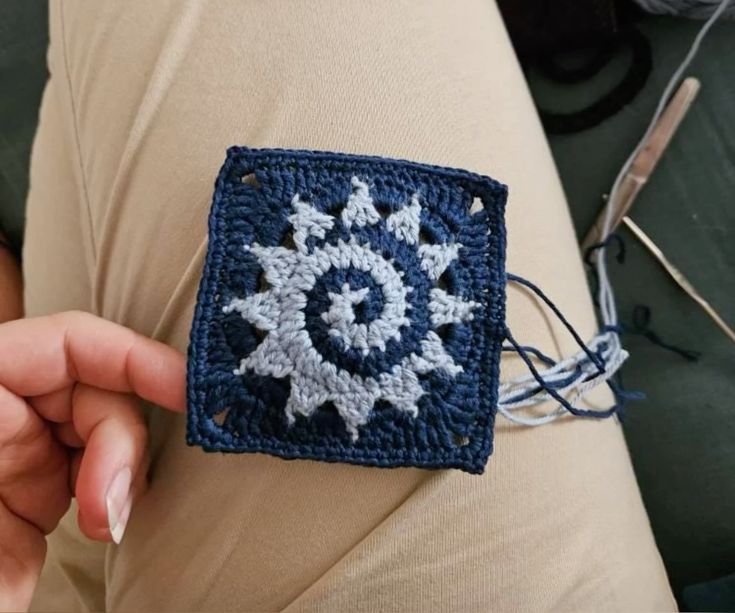
Crochet Spiral Sun Granny Square - Pattern
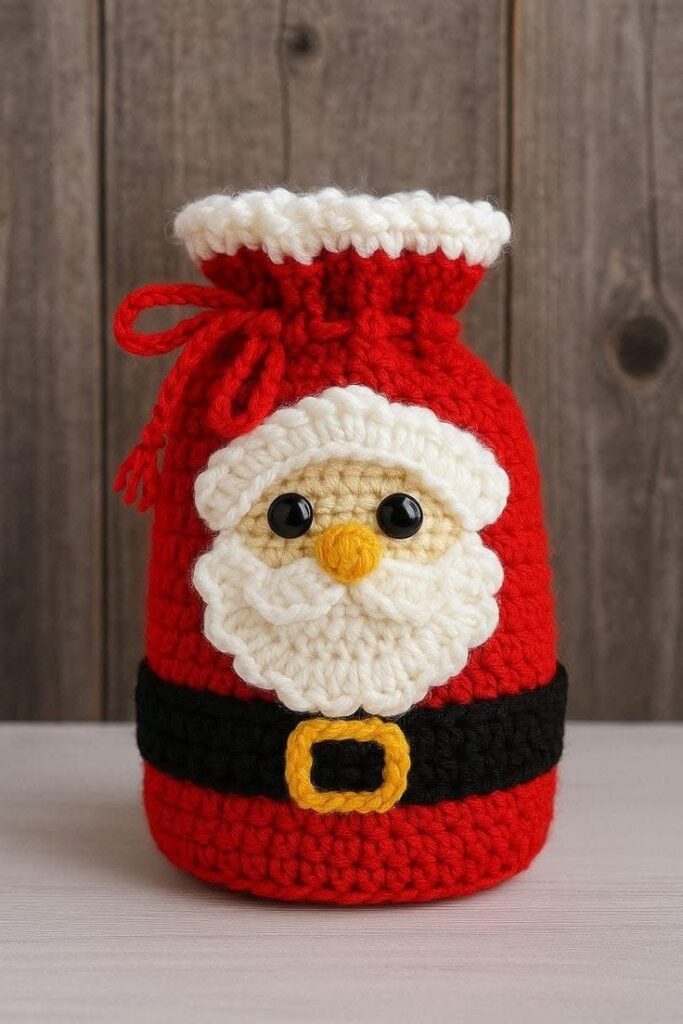
The Crocheted Santa Claus Bag – Crochet Pattern is the perfect way to add a touch of handmade holiday charm to your Christmas season. Whether you’re a beginner looking to practice new stitches or an experienced crafter searching for a festive project, this pattern combines creativity and practicality in one adorable design. A Crocheted Santa Claus Bag can be used to hold gifts, candies, or small surprises for loved ones, making it a delightful addition to any holiday décor.
Working on a Crocheted Santa Claus Bag – Crochet Pattern not only brings joy during the crafting process but also results in a keepsake that can be used year after year. Handmade holiday decorations have a unique warmth that store-bought items often lack. The softness of yarn, the personalized details, and the satisfaction of creating something with your own hands make crochet projects like this especially rewarding.
This Crocheted Santa Claus Bag – Crochet Pattern tutorial will guide you through the steps of making this charming project. From choosing the right yarn to adding the finishing touches that bring Santa’s jolly face to life, you’ll find detailed tips and inspiring ideas to help you craft a festive masterpiece. Let’s dive in and learn how to crochet your very own Santa bag that spreads cheer wherever it goe.
Before you begin your Crocheted Santa Claus Bag – Crochet Pattern, it’s essential to gather all your materials and ensure you’re ready to start. Using the right supplies makes a big difference in the outcome of your project.
For this project, you’ll need medium-weight yarn in classic Christmas colors: red for Santa’s suit, white for his beard and hat trim, black for his belt, and a bit of gold or yellow for the buckle. Acrylic yarn works beautifully because it’s durable and easy to handle, but cotton yarn gives a more natural texture if you prefer a softer finish.
Next, choose a crochet hook that complements your yarn. Most Crocheted Santa Claus Bag – Crochet Pattern instructions recommend a 4 mm or 5 mm hook, depending on the tension you like to work with. Always test your gauge with a small swatch before starting the main project.
You’ll also need scissors, a yarn needle for weaving in ends, and a few stitch markers if you like to keep your rows organized. Don’t forget a small amount of stuffing if you want Santa’s beard or hat to have extra dimension.
Preparation is key to enjoying the process. Once you have everything ready, set aside a quiet space where you can focus and enjoy the soothing rhythm of crocheting. Having all your materials organized ensures a stress-free and fun crafting experience.
With your tools and yarn ready, it’s time to begin creating the base of your Crocheted Santa Claus Bag and shaping it into something magical.
To start your Crocheted Santa Claus Bag – Crochet Pattern, begin by creating the base of the bag. This will form the foundation of your entire project, so take your time to ensure the stitches are even and consistent. You can start with a magic ring or chain a few stitches to form a small circle, depending on your preferred technique.
Once your foundation circle is ready, continue to work in rounds, increasing gradually to create a sturdy and balanced base. The key is to maintain a flat circle before transitioning into the body of the bag. When your base reaches the desired diameter, stop increasing and start crocheting upward to form the sides.
For the body of the Crocheted Santa Claus Bag, alternate between rows of red and white yarn to create Santa’s outfit. Red will represent his suit, while the white section at the top symbolizes his fluffy hat trim. Keep your stitches tight to ensure the bag maintains its shape and can hold gifts securely.
As you move up the bag, you can also add decorative details such as a black stripe for Santa’s belt and a small gold square for the buckle. These small touches bring your project to life and highlight the fun of working with the Crocheted Santa Claus Bag – Crochet Pattern.
Remember to count your stitches regularly and use a stitch marker to indicate the beginning of each round. This will keep your work symmetrical and prevent accidental miscounts.
By the time you finish the body of the bag, you’ll already see the festive charm of Santa’s classic red-and-white outfit taking form in your crochet work.
The most exciting part of the Crocheted Santa Claus Bag – Crochet Pattern is bringing Santa’s cheerful face to life. Start by crocheting small circles or ovals for the eyes using black or brown yarn, and attach them securely to the front of the bag. For the nose, use a small piece of pink or beige yarn to crochet a tiny round shape and sew it between the eyes.
Next comes the beard, which is what truly defines Santa’s look. Use white yarn to crochet rows of scalloped or looped stitches to create a fluffy and textured beard. You can also experiment with fringe techniques if you want a more three-dimensional effect. Attach the beard just below the nose, making sure it spreads evenly across the front.
Don’t forget the mustache! Two small curved pieces of white crochet will complete Santa’s iconic face. Place them right above the beard and slightly under the nose to add character and personality to your Crocheted Santa Claus Bag.
To finish Santa’s hat, switch back to red yarn and crochet a triangle or cone shape. Add a white trim at the bottom and a pom-pom at the tip for that festive finishing touch. Sew the hat onto the top of the bag, slightly tilted for a playful look.
For those who like extra details, you can even add small buttons, sequins, or embroidery to make your Crocheted Santa Claus Bag – Crochet Pattern stand out. A little sparkle or gold thread can give it that magical holiday glow.
Take your time on this step — these features transform your project from a simple bag into a delightful Christmas decoration that captures the spirit of the season.
Once your Crocheted Santa Claus Bag – Crochet Pattern is assembled, it’s time for the finishing touches that make it both functional and beautiful. Start by weaving in all loose yarn ends with a tapestry needle, securing your stitches to ensure the bag lasts through many holidays.
If you plan to use it as a gift bag, you can crochet a drawstring using a long chain of red or white yarn and thread it through the top row of stitches. This allows you to close the bag neatly and gives it a polished appearance.
For a sturdier version, consider lining your bag with fabric. Choose a festive print or a plain color that complements your yarn. Sew the lining inside the bag using small stitches to reinforce its structure and make it more durable for heavier gifts.
Another creative idea is to use the Crocheted Santa Claus Bag as part of your home décor. It can serve as a charming table centerpiece filled with candy canes, ornaments, or even pine cones. It also makes a unique and thoughtful handmade gift for friends and family.
You can scale the pattern up or down to create different sizes — small versions for candy bags or larger ones for wrapping presents. The versatility of the Crocheted Santa Claus Bag – Crochet Pattern means you can adapt it to fit your needs while keeping the festive aesthetic intact.
Lastly, don’t forget to add your personal touch. Maybe embroider a name on Santa’s hat or attach a small bell to the drawstring. Personalization is what makes each handmade item truly special.
1. Is the Crocheted Santa Claus Bag suitable for beginners?
Yes, the Crocheted Santa Claus Bag – Crochet Pattern is beginner-friendly. The stitches are basic, and the steps are easy to follow with patience and practice.
2. What type of yarn works best for this project?
Acrylic yarn is ideal because it holds shape well and comes in vibrant colors. However, cotton yarn can also be used for a softer, natural look.
3. How long does it take to complete the Crocheted Santa Claus Bag?
Depending on your skill level, it can take anywhere from one afternoon to a few days to complete. The project is manageable and can be done in small sessions.
4. Can I make the bag in different colors?
Of course! While the traditional red and white are classic, you can experiment with pastels or metallic yarns for a modern twist.
5. How can I wash and care for my Crocheted Santa Claus Bag?
Hand washing is recommended. Use mild detergent and air dry to maintain the shape and color of your bag.
6. Can this bag be used as a Christmas gift wrap?
Absolutely. The Crocheted Santa Claus Bag makes an eco-friendly and reusable alternative to traditional wrapping paper.
Creating a Crocheted Santa Claus Bag – Crochet Pattern is a joyful way to celebrate the holiday spirit through creativity. From choosing festive colors to adding Santa’s charming face, every step brings warmth and happiness. This handmade piece not only decorates your home but also becomes a meaningful part of your Christmas traditions.
We hope this guide has inspired you to pick up your crochet hook and start crafting your very own Santa Claus bag. If you enjoyed this tutorial, please leave your honest opinion and share your suggestions. Your feedback helps inspire more beautiful creations for the crochet community!
