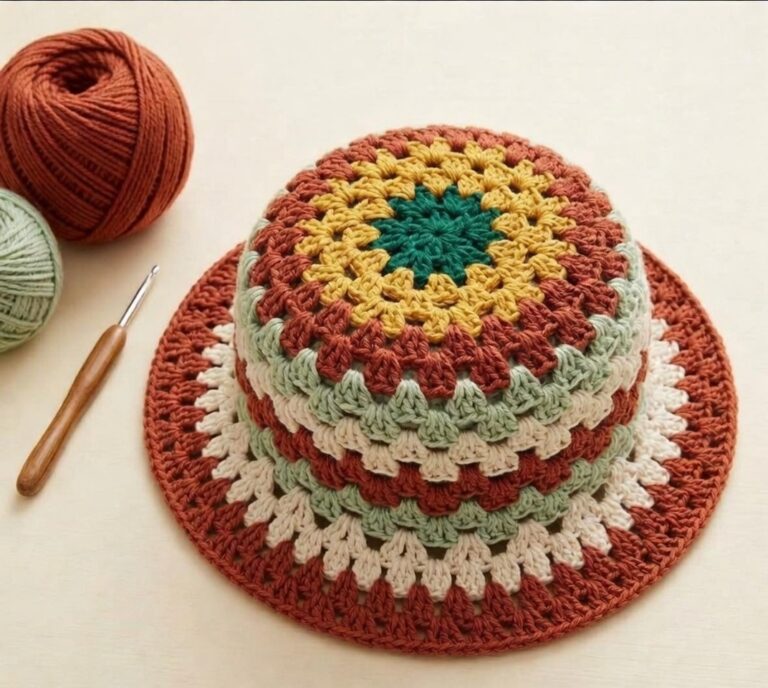
Crocheted Sun Hat Pattern
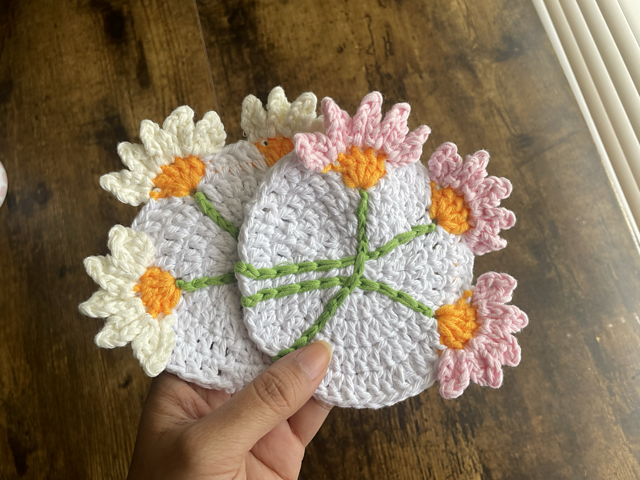
If you love adding a touch of handmade charm to your home, the EASY Crochet 3D Daisy Coasters Tutorial – Crochet Pattern is the perfect project for you. These coasters are not only practical but also bring a cheerful, floral vibe to your table setting. With this step-by-step guide, even beginners can create stunning 3D daisy coasters that make excellent gifts or personal décor pieces. The best part? This tutorial is designed to be simple and fun, helping you complete each coaster quickly while enjoying the relaxing process of crocheting.
Crocheting 3D daisy coasters allows you to combine creativity with functionality. Whether you are hosting a tea party, decorating for spring, or simply want a charming addition to your coffee table, these coasters are a delightful choice. This crochet pattern emphasizes easy-to-follow instructions, clear stitch guidance, and a beautiful three-dimensional effect that makes each coaster truly stand out.
By following this EASY Crochet 3D Daisy Coasters Tutorial – Crochet Pattern, you’ll learn not only how to create these lovely daisies but also techniques that can be applied to other crochet projects. The pattern encourages using different yarn colors, experimenting with textures, and personalizing your coasters with unique details. Let’s dive into this exciting crochet journey and discover how to make your own 3D daisy coasters from scratch.
Before starting your EASY Crochet 3D Daisy Coasters Tutorial – Crochet Pattern, gathering all the necessary materials is essential. You will need a few basic supplies that are easy to find in most craft stores. The main ingredients for these coasters are yarn, hooks, and a pair of scissors. Choosing the right materials ensures that your daisies are sturdy, vibrant, and durable.
For the yarn, select a cotton blend to make your coasters absorbent and easy to wash. You can choose classic white and yellow for a traditional daisy look or mix colors for a playful, modern vibe. Using the recommended crochet hook size ensures that the stitches are tight enough to hold their shape while still remaining flexible.
In addition to yarn and hook, a yarn needle is required for weaving in the ends and finishing your coasters neatly. Optional materials include stitch markers to keep track of rounds and a blocking mat to help shape your coasters after completing them. Having all materials ready makes the EASY Crochet 3D Daisy Coasters Tutorial – Crochet Pattern smooth and enjoyable.
Next, ensure your workspace is comfortable with adequate lighting. Good lighting helps prevent mistakes and reduces eye strain, making the crocheting process more relaxing. Keep a notebook handy for jotting down notes or adjusting the pattern as needed.
Finally, remember that patience is key. Creating 3D daisy coasters requires attention to detail, especially when forming the petals. Taking your time ensures that each coaster is uniform and visually appealing.
With materials prepared, you are now ready to start your EASY Crochet 3D Daisy Coasters Tutorial – Crochet Pattern. Let’s move on to the step-by-step instructions that will guide you through each round and stitch.
Starting the EASY Crochet 3D Daisy Coasters Tutorial – Crochet Pattern involves creating a small center circle that will form the heart of your daisy. This is done with a magic ring, which allows for a tight, clean beginning that can be adjusted as needed. Work single crochet stitches into the ring to build a firm base.
After completing the center, it’s time to crochet the petals. Each petal is made using a combination of chain stitches and double crochets, forming the 3D effect that makes these daisies stand out. The petals are crocheted around the center circle, giving the coaster its distinctive floral shape.
Once all petals are in place, you will crochet a border around the daisy to form a circular coaster shape. This step helps stabilize the petals and ensures that the coaster lies flat on your table. The border can be done in a contrasting color or the same color as the petals for a cohesive look.
As you work through each round, it’s important to keep your tension consistent. Uneven tension can lead to misshaped petals or a coaster that doesn’t sit properly. Use stitch markers to track the beginning of each round for better accuracy.
Finishing touches involve weaving in any loose yarn ends and gently blocking the coaster. Blocking enhances the 3D effect and ensures that the coasters look polished and professional. Your completed 3D daisy coaster should now be ready to use or gift.
Finally, remember that practice improves technique. The more you create these coasters, the quicker and more precise your crochet will become. Enjoy the process of bringing these daisies to life.
One of the most enjoyable aspects of the EASY Crochet 3D Daisy Coasters Tutorial – Crochet Pattern is the ability to customize your project. You can experiment with yarn colors to match your home décor or create seasonal variations, such as pink petals for spring or orange for autumn.
Size is another customization option. Adjusting the hook size or yarn thickness allows you to create smaller or larger coasters. Smaller versions can be used as decorative doilies, while larger ones serve as functional table coasters.
Texture plays a role as well. You can try different yarn textures to achieve unique effects. Smooth cotton yarn gives a clean look, while fuzzy or boucle yarn adds softness and dimension.
Adding embellishments like beads, embroidery, or buttons at the center of the daisy adds a personal touch. These details can transform simple coasters into special gifts that are sure to impress friends and family.
Mixing and matching coasters with different petal colors in a single set creates a playful, eclectic look. This approach is perfect for adding a pop of color to a neutral table setting.
Finally, consider gifting a set of these 3D daisy coasters. Handmade gifts show thoughtfulness and care, making these coasters perfect for birthdays, housewarming parties, or holidays.
Even with a clear EASY Crochet 3D Daisy Coasters Tutorial – Crochet Pattern, beginners may encounter a few common mistakes. Being aware of these can help you avoid frustration and ensure a successful outcome.
One frequent error is uneven tension, which can distort the shape of the daisy petals. Maintaining consistent stitch tension is essential for a polished final product. Practicing basic stitches beforehand can help.
Skipping stitches or miscounting can also affect the overall pattern. Using stitch markers and counting stitches regularly ensures accuracy. It’s better to correct mistakes early than to undo multiple rounds later.
Another issue is not finishing ends properly. Loose yarn ends can unravel, causing the coaster to lose its shape. Always weave in ends securely and trim excess yarn.
Crocheting too tightly can make the petals stiff and difficult to shape. Conversely, crocheting too loosely results in floppy petals. Finding a balanced tension is key for the 3D effect.
Ignoring blocking can leave coasters looking uneven. Even a quick block helps petals lay flat and enhances the finished appearance. Use a simple pinning method to maintain shape while drying.
Lastly, rushing through the project can reduce its quality. Take your time, follow the tutorial carefully, and enjoy the creative process.
Q1: Can beginners follow this EASY Crochet 3D Daisy Coasters Tutorial – Crochet Pattern?
A1: Yes! The tutorial is designed for beginners with clear step-by-step instructions and helpful tips to guide you through each stitch.
Q2: What type of yarn is best for 3D daisy coasters?
A2: Cotton or cotton-blend yarn is ideal for coasters, as it is absorbent, durable, and holds shape well.
Q3: How long does it take to make one coaster?
A3: Depending on skill level, it may take 30–60 minutes per coaster. With practice, you can complete them faster.
Q4: Can I customize the colors of the daisies?
A4: Absolutely! You can use any yarn colors you like to match your home décor or seasonal themes.
Q5: Do I need to block the coasters?
A5: Blocking is optional but recommended to enhance the 3D effect and make petals lie flat.
Q6: Can these coasters be washed?
A6: Yes, using gentle hand washing or a delicate cycle in the washing machine is safe for cotton yarn coasters.
The EASY Crochet 3D Daisy Coasters Tutorial – Crochet Pattern is a fun and rewarding project that adds charm to any home. By following the detailed instructions, preparing the right materials, and applying customization tips, you can create beautiful 3D daisy coasters that are functional, decorative, and thoughtful gifts. Remember to maintain consistent tension, take your time, and experiment with colors to make each coaster unique.
We hope this guide has inspired you to start crocheting your own daisies. Please share your honest feedback and suggestions in the comments. Your thoughts help improve future tutorials and encourage creativity within the crochet community. Enjoy making your EASY Crochet 3D Daisy Coasters and watch your handmade creations brighten every table

