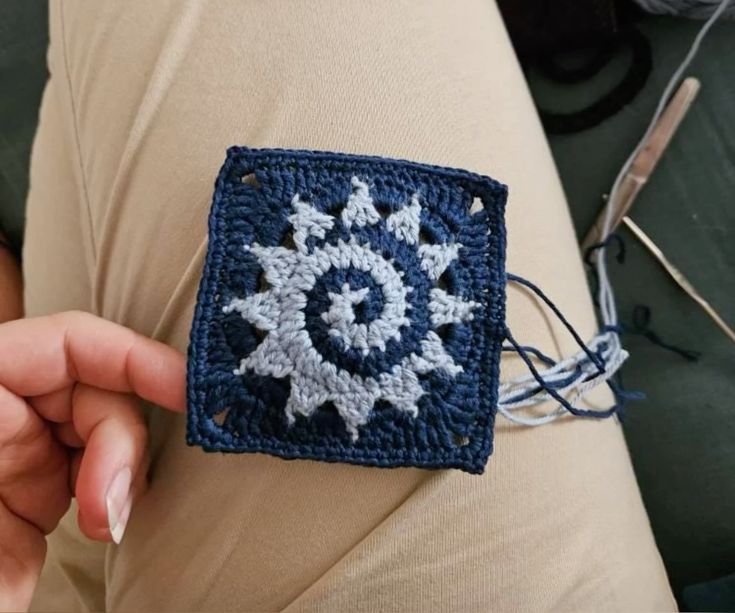
Crochet Spiral Sun Granny Square - Pattern
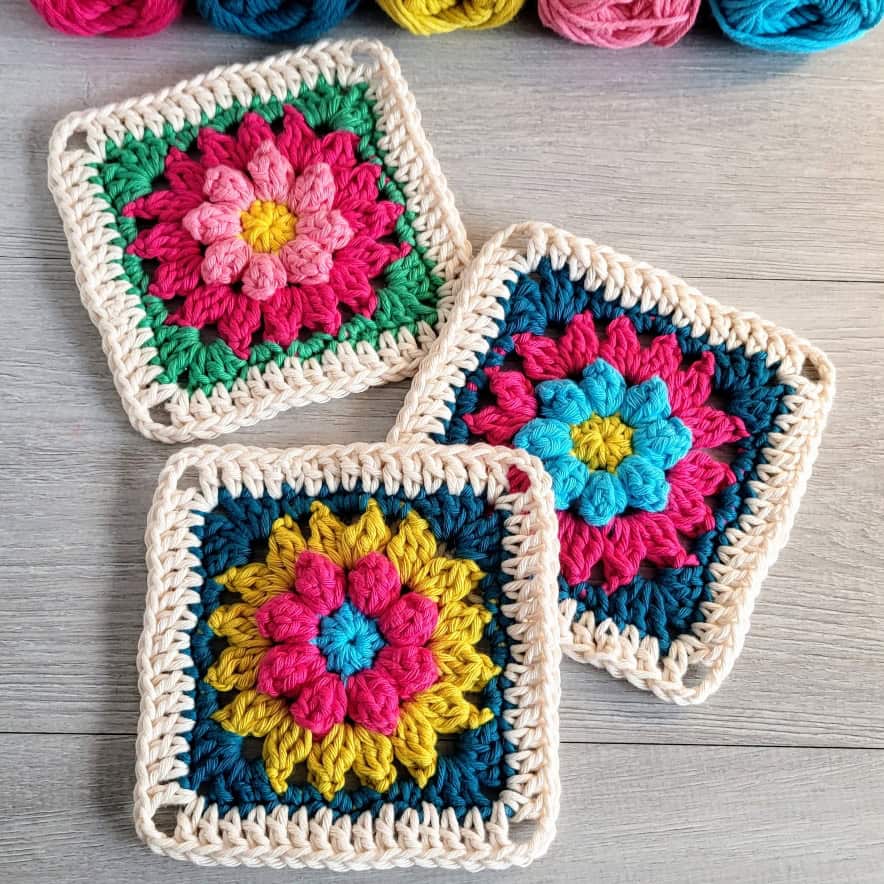
How to Crochet a Flower Granny Square – Crochet Pattern is one of the most charming and versatile projects you can add to your crochet journey. This timeless design combines the beauty of floral motifs with the traditional granny square style, creating a piece that is both decorative and practical. Whether you are a beginner learning the basics or an experienced crocheter looking for inspiration, this pattern offers endless possibilities for creativity.
The appeal of a flower granny square lies in its versatility. You can use it to make blankets, pillow covers, bags, or even clothing accents. Each square becomes a building block, and when joined together, they create colorful and textured masterpieces. Because of its modular nature, you can experiment with different yarn colors, textures, and arrangements to suit your personal style or the project you are working on.
In this article, you will learn how to crochet a flower granny square – crochet pattern step by step, understand the techniques behind it, and discover practical tips for success. The guide is designed to be beginner-friendly while still offering insights for advanced crocheters. By the end, you will be confident in starting your own project with these vibrant squares.
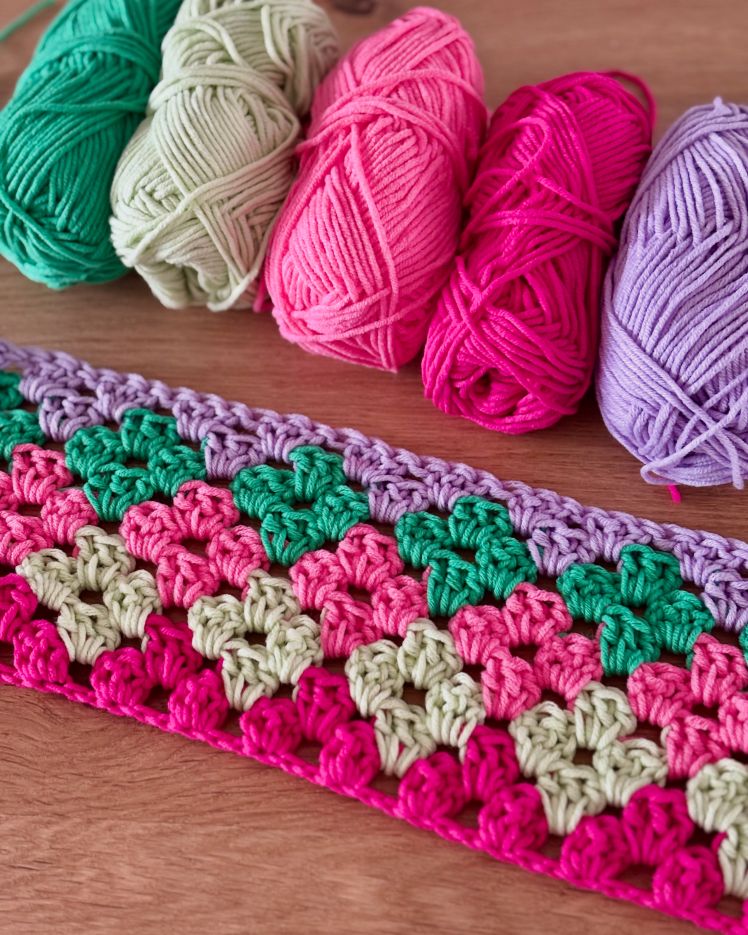
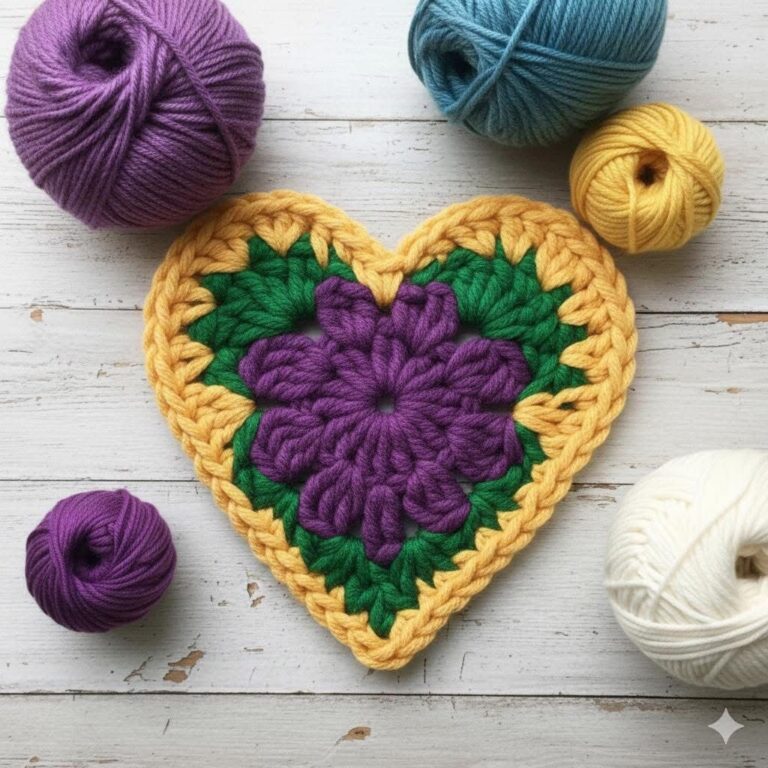
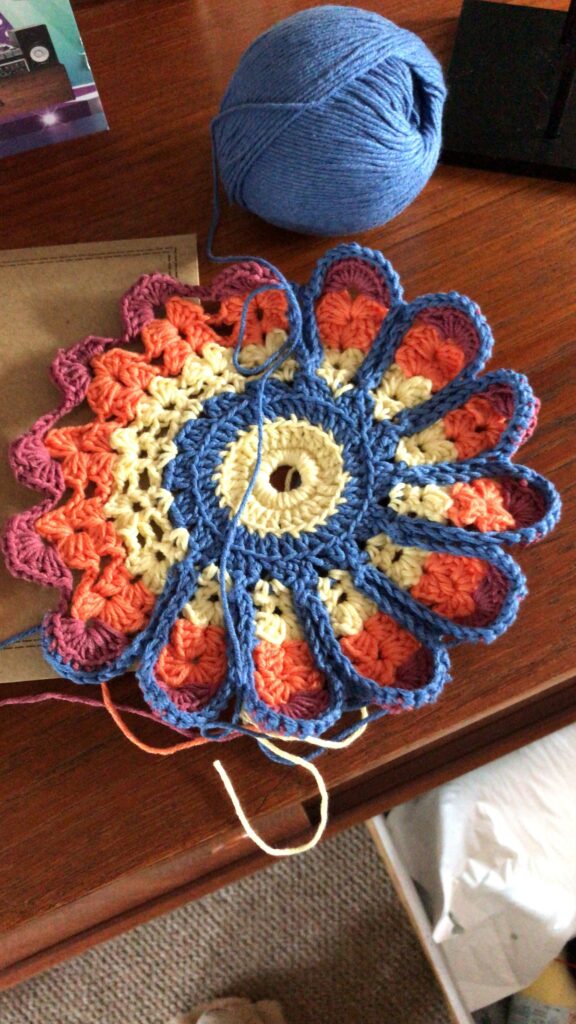
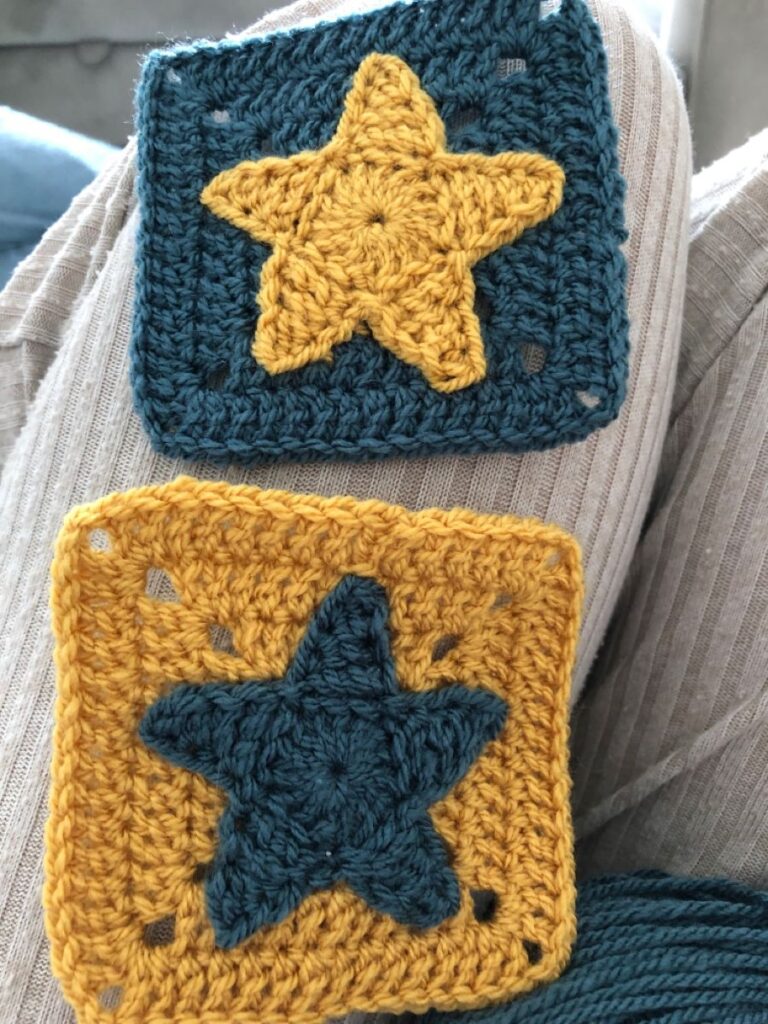
To begin mastering how to crochet a flower granny square – crochet pattern, it is important to start with the basics. A granny square is essentially a square motif worked in rounds, often beginning in the center and expanding outward. The addition of a flower in the middle adds charm and dimension, making it a unique variation of the classic design.
The foundation usually starts with a magic ring or a small chain circle. This base allows the flower petals to bloom from the center. Depending on the pattern, you may crochet between four to eight petals, each crafted using simple stitches such as double crochet or treble crochet. These petals form the heart of the design and set the tone for the entire square.
Another essential part of the process is transitioning from the round floral center to the square shape. This step involves clever use of chains and corner stitches, turning the circular flower into a perfect square that can be joined with others. Without this transition, the motif would not align well when combined into larger projects.
Choosing yarn and hook size is also crucial. A medium-weight yarn is ideal for beginners, as it gives good stitch definition and makes it easier to see the pattern forming. Using a compatible hook size ensures your stitches are consistent and your square holds its shape.
Color selection plays a big role too. Many crocheters prefer contrasting colors for the flower and the background, creating a bold effect. Others enjoy soft, tonal palettes that highlight the texture rather than the contrast. Experimenting with shades can bring out different moods in your final project.
Lastly, practice makes progress. Even if your first square is not perfect, repeating the steps will help refine your tension and stitch placement. Over time, you will find that the flower granny square becomes second nature.
When learning how to crochet a flower granny square – crochet pattern, following a step-by-step method ensures clarity and success. The first step begins with creating the flower center. Using a magic ring, crochet a few chains and a set of stitches (such as double crochet clusters) to form the foundation of the petals. Pull the ring closed to tighten the base, and you will see a small round flower emerging.
Next, build the petals. Each petal can be formed by working multiple stitches into one space, often using double crochets to create a rounded and full look. After finishing one petal, you chain a small number of stitches to move to the next space, repeating until the flower is complete. The petals should circle around the center, resembling a blooming flower.
Once the flower is ready, the transition to a square begins. This step usually involves working into the chain spaces behind the petals. You will add clusters of stitches and chain spaces that naturally form corners, slowly squaring off the motif while still highlighting the flower in the middle.
As you continue adding rounds, the square grows larger. Each round follows a familiar granny square rhythm: clusters of double crochets separated by chains, with additional stitches at the corners to maintain the square shape. The flower remains in the center, while the background expands outward.
Tension control is especially important here. If your stitches are too tight, the square may curl. If too loose, it may feel floppy. Keeping an even rhythm ensures your flower granny square looks neat and holds its structure.
Finally, once the square reaches the desired size, fasten off and weave in the yarn ends. Your finished square is now ready to be joined with others or used as a standalone decorative piece.
Learning how to crochet a flower granny square – crochet pattern opens up countless creative possibilities. These squares can be transformed into practical or decorative items depending on your imagination. One of the most common uses is in blankets. By joining many flower granny squares together, you can create a colorful, cozy blanket perfect for gifts or home décor.
Cushion covers are another popular project. A few squares joined together can turn a plain pillow into a vibrant accent piece. The floral motif adds a handmade touch that enhances any living space. Changing the color scheme allows you to match different seasons or themes in your home.
Bags and purses also benefit from this design. Crocheted tote bags made from flower granny squares are stylish, eco-friendly, and durable. You can line the bag with fabric for added strength and use a sturdy strap to make it practical for daily use.
Garments are another option. Many crocheters use flower granny squares to design vests, cardigans, or even summer tops. The breathable and decorative quality of the squares makes them suitable for layering and adding personality to clothing.
Home accessories such as table runners, placemats, and wall hangings can also be made with these squares. They bring color and artistry to everyday spaces and are relatively quick to assemble compared to larger projects like blankets.
Additionally, small projects such as bookmarks or coasters allow beginners to practice the technique without committing to a large piece. These mini versions make excellent gifts and help build confidence in handling the stitches.
When working on how to crochet a flower granny square – crochet pattern, there are several tips that can make the process smoother and more enjoyable. First, always check your gauge. While granny squares are forgiving, consistent tension ensures your squares match in size, making joining easier later.
Experiment with yarn textures. A smooth cotton yarn creates crisp stitch definition, while a soft acrylic or wool blend gives a warmer and cozier feel. Mixing textures in one project can add depth and interest, though consistency is usually recommended for larger works.
Blocking is another essential step. Once your square is complete, dampen it lightly and pin it to a flat surface in its intended dimensions. Allow it to dry completely before removing the pins. Blocking helps the stitches settle and the square maintain its shape.
Customization is where creativity truly shines. You can change the number of petals, use multicolored yarn for a gradient effect, or even add embellishments like beads to the flower center. Each modification turns a simple granny square into a personalized piece of art.
Joining techniques are equally important. You can sew squares together with a tapestry needle or crochet them together using slip stitches or single crochets. The method you choose impacts the overall look of your finished project. For example, visible joins can add texture, while invisible joins create a seamless effect.
Finally, enjoy the process. Crochet is not just about the final result but also about the relaxation and satisfaction that come with each stitch. Taking your time, experimenting, and embracing imperfections will make the journey rewarding.
What is the easiest way to start a flower granny square?
The easiest way is to use a magic ring as the foundation. It creates a neat center and allows the petals to form evenly around it.
Can beginners learn how to crochet a flower granny square – crochet pattern?
Yes, beginners can absolutely learn. The project involves basic stitches like chains, slip stitches, and double crochets, making it a great learning opportunity.
How many flower granny squares do I need for a blanket?
The number depends on the desired blanket size and the size of your squares. Small baby blankets may require around 30 squares, while larger bed covers may need over 100.
Which yarn is best for flower granny squares?
Medium-weight yarns like worsted or aran are often recommended for beginners. They provide good stitch definition and make the squares easier to handle.
How do I make sure my squares are the same size?
Maintaining even tension and checking your gauge are key. Blocking each square also helps standardize the size before joining.
Can I mix different types of granny squares in one project?
Yes, mixing styles adds variety. Just make sure all squares are blocked to the same dimensions so they fit together properly.
In this article, you discovered how to crochet a flower granny square – crochet pattern, from understanding the basics and step-by-step instructions to exploring creative uses and customization tips. This versatile design allows you to create unique projects that showcase both tradition and individuality.
Now it is your turn to pick up your yarn and hook and give it a try. Whether you are making a single coaster or a large blanket, each flower granny square will be a beautiful expression of your creativity. I would love to hear your opinion and suggestions—share your thoughts about this guide and let me know how your own projects turn out!


