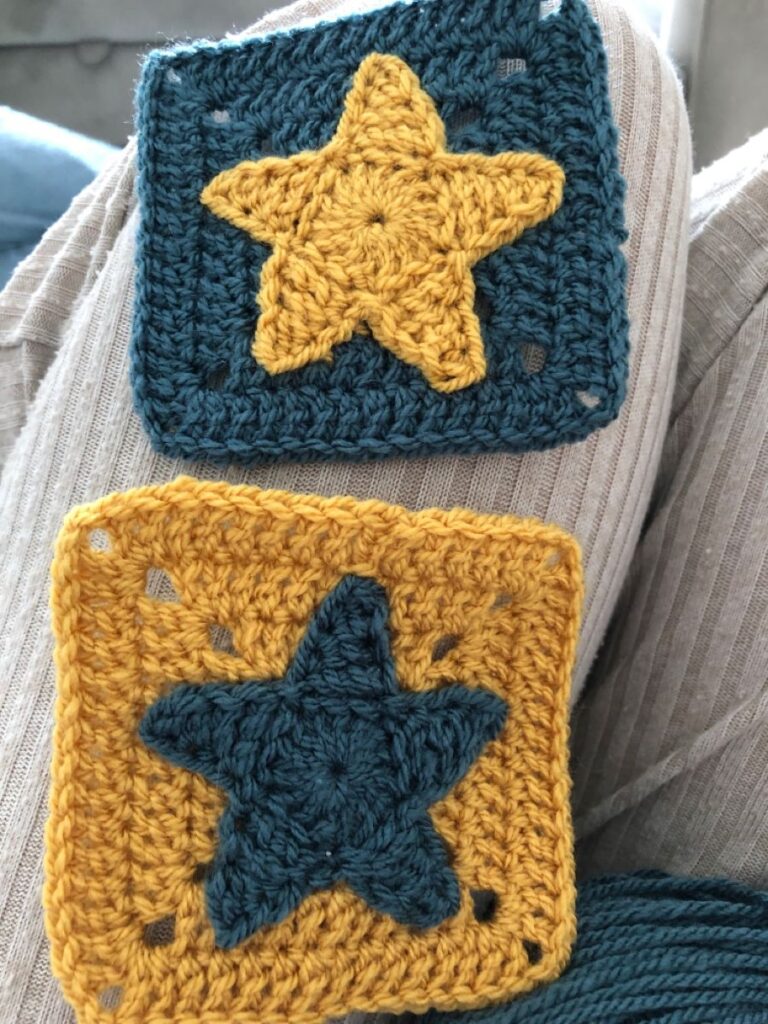
Star Granny Square - Pattern
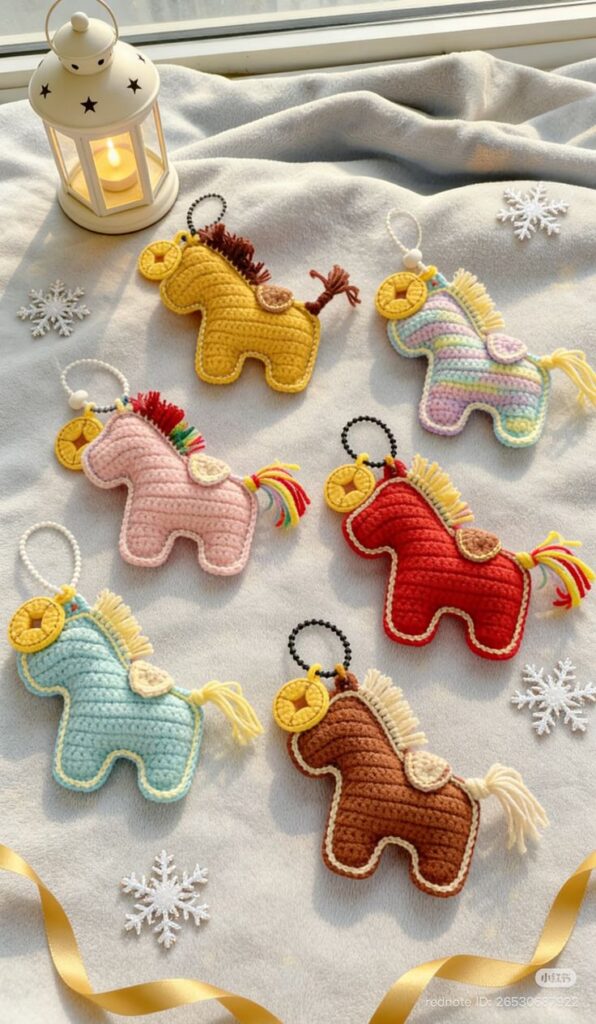
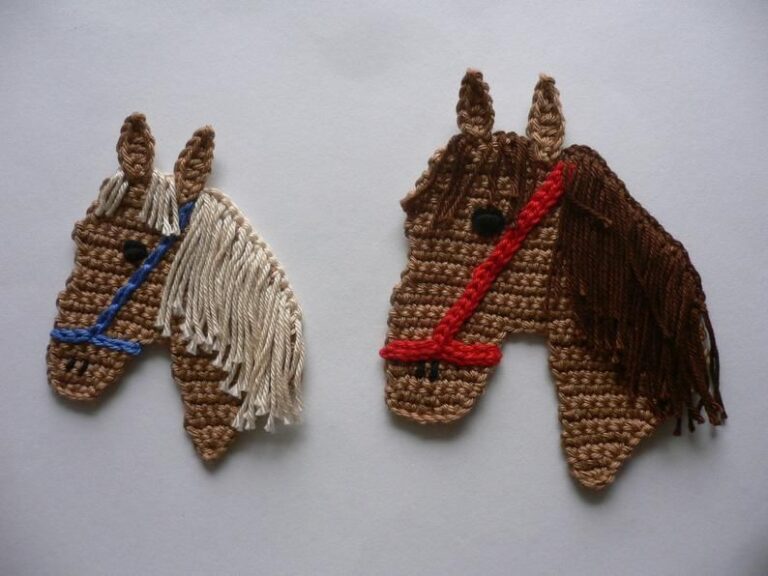
How to crochet Horse keychain – Pattern is a delightful and creative project that combines charm, practicality, and handmade love into one small accessory. If you have ever wanted to create something adorable, functional, and meaningful with yarn, this tutorial-style guide will walk you through everything you need to know. Whether you are a beginner or an experienced crocheter, learning how to crochet Horse keychain – Pattern can become one of your favorite quick projects.
Crocheting small amigurumi items like keychains is a wonderful way to use leftover yarn and practice shaping techniques. A crochet horse keychain is especially popular because horses symbolize strength, freedom, loyalty, and grace. This tiny handmade piece can be used as a bag charm, backpack accessory, gift topper, or even a thoughtful handmade present for horse lovers.
In this comprehensive guide, you will learn the essential materials, stitches, shaping techniques, assembly process, and finishing touches required to successfully complete your own Horse keychain crochet pattern. Along the way, we will explain key terms such as amigurumi, magic ring, single crochet, invisible decrease, and crochet embellishment techniques, ensuring that every step is clear and beginner-friendly.
Before starting your How to crochet Horse keychain – Pattern, gathering the right materials is essential for a smooth and enjoyable process. Choosing quality supplies ensures durability and a polished final result. The beauty of this project lies in its simplicity, as it requires only basic crochet tools.
First, you will need worsted weight yarn or DK yarn in your preferred horse colors. Common shades include brown, beige, black, white, and gray. Cotton yarn is often recommended for keychains because it is sturdy and maintains shape well. Acrylic yarn also works, especially for beginners who want an affordable option.
Next, select the correct crochet hook size. Typically, a smaller hook such as 2.5 mm to 3.5 mm works best for amigurumi projects. A smaller hook creates tighter stitches, preventing stuffing from showing through and helping the horse keychain keep its form.
You will also need polyester fiberfill stuffing to give your crochet horse a soft yet firm structure. Use small amounts at a time and gently shape as you go. Overstuffing may distort the shape, while under-stuffing may make the piece look flat.
Essential tools include a yarn needle, stitch markers, and small sharp scissors. A stitch marker is especially helpful when working in continuous rounds, which is common in amigurumi patterns like this one. It helps track the beginning of each round.
Finally, to transform your crochet horse into a keychain, you will need a keychain ring or lobster clasp. These hardware pieces are easy to attach and make your project functional. Choosing high-quality metal findings ensures long-term durability.
Mastering the fundamental techniques is the key to successfully completing your How to crochet Horse keychain – Pattern. Most crochet horse keychains are made using amigurumi methods, which involve working in continuous spirals without joining rounds.
The first essential technique is the magic ring (also known as magic circle). This adjustable loop allows you to close the center tightly, which is perfect for creating the horse’s head and body without leaving visible holes. It is one of the most important foundations in amigurumi projects.
The primary stitch used in this project is the single crochet stitch. This stitch creates a dense fabric ideal for shaping small animals. Consistent tension is important to ensure that your horse keychain maintains a neat appearance throughout the project.
You will also use increase stitches, which involve placing two single crochets in the same stitch. Increases help expand the shape, forming rounded sections like the horse’s head and body. Proper placement of increases ensures symmetry.
Equally important is the invisible decrease technique. Unlike regular decreases, invisible decreases create a smoother finish and prevent gaps. This is especially important in small projects where every detail is visible.
Another helpful technique is surface crochet or embroidery details. These methods allow you to add eyes, nostrils, a mane, and other defining features. Simple embroidery with black or dark brown yarn can give your crochet horse personality and charm.
Now let’s explore the construction process of your How to crochet Horse keychain – Pattern. This section explains the general structure and assembly, helping you understand how each piece comes together.
Begin by crocheting the horse’s head using the magic ring technique. Work several rounds of single crochet with strategic increases to form a rounded shape. After reaching the widest part of the head, continue with even rounds before starting your decreases.
As you decrease, begin lightly stuffing the head with polyester fiberfill. Add small amounts gradually and shape gently with your fingers. Continue decreasing until the opening is small, then close securely and fasten off.
Next, crochet the body using a similar method. The body is usually slightly oval or cylindrical. Again, increases create width while decreases shape the lower section. Keep the stuffing firm but balanced to ensure stability when attached to keys.
The ears, muzzle, and legs can be crocheted separately in miniature pieces. These smaller elements require careful stitching but are essential for realism. Sew them securely using a yarn needle, making sure they are evenly aligned.
For the mane and tail, you may use short strands of yarn attached individually or crochet small chains and stitch them into place. This adds texture and visual appeal to your Horse keychain crochet pattern.
Finally, attach the keychain ring by creating a small reinforced loop at the top of the head or back. Use tight stitches and secure knots to prevent detachment. Double-check all sewn parts before finishing.
One of the most enjoyable aspects of learning How to crochet Horse keychain – Pattern is the opportunity to personalize your creation. Customization transforms a simple project into a meaningful keepsake.
You can experiment with different yarn colors to represent various horse breeds. For example, create a white horse, a chestnut tone, or a black stallion. Adding small color variations on the legs or muzzle enhances realism.
Consider adding safety eyes instead of embroidered eyes if the keychain is intended for adult use. Safety eyes provide a polished, professional finish. However, always ensure they are securely fastened.
Another creative idea is incorporating small crochet accessories such as a tiny saddle or scarf. These simple additions can elevate your crochet horse keychain pattern and make it stand out.
Texture also plays a role in customization. Using fuzzy yarn for the mane or combining different yarn weights creates visual contrast. Just ensure that durability remains a priority for a keychain project.
You may also add initials or small charms alongside the key ring. Personalization makes the horse keychain an ideal handmade gift for birthdays, holidays, or special celebrations.
To finish, carefully weave in all loose ends and inspect the project from every angle. Gently reshape the piece if needed. A clean finish ensures your How to crochet Horse keychain – Pattern looks professional and long-lasting.
What skill level is required for a crochet horse keychain?
This project is generally beginner to intermediate level. If you are comfortable with single crochet, increases, decreases, and sewing small pieces, you can successfully complete it.
How long does it take to crochet a horse keychain?
Most crocheters can complete a crochet horse keychain in two to four hours, depending on experience and detailing.
What type of yarn is best for durability?
Cotton yarn is often recommended because it is strong and holds its shape well. Acrylic yarn is also suitable for lightweight keychains.
Can I wash a crochet horse keychain?
Yes, but hand washing gently in cool water is recommended. Allow it to air dry completely to maintain shape.
How do I make the keychain more secure?
Reinforce the loop used to attach the key ring with extra stitches and secure knots. Double stitching provides added durability.
Can this pattern be adjusted to make a larger horse?
Yes, using thicker yarn and a larger hook will naturally increase the size. You can also modify stitch counts proportionally.
Is this project suitable for selling?
Handmade crochet keychains are popular at craft fairs and online marketplaces. Always ensure originality if adapting a pattern.
Learning How to crochet Horse keychain – Pattern is a rewarding and enjoyable journey into the world of amigurumi. Throughout this guide, we explored the essential materials, foundational crochet techniques, shaping methods, assembly steps, and creative customization ideas. By understanding core concepts such as magic ring, single crochet stitch, invisible decrease, and proper stuffing techniques, you can confidently create a charming and durable crochet horse keychain.
This project is perfect for using leftover yarn, practicing detailed shaping, and creating heartfelt handmade gifts. With patience, attention to detail, and creativity, your crochet horse keychain can become a treasured accessory or a meaningful present. Keep practicing, experiment with colors and textures, and enjoy every stitch of your handmade creation.