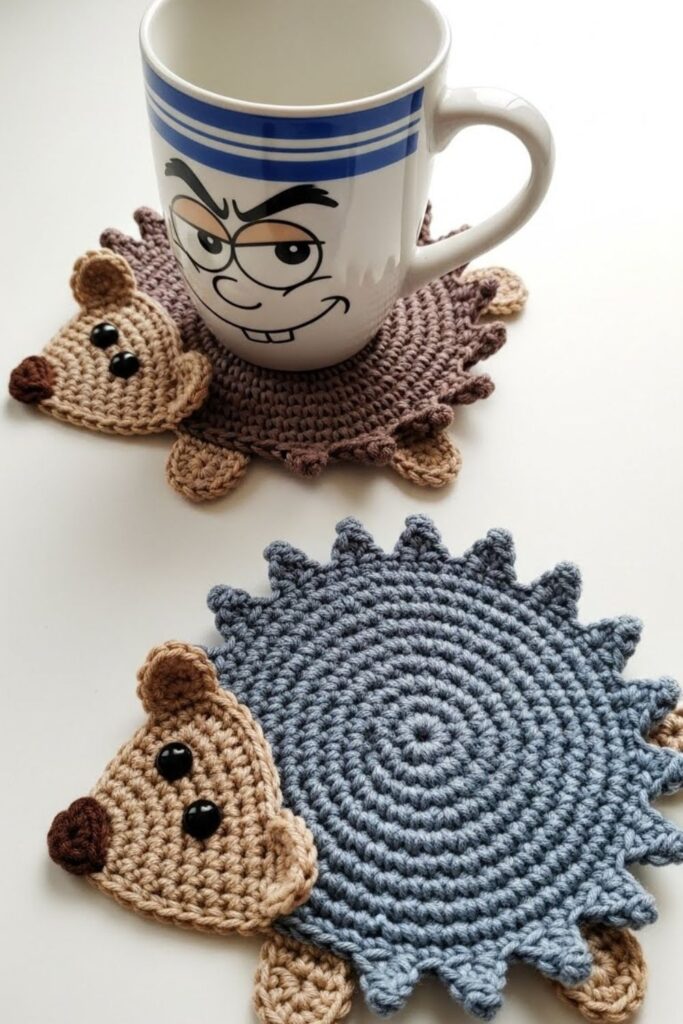
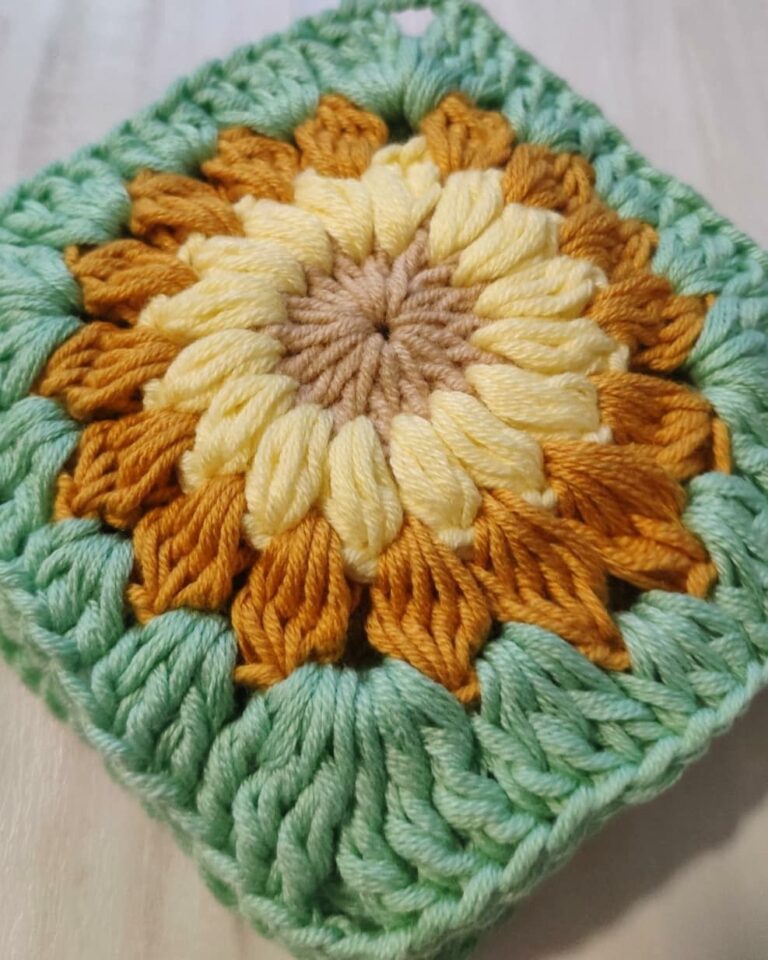
How to Make a Hedgehog Coaster - Crochet Pattern
How to Make a Hedgehog Coaster – Crochet Pattern is a delightful and creative way to bring charm and functionality into your home while enjoying the relaxing art of crochet. Whether you are a beginner or someone with more experience in crochet, this project offers a perfect balance between simplicity and creativity. With just a few materials and a bit of patience, you can create something truly adorable and practical.
Crocheting is more than just a hobby; it is a form of expression that allows you to turn simple yarn into beautiful handmade pieces. The How to Make a Hedgehog Coaster – Crochet Pattern stands out because it combines functionality with a cute design that appeals to all ages. These coasters are perfect for protecting your surfaces while adding a cozy, handmade touch to your home décor.
In this guide, you will learn everything you need to know about the How to Make a Hedgehog Coaster – Crochet Pattern, from materials and techniques to step-by-step instructions and helpful tips. By the end of this article, you will feel confident in creating your own hedgehog coaster and even customizing it to suit your personal style.
Before diving into the project, it is important to understand the foundation of the How to Make a Hedgehog Coaster – Crochet Pattern. This pattern is typically worked in rounds, making it ideal for those who want to practice circular crochet techniques. The coaster begins with a simple base that gradually forms the shape of a hedgehog.
One of the key elements of this pattern is the use of basic stitches such as single crochet, half double crochet, and slip stitches. These stitches are beginner-friendly and form the structure of the hedgehog’s body. If you are new to crochet, this is a great opportunity to practice and improve your skills.
The design of the hedgehog usually includes a round body, a slightly pointed face, and textured stitches that mimic the appearance of spikes. This texture adds depth and makes the coaster visually appealing. It also provides a better grip for cups and mugs.
Choosing the right yarn is essential for achieving the best results. Cotton yarn is often recommended for coasters because it is durable, absorbent, and easy to clean. It also helps the coaster maintain its shape over time.
The hook size you use will affect the final look of your coaster. A smaller hook will create tighter stitches, while a larger hook will result in a looser texture. For this pattern, a medium-sized hook is usually ideal.
Understanding these basics will make the process of following the How to Make a Hedgehog Coaster – Crochet Pattern much smoother and more enjoyable. Taking the time to learn these elements will help you avoid common mistakes and achieve a polished result.
To successfully complete the How to Make a Hedgehog Coaster – Crochet Pattern, gathering the right materials is crucial. The good news is that this project requires only a few basic supplies, making it accessible and budget-friendly.
First, you will need yarn in at least two colors. One color will be used for the hedgehog’s body, and another for the face. Neutral tones such as brown, beige, and cream are commonly used, but you can get creative with your color choices.
A crochet hook that matches your yarn weight is also necessary. Most patterns recommend a hook size between 3.5 mm and 5 mm. Using the correct hook ensures that your stitches are consistent and your coaster holds its shape.
You will also need a pair of scissors to cut the yarn and a yarn needle to weave in the ends. These tools are essential for finishing your project neatly and securely.
Safety eyes or small buttons can be used to create the hedgehog’s eyes. Alternatively, you can embroider the eyes using black yarn if you prefer a softer, child-friendly option.
A stitch marker can be very helpful when working in rounds. It allows you to keep track of your starting point and ensures that your pattern remains consistent.
Having all your materials ready before starting the How to Make a Hedgehog Coaster – Crochet Pattern will make the process smoother and more enjoyable. Preparation is key to a successful crochet project.
Now that you have your materials ready, it is time to begin the How to Make a Hedgehog Coaster – Crochet Pattern. Start by creating a magic ring, which will serve as the center of your coaster. This technique allows you to create a tight, adjustable loop.
Work a series of single crochet stitches into the magic ring to form the base. As you continue, increase the number of stitches in each round to expand the circle evenly. This will create the body of the hedgehog.
Once the base is complete, you can begin shaping the hedgehog’s face. This is typically done by working fewer increases on one side, giving the coaster a slightly oval shape. This detail adds character to your design.
To create the hedgehog’s spikes, use textured stitches such as bobble stitches or puff stitches. These stitches add dimension and make the coaster look more realistic and playful.
After completing the body, switch to a lighter yarn color to crochet the face area. This contrast helps define the hedgehog’s features and enhances the overall appearance.
Finally, add the finishing touches by attaching the eyes and embroidering the nose. Make sure all ends are securely woven in to ensure durability. Following these steps will help you successfully complete the How to Make a Hedgehog Coaster – Crochet Pattern.
When working on the How to Make a Hedgehog Coaster – Crochet Pattern, there are several tips that can help you achieve the best results. One important tip is to maintain consistent tension throughout your project. This ensures that your stitches are even and your coaster looks professional.
Customization is one of the most enjoyable aspects of crochet. You can experiment with different yarn colors, add decorative elements, or even create a set of coasters with unique designs. Personalizing your hedgehog coaster makes it truly one of a kind.
Another idea is to adjust the size of your coaster by adding or reducing rounds. This allows you to create coasters that fit different cup sizes or serve as decorative pieces.
Avoid using yarn that is too stretchy or delicate, as it may not hold the shape of the coaster well. Choosing the right material is essential for both functionality and durability.
Be careful not to skip stitches or lose track of your rounds. Using a stitch marker can help you stay organized and avoid mistakes that may affect the final result.
Lastly, take your time and enjoy the process. The How to Make a Hedgehog Coaster – Crochet Pattern is meant to be a relaxing and rewarding project. Patience and attention to detail will make a big difference in the outcome.
What skill level is required for this pattern?
The How to Make a Hedgehog Coaster – Crochet Pattern is suitable for beginners, but basic knowledge of crochet stitches is recommended.
What type of yarn is best for coasters?
Cotton yarn is the best choice because it is absorbent, durable, and holds its shape well.
How long does it take to make one coaster?
Depending on your skill level, it can take between one to three hours to complete a single hedgehog coaster.
Can I wash the coaster?
Yes, most cotton yarn coasters are machine washable, but it is recommended to air dry them to maintain their shape.
Can I sell coasters made from this pattern?
In most cases, yes. Handmade items are often sold at craft fairs or online, but always ensure you respect any pattern usage guidelines.
What can I do if my coaster curls?
Curling usually happens due to tight stitches. Try using a slightly larger hook or blocking your finished piece.
In this complete guide on How to Make a Hedgehog Coaster – Crochet Pattern, you learned everything from the basic techniques to the finishing details that bring this adorable project to life. From selecting the right materials to mastering the stitches and adding creative touches, each step plays an important role in creating a beautiful and functional coaster.
This pattern is perfect for anyone looking to combine creativity with practicality. Not only does it help protect your surfaces, but it also adds a handmade charm to your home or makes a thoughtful gift for loved ones.
Now it is your turn to try the How to Make a Hedgehog Coaster – Crochet Pattern and enjoy the process of creating something unique with your own hands. If you found this guide helpful, feel free to share your honest opinion and leave suggestions. Your feedback is always welcome and helps improve future tutorials!


