
Cross Door - Quilt Pattern
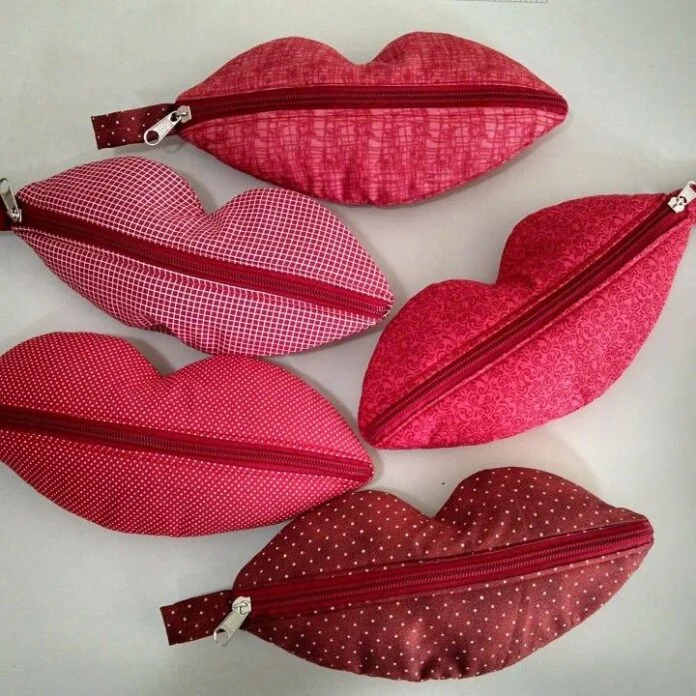
Creating a DIY Cosmetic Zipper Pouch. Cute Cosmetic Bag. Gift idea. Quilt Pattern is a delightful and fulfilling sewing project that blends practicality with creativity. Whether you’re a seasoned quilter or a beginner eager to try something new, making your own quilted zipper pouch allows you to showcase your personal style while crafting a thoughtful and functional item.
The beauty of the DIY Cosmetic Zipper Pouch. Cute Cosmetic Bag. Gift idea. Quilt Pattern lies in its versatility. Not only can it be used to organize makeup and toiletries, but it also makes for a charming handmade gift that shows effort and care. You can personalize each pouch with different fabrics, quilting styles, and zipper accents to suit the recipient—or to treat yourself.
In this tutorial, we’ll guide you through everything you need to know to make your own DIY Cosmetic Zipper Pouch. Cute Cosmetic Bag. Gift idea. Quilt Pattern from scratch. From choosing the right materials to assembling the pouch step by step, this article will equip you with the tips and knowledge to sew confidently and create a bag you’ll love.
The first step in making a DIY Cosmetic Zipper Pouch. Cute Cosmetic Bag. Gift idea. Quilt Pattern is selecting the perfect fabrics and supplies. Your choices will define the final look and functionality of the bag.
Choose high-quality quilting cotton for the exterior of your pouch. Quilting cotton is sturdy, comes in endless patterns, and is easy to sew, making it an ideal choice for this project. You can even use scraps from other quilting projects to reduce waste and add a touch of sustainability.
For the lining, go with a lightweight cotton or water-resistant fabric, especially if you plan to store cosmetics inside. This helps protect the bag from spills or stains and makes it easy to clean.
You will also need interfacing or quilt batting to add structure to your DIY Cosmetic Zipper Pouch. Cute Cosmetic Bag. Gift idea. Quilt Pattern. This creates a plush feel and gives the pouch a polished, store-bought appearance.
A quality zipper is essential. Choose a zipper that is at least 1 inch longer than the width of your pouch, allowing extra room to maneuver while sewing. Decorative zippers with metallic finishes or colorful teeth can add a unique touch.
Optional embellishments like fabric labels, tags, or quilting accents such as topstitching and hand embroidery will personalize your project and elevate the design.
Lastly, gather your basic sewing tools: sewing machine, rotary cutter or scissors, quilting ruler, pins or clips, iron, and thread that matches or complements your fabric.
Now that your materials are ready, it’s time to begin cutting and preparing the pieces for your DIY Cosmetic Zipper Pouch. Cute Cosmetic Bag. Gift idea. Quilt Pattern. Precision is key to a clean and professional finish.
Decide on the size of your cosmetic pouch. A common size is 9 inches wide by 6 inches tall, but you can adjust it to suit your needs. Cut two pieces of your main fabric, two pieces of lining, and two pieces of batting or interfacing to match your chosen dimensions.
Quilt your exterior fabric to the batting. You can use simple straight lines, free-motion quilting, or creative geometric designs. This is the step where your pouch truly starts to take on character and texture.
Trim all pieces so they are even and perfectly aligned. A rotary cutter and quilting ruler will ensure clean, straight edges for all components.
If you’re adding any interior pockets or labels, now is the time to sew those to the lining. Consider adding a small slip pocket for holding tiny items like hair ties or lip balm.
Once quilted and trimmed, press all layers thoroughly with an iron. Crisp, flat pieces are easier to work with and will help ensure a smooth assembly process.
Remember to mark the zipper placement on the top edge of your outer panels using a disappearing fabric marker. Accurate markings at this stage will help with zipper alignment later.
Sewing the zipper can seem intimidating at first, but it’s easier than it looks! With a few tips, you’ll be attaching the zipper to your DIY Cosmetic Zipper Pouch. Cute Cosmetic Bag. Gift idea. Quilt Pattern in no time.
Start by placing one exterior panel right side up. Then, align the zipper along the top edge, facing down, with the zipper pull on the left. Layer the lining piece on top, right side down, so the zipper is sandwiched between the exterior and lining.
Pin or clip the layers together and sew along the top edge using a zipper foot. This foot allows you to sew close to the zipper teeth for a neat finish.
Flip the fabrics so both right sides are facing out and press the seam away from the zipper. Topstitch along the edge to keep the fabric from catching in the zipper and to give your pouch a finished look.
Repeat the same steps on the other side of the zipper with the remaining exterior and lining pieces. Once both sides are sewn, open the zipper halfway—this is important so you can turn the pouch right side out later.
Layer the exterior pieces right sides together, and the lining pieces right sides together. Pin or clip the edges, aligning corners and seams. Sew all the way around the perimeter, leaving a 3-inch opening at the bottom of the lining.
Clip the corners to reduce bulk, and turn the pouch right side out through the opening in the lining. Use a blunt tool to push out the corners gently.
Press the pouch and hand-stitch or machine-sew the opening in the lining closed. Give the entire pouch a final press for a crisp finish.
Now that your DIY Cosmetic Zipper Pouch. Cute Cosmetic Bag. Gift idea. Quilt Pattern is complete, it’s time to personalize it and make it truly one-of-a-kind. This is where you can let your creativity shine.
Add a decorative zipper pull using ribbon, leather, or beads for a pop of charm and functionality. It makes the zipper easier to grasp and adds an extra touch of style.
Consider embellishing the exterior with hand embroidery, fabric appliqué, or iron-on patches. These additions can reflect your personality or make the bag extra special as a gift.
If you’re making multiple pouches as gifts, you can coordinate the fabric and color palette for a cohesive collection. This is a perfect option for bridal party gifts or holiday stocking stuffers.
Attach a fabric label with your name or brand if you sell your creations or want to show off your handiwork. Labels give the bag a professional touch and make it feel like a boutique item.
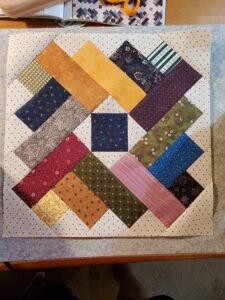
Another fun option is to add quilt blocks to the exterior panels. Mini log cabins, flying geese, or simple patchwork squares can turn your DIY Cosmetic Zipper Pouch. Cute Cosmetic Bag. Gift idea. Quilt Pattern into a mini canvas of quilting art.
Finally, consider packaging the pouch with travel-size products or small gifts inside when giving it to others. This thoughtful touch makes it feel complete and personal.
Q: What size should I make my cosmetic zipper pouch?
A: A good starting size is 9″ x 6″, but you can customize the dimensions depending on your needs. Larger pouches work well for travel, while smaller ones are great for everyday use.
Q: Do I need to quilt the fabric, or can I skip that step?
A: Quilting adds texture and structure, which enhances the look and feel of the pouch. However, if you prefer a simpler design, you can use fusible interfacing instead.
Q: What’s the best zipper length for this project?
A: Choose a zipper that is slightly longer than your fabric width—around 10″ for a 9″ pouch—to allow easier installation and trimming.
Q: Can I sew this pouch by hand if I don’t have a machine?
A: Yes, it’s possible to hand-sew the pouch, though it will take more time. Use strong, even stitches, especially around the zipper and seams.
Q: Is this project beginner-friendly?
A: Absolutely! The DIY Cosmetic Zipper Pouch. Cute Cosmetic Bag. Gift idea. Quilt Pattern is perfect for beginners wanting to learn quilting and zipper techniques in a manageable project.
Q: What are some gift ideas for these pouches?
A: Fill them with makeup, skincare items, travel accessories, or even sewing tools. They make perfect gifts for birthdays, holidays, or bridesmaid presents.
The DIY Cosmetic Zipper Pouch. Cute Cosmetic Bag. Gift idea. Quilt Pattern is a satisfying and rewarding sewing project that combines creativity with usefulness. By following this tutorial, you’ve learned how to choose the right fabrics, quilt the panels, sew a zipper with confidence, and personalize your pouch to make it extra special.
Whether you’re crafting for yourself or creating heartfelt gifts for loved ones, these cute pouches are sure to impress. We hope this guide has inspired you to grab your favorite fabrics and start sewing today!
If you enjoyed this article or tried making your own pouch, we’d love to hear your thoughts! Please leave a sincere opinion below and feel free to share suggestions for future tutorials. Happy sewing!


