
Cross Door - Quilt Pattern
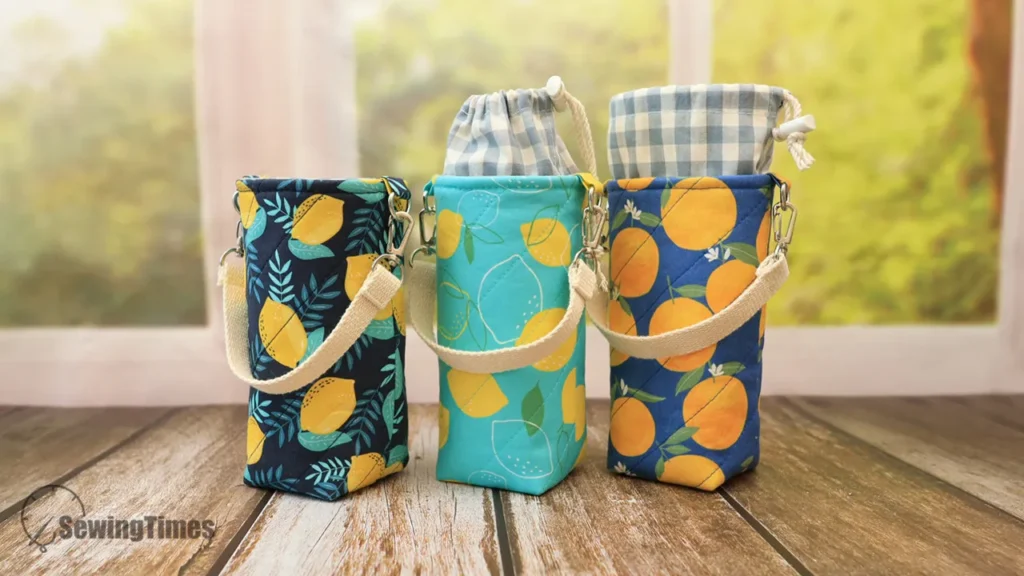
The Easy Bottle Bag Tutorial – Quilt Pattern is the perfect sewing project for crafters who want to create something both functional and stylish. Whether you are planning a gift for a friend, making a wine tote for a dinner party, or designing a reusable bottle bag for your own kitchen, this project offers a simple yet rewarding experience. With just a few fabric pieces, some basic quilting techniques, and a little bit of creativity, you can make a beautiful quilted bottle bag that stands out for its charm and durability.
What makes the Easy Bottle Bag Tutorial – Quilt Pattern so appealing is its versatility. You can customize it to fit different bottle sizes, from water bottles to wine or specialty oils, and choose fabrics that suit any occasion. This flexibility means you can create elegant designs for formal events or fun and colorful patterns for casual gatherings. Quilting adds texture and strength, ensuring that your bag is both attractive and functional. Plus, it’s an eco-friendly alternative to disposable gift bags.
In this guide, we will walk through all the steps needed to make your own Easy Bottle Bag Tutorial – Quilt Pattern, from selecting fabrics and cutting pieces to quilting and assembling the bag. You’ll also discover tips for adding personal touches that make your bottle bag truly unique. By the end, you’ll feel confident in creating a custom quilted bag that you can proudly use or gift to someone special.
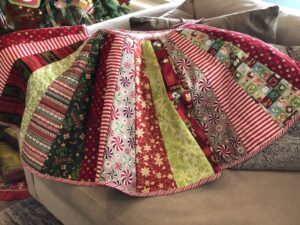
Selecting the right fabrics is the foundation of a beautiful Easy Bottle Bag Tutorial – Quilt Pattern. Quilting cotton is a great choice for this project because it is easy to sew, holds its shape well, and comes in countless colors and prints. You can opt for a single fabric for a sleek, minimalist look or mix and match patterns for a more playful style.
It’s important to consider the theme or occasion when choosing your fabrics. For example, festive prints work well for holiday gifts, while neutral or floral patterns are perfect for year-round use. If you want a bag that looks more luxurious, you might choose a fabric with metallic accents or textured weaves.
In addition to your outer fabric, you will need lining fabric to give your bottle bag a clean finish inside. The lining can either match the outer fabric or provide a contrasting surprise when the bag is opened. This small detail adds a touch of sophistication to your final piece.
To give the bag stability and protect the bottle inside, fusible fleece or interfacing is essential. These materials are placed between the outer fabric and the lining to create structure and durability.
You will also need a sturdy handle material, such as cotton webbing or a quilted fabric strip, to make carrying the bag comfortable and secure. Finally, make sure you have the basic sewing tools: a sewing machine, rotary cutter, quilting ruler, scissors, and coordinating thread.
By gathering the right materials before you start, you set yourself up for a smooth and enjoyable sewing process.
Once your materials are ready, it’s time to cut the pieces for your Easy Bottle Bag Tutorial – Quilt Pattern. Accurate cutting is essential to ensure the bag’s proportions are correct and that all pieces fit together neatly during assembly.
Begin by measuring the height and circumference of the bottle you want to fit inside the bag. Add extra inches for seam allowances and ease, so the bottle fits comfortably without straining the seams. Use your quilting ruler and rotary cutter for clean, straight edges.
You’ll typically need one main rectangle for the bag body, a circular piece for the base, and smaller strips for the handles or drawstring casing if you choose to add one. Cut matching pieces of lining fabric and interfacing for each part.
Once all the pieces are cut, fuse the interfacing or fleece to the wrong side of the outer fabric pieces. This step adds structure to the bag and helps it stand upright even when empty. Press the pieces with an iron to ensure they are flat and smooth.
If you plan to quilt your outer fabric, now is the time to mark quilting lines with a fabric-safe pen or chalk. Popular quilting patterns for bottle bags include diagonal lines, crosshatch designs, or simple vertical stitching.
Quilting your fabric before assembly not only enhances the appearance but also reinforces the material, making the bag sturdier. Take your time with this stage to ensure even stitching and a neat finish.
With all pieces cut, stabilized, and quilted, you’re ready to move on to constructing the bag.
The construction of the Easy Bottle Bag Tutorial – Quilt Pattern starts with sewing the side seam of the main body piece. Place the fabric right sides together and stitch along the side, leaving a clean seam. Press the seam open or to one side, depending on your preference.
Next, attach the circular base to the bottom of the bag body. This step can be a little tricky, so use plenty of pins or clips to secure the fabric evenly around the curve. Sew slowly, easing the fabric as you go to prevent puckering.
Once the outer bag is assembled, repeat the process with the lining fabric, but leave a small opening at the base or side seam. This opening will be used later to turn the bag right side out.
If your design includes handles, now is the time to attach them. Position the handles evenly on both sides of the bag, making sure they are the same length and securely stitched into the seam allowance.
After attaching the handles, place the lining inside the outer bag with right sides facing each other. Align the top edges and sew around the opening. Turn the bag right side out through the lining opening, then stitch the opening closed.
Give the top edge a final press and topstitch if desired. This adds durability and gives the bag a polished, finished look.
At this stage, your quilted bottle bag is fully assembled and ready for the final touches.
One of the joys of making an Easy Bottle Bag Tutorial – Quilt Pattern is that you can personalize it in countless ways. Small design changes can completely transform the look and function of the bag.
Consider adding decorative quilting patterns, such as swirls, waves, or custom motifs that match the occasion. If you enjoy hand embroidery, you can stitch a monogram or small design on the outer fabric for a personal touch.
Appliqué is another great option for embellishment. You can add fabric shapes like hearts, stars, or leaves to make the bag more festive. Fabric paint or iron-on vinyl designs can also give a modern and fun twist to the project.
If you prefer a more practical variation, you can add a drawstring closure at the top instead of leaving it open. This provides extra security for the bottle and can make the bag more versatile for carrying different items.
For added functionality, consider sewing a small pocket on the side of the bag to hold a gift tag, corkscrew, or other small accessories. This makes the bag even more useful and thoughtful as a gift.
No matter how you personalize it, the most important thing is to enjoy the process and let your creativity shine.
1. Is this project suitable for beginners?
Yes, the Easy Bottle Bag Tutorial – Quilt Pattern is beginner-friendly, especially if you follow step-by-step instructions and take your time with curved seams.
2. What size bottle does this pattern fit?
The size can be easily adjusted to fit anything from small water bottles to tall wine bottles by changing the height and width measurements.
3. Do I need special quilting tools?
Basic sewing tools and a sewing machine are sufficient, but a rotary cutter and quilting ruler help achieve precise cuts.
4. Can I make this bag without quilting?
Yes, but quilting adds durability and texture, which can improve both appearance and function.
5. How long does it take to complete one bag?
Most sewists can finish in 1–3 hours, depending on experience and level of detail added.
6. Is it washable?
Yes, if made with washable fabrics and interfacing. Always pre-wash fabrics to prevent shrinkage.
Making an Easy Bottle Bag Tutorial – Quilt Pattern is a fun, practical, and creative sewing project. From choosing the right fabrics and quilting designs to assembling and personalizing the bag, each step allows you to create something beautiful and functional. Whether as a thoughtful handmade gift or for your own use, this bottle bag will be appreciated for its charm and eco-friendliness.
I hope this guide has inspired you to start your own project. Please share your honest opinions and suggestions—I’d love to hear about your experience and ideas for making it even better.


