
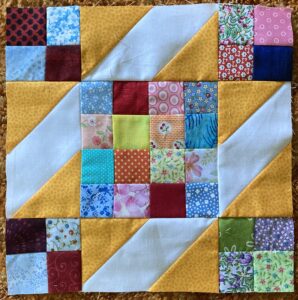
Cross Door - Quilt Pattern
The Free Quilted Slipper Tutorial – Quilt Pattern is a wonderful way to combine both comfort and creativity. Quilting is often associated with blankets, wall hangings, or decorative pieces, but this project shows just how versatile quilting can be. Making your own quilted slippers allows you to enjoy the softness and durability of quilted fabric while creating something functional and cozy for everyday use.
When you follow a Free Quilted Slipper Tutorial – Quilt Pattern, you are not only sewing a useful item but also practicing quilting techniques on a smaller project. This makes it perfect for beginners who want to build their skills or for experienced quilters looking for a quick, satisfying project. The slippers can be made from leftover fabric, giving your scraps new life in a practical and stylish way.
The beauty of this tutorial lies in its flexibility. You can choose fabrics that reflect your style, mix and match colors, or even repurpose old quilt blocks into new, wearable art. With just a few materials and basic sewing skills, the Free Quilted Slipper Tutorial – Quilt Pattern becomes a delightful addition to your handmade wardrobe or a heartfelt gift for friends and family.

To begin your journey with the Free Quilted Slipper Tutorial – Quilt Pattern, you need to gather a few essential materials. Having everything ready at the start will make the process smooth and enjoyable.
First, select fabrics for the exterior and lining of your slippers. Quilting cotton works beautifully, but you can also experiment with flannel or soft fleece for extra warmth. Batting is necessary to give the slippers structure and comfort, so choose a lightweight batting that can easily be sewn through.
You will also need sewing tools like sharp scissors, quilting pins, a rotary cutter, and a cutting mat. A sewing machine with a walking foot attachment is helpful to handle the quilt layers without shifting. Don’t forget to have matching thread, as it will make the final project look neat and professional.
Before cutting, take time to measure your feet or the recipient’s feet accurately. This step is crucial because it ensures the slippers fit comfortably. Using a simple paper template traced from your foot can help create a custom fit. Templates can be adjusted slightly larger or smaller, depending on your preference for a snug or relaxed fit.
Once all the materials are prepared, pre-wash and press your fabrics. This prevents shrinkage later and makes sewing easier. Organization at this stage sets the tone for a stress-free quilting experience.
Finally, create small piles of your fabric, batting, and lining for each slipper. This makes it easier to visualize the project and stay on track throughout the Free Quilted Slipper Tutorial – Quilt Pattern.
The Free Quilted Slipper Tutorial – Quilt Pattern follows a simple process that anyone can achieve with patience. Even if you are new to quilting, this project allows you to practice stitching and layering techniques.
Start by quilting the fabric layers together. Place your outer fabric, batting, and lining in a sandwich, then secure them with quilting pins or spray adhesive. Simple straight-line quilting or diagonal patterns work well and are easy to sew. These stitches not only hold the layers but also add a decorative element.
Once quilted, cut out the slipper shapes using your prepared template. Accuracy here ensures that both slippers are the same size and shape. Make sure to cut mirrored pieces for the left and right feet.
Next, sew the upper part of the slipper by joining the top edges. This creates the shape that will cover your toes. Pressing the seams open at this stage helps reduce bulk and gives a cleaner finish.
Attach the quilted top piece to the slipper sole. Carefully align the edges and pin them in place before stitching. Using a walking foot is highly recommended, as it prevents the layers from slipping during sewing.
Finish the raw edges with bias binding or fabric tape. This step not only secures the seams but also adds a polished and professional appearance to your slippers. Choose a binding color that complements your fabrics for a cohesive look.
After completing the stitching, try on your slippers to check the fit. Minor adjustments can be made by taking in seams or trimming edges slightly. This ensures the Free Quilted Slipper Tutorial – Quilt Pattern results in a perfect pair of cozy, handmade slippers.
One of the most enjoyable parts of the Free Quilted Slipper Tutorial – Quilt Pattern is the ability to customize your design. No two pairs of slippers need to look the same, and this freedom allows your creativity to shine.
Consider using patchwork for the slipper tops. Small fabric squares or triangles sewn together create a unique and colorful design. This is a fantastic way to use leftover quilt blocks or test new quilting patterns on a smaller scale.
Appliqué is another fun option. Add small shapes like hearts, stars, or flowers to the slipper tops before sewing them together. These decorative touches make your slippers more personal and visually appealing.
If you prefer a modern look, try using solid fabrics in bold colors. Simple quilting lines in contrasting thread create a sleek and stylish finish. This approach makes the slippers versatile and suitable for both adults and children.
For added warmth, line the slippers with soft fleece or flannel. These materials make the slippers extra cozy, especially for cold weather. They also give a plush feel to the inside, enhancing comfort with every step.
You can also adjust the slipper height. While this tutorial covers a basic slip-on style, you could extend the upper piece to create boot-style slippers that cover the ankles. This variation adds even more functionality to the Free Quilted Slipper Tutorial – Quilt Pattern.
Finally, consider gifting your handmade slippers. Adding a ribbon and a handmade tag transforms them into a thoughtful and personal present, perfect for birthdays, holidays, or housewarming occasions.
After completing your Free Quilted Slipper Tutorial – Quilt Pattern, it’s important to know how to care for your new slippers. Handmade quilted items require gentle handling to maintain their beauty and durability.
To clean your slippers, spot cleaning is often the best option. A mild soap and damp cloth can remove small stains without damaging the fabric. Avoid harsh chemicals that may weaken the stitching or fade the fabric colors.
If the slippers need a deeper clean, hand washing in lukewarm water is recommended. Gently squeeze out excess water without wringing, then lay them flat to dry. This method helps the slippers keep their shape.
Machine washing can be done only if sturdy fabrics and batting were used. Always place the slippers in a mesh laundry bag and wash on a delicate cycle. Air drying is essential, as heat from dryers can cause shrinkage.
Over time, slippers may show signs of wear, especially at the soles. You can reinforce them by sewing an extra layer of fabric or even using non-slip sole material for added durability and safety.
Proper storage also helps extend their life. Keep slippers in a clean, dry place when not in use. Avoid placing them in direct sunlight for long periods, as this may fade the fabrics.
By following these care tips, your handmade slippers will last longer and remain as cozy as the day they were sewn. The Free Quilted Slipper Tutorial – Quilt Pattern creates a project worth cherishing, and proper maintenance ensures it stays a beloved part of your daily comfort.
1. Can beginners follow the Free Quilted Slipper Tutorial – Quilt Pattern?
Yes, this project is beginner-friendly. It introduces basic quilting and sewing steps on a small scale, making it less overwhelming than larger quilt projects.
2. What type of fabric is best for quilted slippers?
Cotton, flannel, or fleece are excellent choices. Cotton is easy to sew, while fleece provides extra warmth and softness.
3. Do I need a special sewing machine to make quilted slippers?
A regular sewing machine works fine. However, using a walking foot attachment can make sewing through multiple layers easier and smoother.
4. Can I customize the slipper size?
Absolutely. By creating or adjusting a paper template, you can tailor the slippers to fit any foot size comfortably.
5. How do I make the slippers more durable?
Use sturdy fabrics, reinforce the soles, and consider adding non-slip material to prevent wear and provide extra grip.
6. Are quilted slippers a good gift idea?
Yes, handmade quilted slippers make thoughtful and unique gifts. They can be personalized with fabric choices and decorative touches.
The Free Quilted Slipper Tutorial – Quilt Pattern is a creative, practical, and rewarding project for quilters of all skill levels. With just a few materials and simple steps, you can create slippers that are both stylish and comfortable. This tutorial encourages customization, making each pair unique and personal.
Whether you make them for yourself or as gifts, these slippers showcase the beauty of quilting in a functional form. Now that you’ve seen how to bring this project to life, I’d love to hear your thoughts. Share your opinion and suggestions — your feedback helps keep the quilting community inspiring and supportive.


