
Cross Door - Quilt Pattern
The Half-Square Triangle Tutorial – Quilt Pattern is one of the most essential and versatile techniques every quilter should learn. This classic block is the foundation of countless quilt designs, making it perfect for both beginners and experienced quilters. With its simple geometry and endless creative potential, the half-square triangle (HST) allows you to craft unique, colorful, and perfectly balanced quilts that showcase your personal style.
In this comprehensive Half-Square Triangle Tutorial – Quilt Pattern, you will learn how to cut, sew, and press your blocks accurately, ensuring that every point aligns beautifully. This tutorial will also cover essential tips for fabric selection, color combinations, and layout ideas to make your quilt stand out. Whether you are creating a modern masterpiece or a traditional heirloom, mastering the half-square triangle is the key to achieving stunning quilting results.
What makes the Half-Square Triangle Tutorial – Quilt Pattern so beloved among quilters is its simplicity and flexibility. With just two squares of fabric, you can create a wide variety of designs — from chevrons and diamonds to stars and pinwheels. Each block tells its own story through color placement and arrangement, giving your quilt a dynamic and creative touch that reflects your personality.
The Half-Square Triangle Tutorial – Quilt Pattern begins with understanding what an HST actually is. Essentially, it is a quilt block made by cutting a square diagonally to form two equal right-angled triangles. When sewn back together, these triangles create a two-color square block that can be used in various quilt layouts.
Creating accurate HSTs requires attention to detail. Even the smallest misalignment in cutting or stitching can throw off the symmetry of your block. Therefore, precision is key — using a rotary cutter, ruler, and mat will help ensure your cuts are clean and even.
When it comes to choosing fabrics, contrast is everything. Select fabrics that have distinct color differences to highlight the geometry of the triangles. Light and dark fabric combinations create a striking visual balance that brings out the beauty of the Half-Square Triangle Tutorial – Quilt Pattern.
One common question among beginners is: “How large should my fabric squares be?” The general rule is to add ⅞ inch to the desired finished size of your HST. This allows for seam allowances and ensures accuracy when trimming.
It’s also essential to pay attention to pressing techniques. Always press seams toward the darker fabric to prevent shadowing through lighter materials. Using a hot iron and a bit of steam can help flatten seams for a crisp finish.
Finally, accuracy during sewing is just as important as cutting. Use a consistent ¼-inch seam allowance throughout your project. This consistency ensures your quilt blocks will fit together perfectly when assembled.
Now that you understand the basics, it’s time to follow a clear process for creating your Half-Square Triangle Tutorial – Quilt Pattern. The most popular and reliable method is the “two-at-a-time” technique, which ensures consistent results and minimal fabric waste.
Start by cutting two fabric squares of equal size — one from a light fabric and one from a dark fabric. Place them right sides together, ensuring all edges align perfectly. This positioning is crucial to avoid distortion when sewing.
Next, draw a diagonal line across the back of the lighter fabric square using a fabric-safe pencil or marker. This line will serve as your guide for stitching. Then, sew a straight line ¼ inch on both sides of the drawn diagonal line.
After sewing, use your rotary cutter to cut directly along the drawn line. This will produce two equal triangle units. Carefully open each one and press the seam toward the darker fabric, maintaining the clean contrast that defines this quilt block.
Trimming is the next important step. Use a square ruler to trim your blocks to the correct size, making sure all edges are even and points are sharp. Accuracy in trimming ensures your quilt will assemble beautifully without gaps or distortion.
Repeat this process to create as many Half-Square Triangles as your quilt design requires. Once you get into the rhythm, you’ll find that this method becomes fast, efficient, and satisfying.
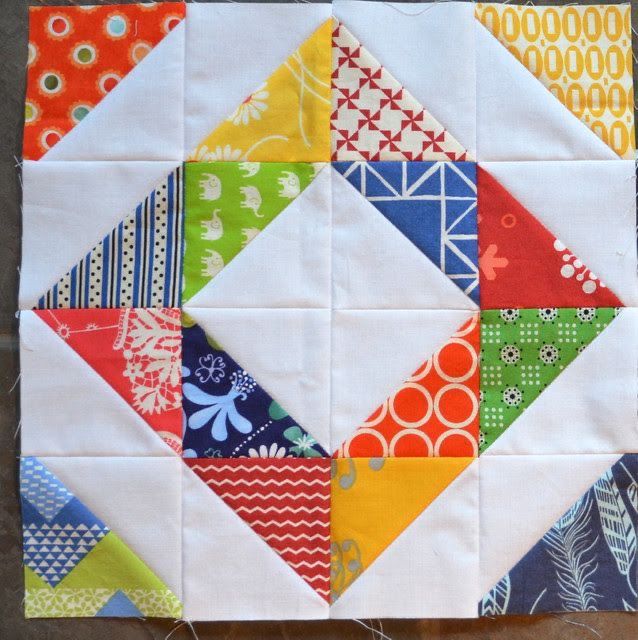
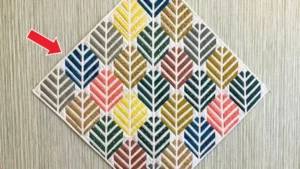
One of the most exciting aspects of the Half-Square Triangle Tutorial – Quilt Pattern is the sheer variety of design options available. This simple block can be arranged in dozens of ways to form different patterns, allowing endless creativity in your quilting projects.
A common and visually appealing layout is the “chevron” design, where alternating rows of triangles create a wave-like motion across the quilt. Another popular pattern is the “pinwheel,” which uses four HSTs to create a dynamic spinning effect.
You can also experiment with “diamond” or “zigzag” patterns. These arrangements rely on the direction of the triangles, so small adjustments can dramatically change the overall appearance of your quilt. The possibilities are limitless with a strong understanding of Half-Square Triangle arrangements.
Color placement plays a major role in design impact. Consider using a color palette that complements your home decor or reflects a particular season. For example, soft pastels work beautifully for spring-themed quilts, while deep reds and greens are perfect for festive holiday quilts.
For a modern twist, you can incorporate negative space by combining HSTs with solid color blocks. This approach creates a clean, minimalist aesthetic that highlights the geometric nature of your quilt.
Experimentation is key — lay out your blocks on a design wall before stitching them together. This allows you to preview different layouts and adjust color placement until you’re completely satisfied with your composition.
After mastering the Half-Square Triangle Tutorial – Quilt Pattern, it’s time to assemble your quilt top and give it a professional finish. Begin by sewing your rows carefully, keeping an eye on seam intersections to ensure all points match neatly. Pinning at every seam can help maintain precision.
Once your quilt top is complete, prepare the quilt sandwich — the quilt top, batting, and backing fabric. Smooth out any wrinkles and baste the layers together using pins or temporary adhesive spray. This step prevents shifting while quilting.
When quilting, you can use either straight-line or free-motion techniques, depending on your comfort level. Straight-line quilting along the seams emphasizes the geometric structure of your Half-Square Triangle Quilt Pattern, while free-motion quilting adds a softer, artistic texture.
Binding is the final touch that frames your quilt. Choose a binding fabric that complements the colors of your quilt top. Machine or hand-stitch the binding for a neat, polished edge.
For long-lasting results, proper care is essential. Always wash your quilt in cold water using a gentle cycle and mild detergent. Avoid bleach, as it can damage fabric fibers and fade colors over time.
Finally, store your quilt in a cool, dry place. Avoid direct sunlight, as prolonged exposure can cause fading. With good care, your quilt will remain beautiful and cozy for years to come.
1. What size should my fabric squares be for a Half-Square Triangle?
To determine the right size, add ⅞ inch to your desired finished block size. For example, if you want a 4-inch finished HST, cut your fabric squares to 4⅞ inches.
2. Can I make Half-Square Triangles without sewing on both sides of the line?
Yes, but the traditional method ensures better accuracy and symmetry. Sewing on both sides of the drawn line helps produce two identical blocks at once.
3. How can I prevent my fabric from stretching when cutting?
Always use a sharp rotary cutter and a non-slip ruler. Handle your fabric gently to avoid distorting the bias edges of the triangles.
4. What are some creative layouts for Half-Square Triangles?
You can create chevron, pinwheel, diamond, zigzag, and star patterns. Experiment with color placement and rotation for different effects.
5. What type of fabric works best for HST quilts?
High-quality 100% cotton fabrics are ideal because they are durable, easy to press, and maintain shape during sewing and washing.
6. How do I ensure perfect points when joining HSTs?
Trim your blocks accurately and use consistent ¼-inch seam allowances. Pin intersections carefully to keep points sharp and aligned.
The Half-Square Triangle Tutorial – Quilt Pattern is an invaluable guide for anyone looking to elevate their quilting skills. By mastering this timeless block, you open the door to endless design possibilities, from traditional layouts to contemporary masterpieces. Precision, patience, and creativity are the keys to success when working with half-square triangles.
We hope this guide has inspired you to create your own stunning Half-Square Triangle Quilt Pattern. Take your time, experiment with colors and layouts, and enjoy the process of bringing your vision to life. Don’t forget to share your experience in the comments — we’d love to hear your honest opinion and suggestions for future tutorials!


