
Cross Door - Quilt Pattern
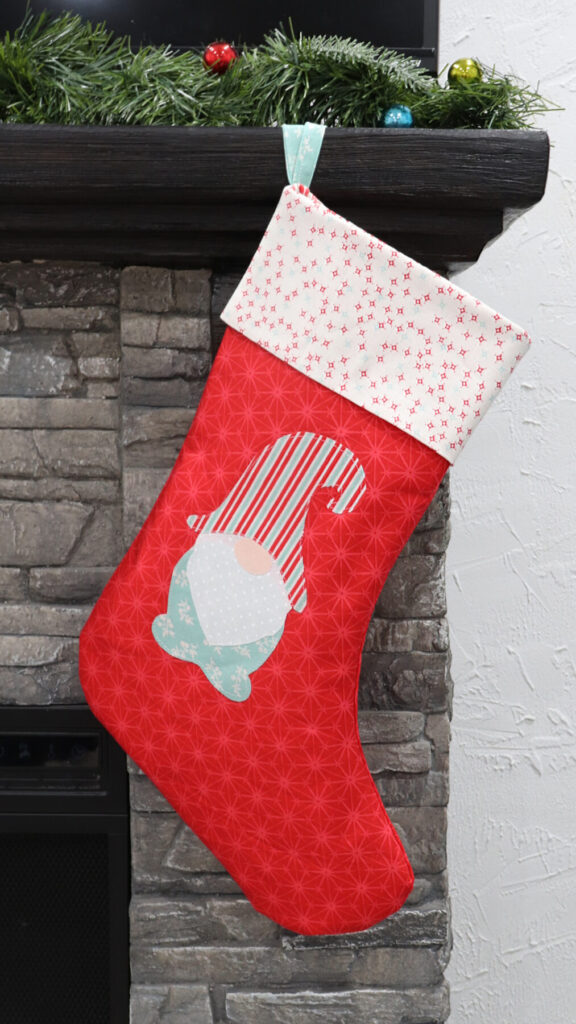
The Holiday Gnome Stocking – Quilt Pattern is a delightful sewing project that brings charm, creativity, and holiday cheer to your handmade decorations. With its whimsical gnome design and quilted structure, this stocking becomes more than just a place to hold gifts—it transforms into a treasured piece of festive décor. Whether you are an experienced quilter or a beginner looking for a seasonal project, this design allows you to combine practical quilting skills with the fun spirit of the holidays. The gnome motif, with its playful hat, beard, and cozy textures, makes the stocking truly unique and perfect for brightening any Christmas mantle.
When creating a Holiday Gnome Stocking – Quilt Pattern, you have the opportunity to blend fabric choices, quilting designs, and personal touches that reflect your own style. Quilting offers both texture and durability, ensuring that the stocking not only looks beautiful but will also hold up for many years of holiday celebrations. The size and shape can be adapted to suit different needs—whether for small gift exchanges or as a decorative oversized stocking. This flexibility makes the pattern versatile and enjoyable for quilters who like experimenting with colors and layouts.
In this article, we will explore how to successfully make your own Holiday Gnome Stocking – Quilt Pattern, from choosing fabrics to constructing the quilted panels, assembling the stocking, and finally adding finishing touches. You’ll also learn how to personalize the design, making it a wonderful handmade keepsake for your family or a thoughtful gift for friends. By the end, you’ll feel confident to start this festive project and create stockings that will bring smiles for many Christmas seasons to come.
The first step in making a Holiday Gnome Stocking – Quilt Pattern is selecting the right fabrics and materials. Quilting cotton is often the preferred fabric because it is easy to sew, comes in a variety of colors, and creates clean lines for piecing the design. Holiday prints such as plaids, snowflakes, or festive reds and greens are popular choices, while solid fabrics can be used to highlight the gnome’s beard, hat, or body.
Another important consideration is the lining fabric. Since stockings are often filled with gifts, candy, or small trinkets, choosing a sturdy but soft lining ensures durability and a neat interior finish. Coordinating the lining with the outer quilt design creates a professional appearance and adds to the festive charm.
Batting or fusible fleece should also be included to give the stocking structure and a cozy quilted look. This not only enhances the overall design but also makes the stocking sturdier, ensuring it can hold heavier items without losing shape.
You will also need thread in coordinating or contrasting colors, depending on whether you want the quilting lines to blend in or stand out. A walking foot for your sewing machine can help achieve even stitches through multiple fabric layers.
Don’t forget embellishments. Buttons, pom-poms, or embroidery details can add character to the gnome’s hat or beard, making each stocking truly one of a kind. These small touches create personality and set your handmade piece apart from store-bought alternatives.
By carefully selecting your fabrics, batting, and decorative accents, you set the stage for a Holiday Gnome Stocking – Quilt Pattern that is both durable and beautifully festive.
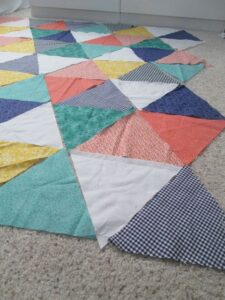
Once materials are ready, the next step in creating the Holiday Gnome Stocking – Quilt Pattern is cutting and quilting the panels. Precision cutting ensures that all pieces align properly when assembled, which is essential for a polished result. Using a rotary cutter, quilting ruler, and cutting mat will help you achieve clean, accurate lines.
Most designs include two main quilted panels: the front, featuring the gnome motif, and the back, which can be pieced with coordinating fabrics or left as a solid quilted surface. The gnome design often requires appliqué for the beard, nose, and hat, so take your time arranging and securing these pieces.
Once the design elements are in place, layer the quilt top with batting and a backing fabric, then baste the layers together. This creates a quilt sandwich ready for stitching. Basting spray or pins will hold everything in place while quilting.
The quilting itself can be as simple or intricate as you prefer. Straight-line quilting works well for a clean look, while free-motion quilting can add swirls, snowflakes, or decorative patterns that enhance the holiday theme. Quilting not only reinforces the panels but also brings texture and depth to the gnome design.
After quilting, trim the excess batting and fabric to create even edges. This makes assembly easier and ensures the stocking panels align neatly. Be sure to check that the gnome features are securely stitched before moving on.
By carefully cutting, layering, and quilting your panels, you give life to the playful gnome design, creating a strong foundation for the stocking’s final construction.
With quilted panels complete, it’s time to assemble the Holiday Gnome Stocking – Quilt Pattern. Start by placing the front and back panels right sides together, aligning the edges carefully. Use clips or pins to hold the layers in place before sewing around the shape of the stocking, leaving the top open.
Sew slowly around the curves, especially near the toe and heel areas, to ensure smooth lines. Once stitched, trim the seam allowance and clip notches into the curved areas so the stocking turns right side out smoothly.
Next, prepare the lining pieces. Sew them together in the same way, leaving a small opening at the bottom for turning later. Once both the lining and outer stocking are ready, insert the lining into the stocking with right sides together, matching the top edges.
Stitch around the top edge to secure the lining to the outer stocking. Then pull the stocking right side out through the opening in the lining. Close the opening with a slip stitch or a topstitch for a clean finish.
Add a fabric loop or ribbon to the top corner of the stocking so it can hang easily on a mantle or hook. Reinforce this area with extra stitching to ensure durability when filled with gifts.
At this stage, the stocking should look nearly complete. Press the top edge carefully and, if desired, add decorative topstitching to give the stocking a polished finish.
Through careful assembly, the quilted gnome stocking comes to life, ready to bring joy and charm to your holiday décor.
The final stage of making a Holiday Gnome Stocking – Quilt Pattern is adding finishing touches and personalization. These details transform the stocking from a simple quilted piece into a unique holiday treasure.
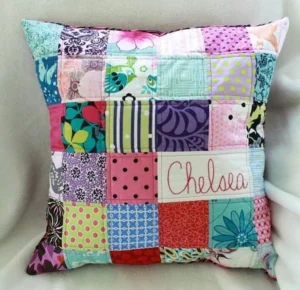
You can personalize the stocking with embroidered names or initials. This makes it special for each family member and ensures no one’s gifts get mixed up. Hand embroidery or machine stitching both work beautifully for this detail.
Decorative trims such as lace, ric-rac, or faux fur can be added to the top cuff for extra charm. These embellishments highlight the festive theme and add texture. A fluffy beard made of fleece or faux fur fabric can give the gnome design a playful three-dimensional effect.
Consider experimenting with fabric variations. For example, metallic fabrics for the gnome’s hat or patterned fabric for the body create a striking visual contrast. Mixing textures brings added depth and interest.
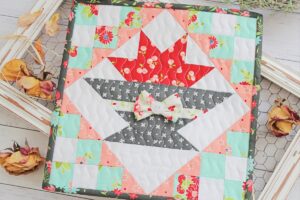
Adding small appliqué shapes, like stars, trees, or snowflakes, can also enhance the overall design. These details connect the stocking to the holiday spirit and make it more visually appealing.
If you’re making multiple stockings, try using the same gnome template but change fabrics and colors so each stocking has its own personality while still coordinating as a set. This creates a warm, cohesive look when displayed together.
With thoughtful finishing touches and personalization, your Holiday Gnome Stocking – Quilt Pattern becomes more than just a decoration—it becomes a handmade keepsake that will be cherished for years.
1. Is the Holiday Gnome Stocking a beginner-friendly project?
Yes, beginners can successfully make this project, especially if they follow step-by-step instructions and keep the quilting simple.
2. What size should I make the stocking?
The size is flexible. Standard stockings measure around 16–18 inches tall, but you can scale the pattern to fit your preference.
3. Can I use fabrics other than quilting cotton?
Yes, canvas, denim, or even felt can work, but quilting cotton remains the easiest and most versatile choice.
4. How can I make the gnome beard look more realistic?
Using faux fur or fleece instead of cotton fabric gives the beard a fluffy, textured appearance that stands out.
5. Do I need a quilting machine?
No, a regular sewing machine works well. A walking foot attachment can make quilting easier and neater.
6. How long does it take to complete one stocking?
Most quilters can finish in one to two days, depending on complexity and added embellishments.
Creating a Holiday Gnome Stocking – Quilt Pattern is a joyful project that combines quilting skills with the fun of holiday creativity. From selecting fabrics and quilting the gnome panels to assembling the stocking and adding personal details, each step allows you to express your style and create something meaningful. This handmade piece is not only decorative but also practical, holding gifts while becoming part of your family’s holiday traditions.
I hope this guide inspires you to try your own version of the stocking. Please share your honest feedback and suggestions—I would love to hear how your project turns out and what creative ideas you bring to your festive quilting.


