
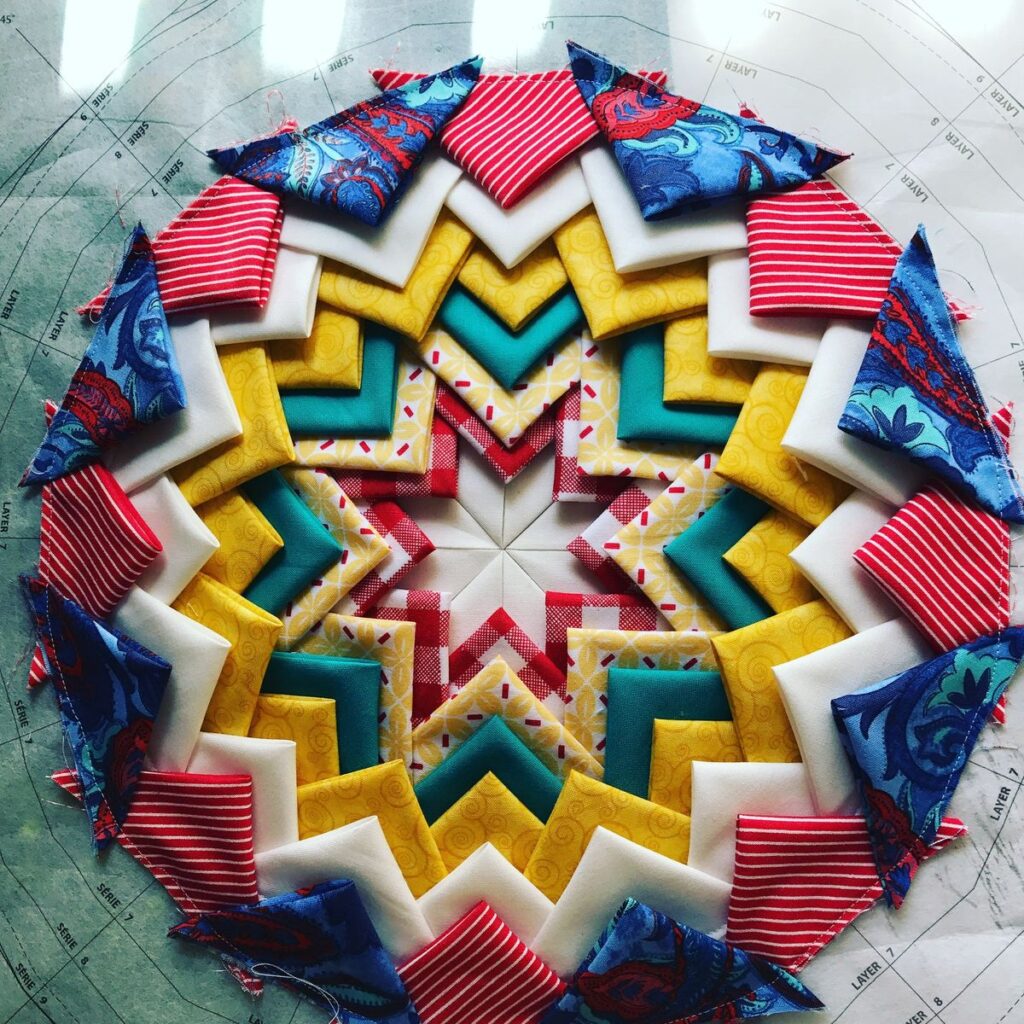
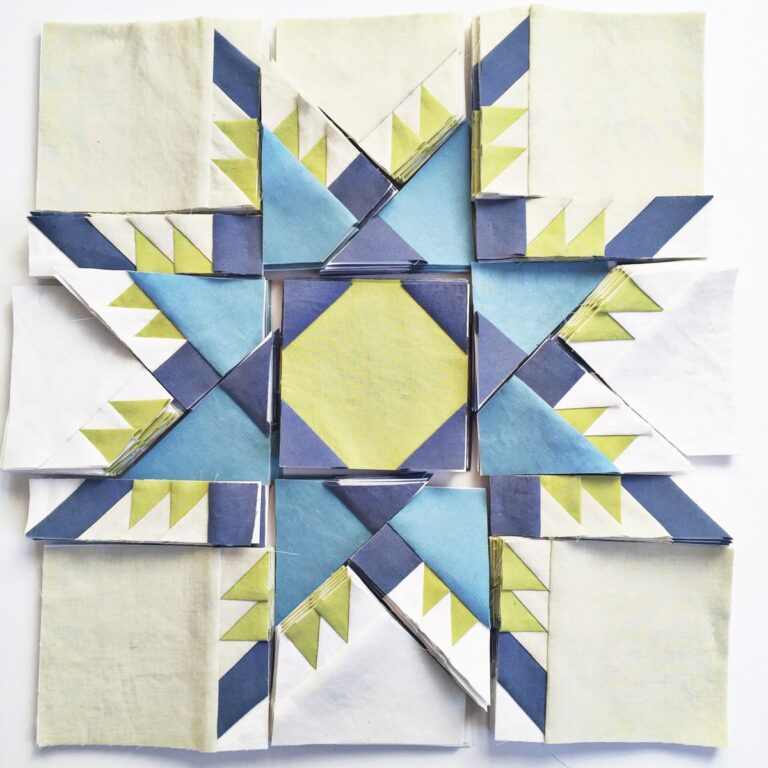
Summer-Country-Star-Flower - Quilt Pattern
How To: Sew Easy Inset Circles – Quilt Pattern is one of those techniques that looks advanced and complicated but can actually be learned with a bit of patience and practice. Quilters often shy away from inset circles because they fear puckers, uneven seams, or complicated cutting. However, with the right method, anyone can add these beautiful rounded shapes to their quilt projects. Circles create movement, soften geometric lines, and add a touch of elegance to otherwise simple designs.
The beauty of learning How To: Sew Easy Inset Circles – Quilt Pattern is that it opens the door to countless design possibilities. Whether you want to create bold statement blocks, modern abstract layouts, or soft and flowing patterns, inset circles can bring your quilting ideas to life. Unlike straight seams, curved piecing requires a little extra attention, but the results are well worth it.
In this article, we’ll explore a step-by-step approach to mastering inset circles, tips for success, and ideas on how to use this technique in your quilts. By the end, you’ll feel confident enough to try your hand at sewing circles into your blocks, and you may even fall in love with the process. Let’s dive into the details of How To: Sew Easy Inset Circles – Quilt Pattern and discover how it can transform your quilting projects.
When working with How To: Sew Easy Inset Circles – Quilt Pattern, the first step is understanding the foundation. Inset circles involve sewing a circular piece of fabric into a cut-out space within a block. This method is different from appliqué, where the circle is sewn on top of another piece. Instead, inset circles create a smooth, seamless effect that feels integrated into the quilt block.
One of the most common beginner mistakes is cutting the circle or background incorrectly. Accuracy is crucial because even slight differences can cause gaps or puckers. Using templates or fabric marking tools ensures precision. If you’re nervous, start with larger circles before working your way to smaller, more detailed ones.
Another important aspect is fabric choice. Lightweight cotton with minimal stretch works best for beginners because it holds its shape. Fabrics with too much give can cause the seam to warp. Always remember to prewash and press your fabrics for the cleanest results.
Seam allowance is also key. A consistent ¼-inch seam will help your circle sit smoothly inside its background. Quilters often use pins or basting stitches to hold the fabric in place before sewing. This reduces shifting and makes the sewing process less stressful.
Practice makes perfect when learning How To: Sew Easy Inset Circles – Quilt Pattern. Don’t be discouraged by the first attempts. Quilters often notice huge improvements after practicing just a few blocks. Think of it as a skill you develop over time.
Finally, understanding that quilting is both art and craft can help ease the pressure. Your inset circles don’t need to be absolutely flawless; small imperfections add character and make your quilt unique.
The process of How To: Sew Easy Inset Circles – Quilt Pattern can be broken into simple steps. First, cut your background fabric and circle fabric using a template. Mark the stitching lines carefully on both pieces. A clear marking tool ensures accuracy without leaving permanent marks.
Next, prepare the circle by clipping small notches into the seam allowance. This allows the fabric to curve smoothly without pulling or bunching. Do the same for the background fabric where the circle will be inset. These tiny cuts make sewing curved seams much easier.
Pinning is the next essential step. Align the circle and background fabric right sides together, matching quarter points first. Then, add additional pins in between to secure the pieces. Some quilters prefer glue basting instead of pins for a smoother sewing experience.
Once pinned, sew slowly along the marked stitching line. Take your time and avoid stretching the fabric. Sewing curves is very different from sewing straight seams, so it’s important to guide the fabric gently. A shorter stitch length can also help keep curves neat.
After sewing, press the seam carefully. Always press towards the circle to create a smooth finish. Some quilters recommend trimming the seam allowance slightly to reduce bulk, especially with smaller circles.
Finally, admire your work! Your first inset circle may not be perfect, but each attempt will improve your confidence and technique. Over time, you’ll find your own rhythm for sewing inset circles with ease.
Learning How To: Sew Easy Inset Circles – Quilt Pattern isn’t just about technique; it’s about creativity. Circles can be used in endless ways to add depth and movement to your quilts. One popular idea is creating a modern quilt filled with circles of varying sizes. This design looks dynamic and fresh while still being approachable.
You can also experiment with contrasting fabrics. For example, inserting a bright, bold circle into a neutral background creates a striking focal point. Similarly, using low-volume prints for both the background and the circle results in a softer, more subtle effect.
Inset circles are also fantastic for themed quilts. Think of quilts inspired by the moon, planets, or bubbles. Circles naturally lend themselves to these designs, and the seamless construction makes them look polished and professional.
If you love traditional quilting, inset circles can still play a role. They can be combined with classic blocks like nine-patch or log cabin to add an unexpected twist. Circles break up straight lines, adding an element of surprise without overwhelming the quilt.
Inset circles also work beautifully in smaller projects such as pillow covers, table runners, and wall hangings. Practicing with these small items helps build confidence before tackling a full quilt.
Finally, inset circles provide a wonderful opportunity for color play. From gradients to rainbow arrangements, circles highlight fabric collections in unique and eye-catching ways.
To truly master How To: Sew Easy Inset Circles – Quilt Pattern, it helps to keep a few tried-and-true tips in mind. First, slow down. Rushing through curves often leads to puckers and frustration. Treat each circle as its own project and give it the attention it deserves.
Second, practice with scraps before using your good fabric. This removes the fear of making mistakes and allows you to experiment with different methods, like pinning versus glue basting.
Third, consider using starch on your fabric before cutting. Stiffened fabric is easier to handle and less likely to stretch while sewing. This simple step can make a big difference, especially for beginners.
Fourth, don’t be afraid to try different circle sizes. Starting with larger circles builds confidence, but smaller circles can create more intricate designs. Challenge yourself gradually and celebrate each milestone.
Fifth, always press carefully. Pressing is one of the most underrated steps in quilting, yet it makes a huge difference in the final look. Gentle pressing with steam helps the circle lie flat and professional.
Lastly, embrace imperfection. Quilting is about creativity, not perfection. Your inset circles may not all look identical, but that uniqueness is what makes your quilt special.
1. What is the difference between inset circles and appliqué circles?
Inset circles are sewn directly into a cut-out space in the fabric, creating a seamless effect, while appliqué circles are stitched on top of another fabric layer.
2. Do I need special tools to sew inset circles?
Templates, marking tools, and sharp scissors are helpful, but no special equipment is required. A regular sewing machine with a standard foot works perfectly.
3. What size circle is best for beginners?
Larger circles are easier to manage because the curves are gentler. Start with a circle at least 6 inches in diameter before trying smaller designs.
4. How do I prevent puckers when sewing inset circles?
Accurate cutting, careful pinning, and sewing slowly are key. Clipping the seam allowance also helps the fabric ease around the curves.
5. Can inset circles be used in hand quilting?
Yes! Inset circles can be sewn by hand using traditional piecing techniques. It requires patience but produces a beautiful finish.
6. What quilting designs work best with inset circles?
Inset circles pair well with modern, abstract, and even traditional quilts. They’re especially effective in designs inspired by nature, planets, or geometric layouts.
Learning How To: Sew Easy Inset Circles – Quilt Pattern may seem intimidating at first, but with the right approach, it becomes a fun and rewarding quilting skill. From understanding the basics, to sewing step-by-step, to exploring creative uses, inset circles can add beauty and movement to your quilts. With practice and patience, you’ll find that this technique isn’t nearly as hard as it looks.
I hope this guide has inspired you to try inset circles in your next quilting project. If you give it a try, I’d love to hear your thoughts. Please share your honest opinion and suggestions in the comments—I’m always excited to learn from fellow quilters and improve together!


