
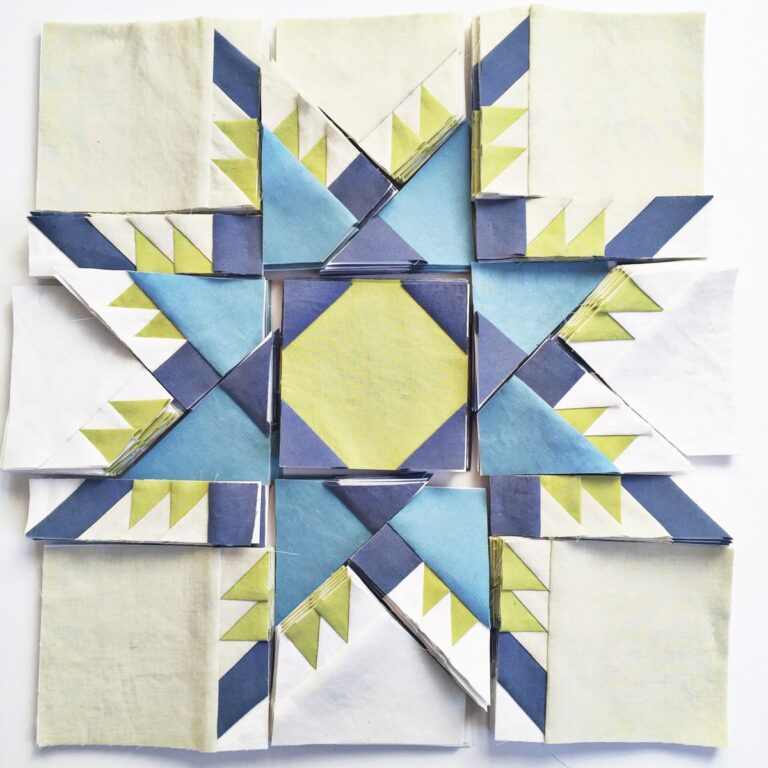
Summer-Country-Star-Flower - Quilt Pattern
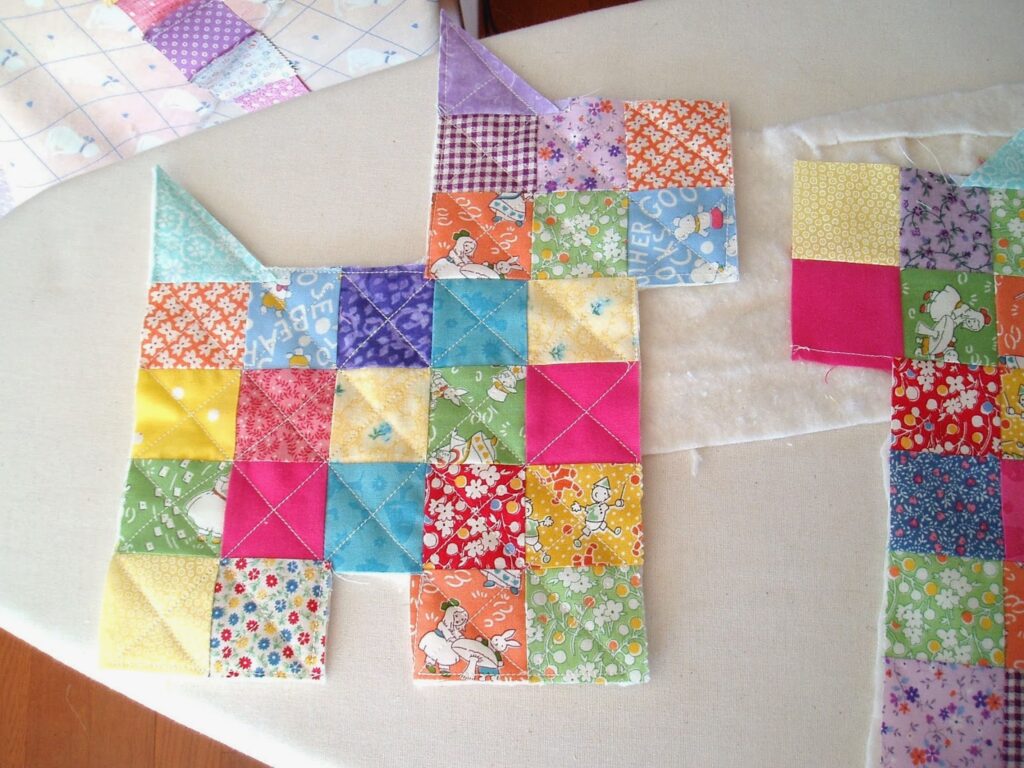
PATCHWORK SCOTTIE DOG – Quilt Pattern is a charming and nostalgic project that instantly captures the hearts of quilting lovers. This delightful theme blends tradition, creativity, and the irresistible silhouette of the beloved Scottie dog. Whether you are a beginner learning the first steps of quilting or an experienced quilter searching for a fresh project, this pattern offers endless possibilities and personalized touches. Throughout this article, you will learn how to work with the PATCHWORK SCOTTIE DOG – Quilt Pattern, how to choose fabrics, how to assemble your blocks, and how to finish your quilt with beauty and precision.
One of the reasons quilters love the PATCHWORK SCOTTIE DOG – Quilt Pattern is its playful yet classic format. The Scottie figure brings joy and sentimentality, making it perfect for gifts, nursery décor, themed rooms, and even holiday collections. Additionally, this quilt style is an excellent choice for using scraps, combining textures, and expressing a unique artistic eye. Working with patchwork invites you to explore color mixing, block placement, and creative stitching.
Before exploring the step-by-step structure, it’s essential to embrace the spirit of patchwork: patience, precision, and pleasure in the process. Every cut, stitch, and detail helps transform a simple piece of fabric into something filled with personality. When working with the PATCHWORK SCOTTIE DOG – Quilt Pattern, the joy is multiplied because the final result always brings a smile, both from those who make it and from those who receive it. Now that your inspiration is ready, let’s move on to the key stages of this heartwarming quilt project.
Selecting the right fabrics sets the tone for your entire PATCHWORK SCOTTIE DOG – Quilt Pattern project. The Scottie silhouette is perfect for creative combinations, whether using coordinated tones, contrasting fabrics, or textured materials. Cotton remains the most recommended fabric due to its durability, softness, and ease of handling, especially for beginners.
When choosing colors, think about the mood you want to create. Bright colors express playfulness, while darker tones give a vintage and classic look. Neutrals can create elegant contrasts, allowing the Scottie dog shape to stand out beautifully on the quilt. The secret is to balance background and foreground harmoniously.
Printed fabrics also work wonderfully in this pattern. Tiny florals, polka dots, checks, and even holiday prints add an extra touch of charm. The Scottie figure becomes more expressive when the fabric has personality. Since this is a patchwork project, small leftover pieces can be included as part of your creative mix.
Another important consideration is fabric quality. Opting for prewashed, high-thread-count cotton ensures smoother stitching and reduces shrinking issues later. With durability and beauty combined, your PATCHWORK SCOTTIE DOG – Quilt Pattern quilt will last for years.
Some quilters prefer working with curated bundles, such as fat quarters or fabric collections, to ensure color harmony. Others love the challenge of mixing scraps with varying shades. Both approaches work wonderfully, as long as you keep balance and contrast in mind.
Finally, remember that choosing fabrics is where your creativity shines. Take your time, experiment with combinations, and enjoy the process. The beauty of patchwork lies in its artistic freedom, and the Scottie dog motif makes this journey even more joyful.
Once your fabrics are ready, the next stage in the PATCHWORK SCOTTIE DOG – Quilt Pattern is precise cutting. Accuracy is essential in patchwork, ensuring that all pieces align perfectly during assembly. Start by reviewing your templates or block measurements before making any cuts.
Rotary cutters, cutting mats, and clear acrylic rulers are essential tools for achieving crisp, clean edges. Smooth edges help maintain the integrity of your block shapes, especially when working with the detailed silhouette of the Scottie dog. The sharper the tools, the better the final result.
Before cutting all pieces, make a test block. This small step helps verify measurements, evaluate fabric combinations, and fine-tune your technique. A single practice block can save time and prevent mistakes deeper in the project.
When preparing the Scottie dog shape, pay attention to angles and curves. Some patterns use simple geometric forms, while others include more detailed contours. Regardless of the style, maintain patience and precision. Slow and steady work is key for clean patchwork silhouettes.
To enhance the Scottie’s appearance, you may include small accents like ears, collars, or bows. These can be appliquéd, stitched, or pieced depending on your preference. Such details bring personality and charm to each block, making your quilt more expressive.
After cutting all pieces, label them clearly to streamline assembly. Organizing your fabric pieces prevents confusion and makes the quilting experience more enjoyable. Well-prepared blocks are the foundation of a beautiful finished quilt.
Now it’s time to bring your quilt to life. Assembling the PATCHWORK SCOTTIE DOG – Quilt Pattern involves piecing the blocks carefully and consistently. Start by arranging the pieces according to your template, ensuring the Scottie silhouette remains visible and balanced.
Begin stitching from the smallest sections, working toward larger components. This method helps you maintain shape accuracy while avoiding distortion. Short seams are easier to control and result in cleaner lines throughout your block.
Pressing seams as you work is essential. Use an iron on medium heat to flatten each seam, making future assembly easier and improving the overall alignment. Pressing toward the darker fabric often helps prevent shadowing on lighter pieces.
Once your Scottie blocks are complete, decide on the quilt layout. You may create a uniform pattern using identical blocks or mix different colors for a playful look. The Scottie motif allows endless variations, from alternating directions to building themed rows.
Sashing is optional but highly effective. Adding strips between blocks enhances visibility and creates separation, especially when using bold prints. It also offers more creative opportunities with color and contrast.
Finish assembling your quilt top by connecting rows, aligning seams, and correcting small imperfections. At this stage, you will already see the charming personality of the PATCHWORK SCOTTIE DOG – Quilt Pattern shining through every block.
With your quilt top ready, the final stage of the PATCHWORK SCOTTIE DOG – Quilt Pattern involves layering, quilting, and binding. These finishing touches give your quilt structure, durability, and a polished appearance. Each step enhances the beauty of your design.
Begin by creating a quilt sandwich: backing fabric, batting, and the quilt top. Smooth each layer to avoid wrinkles, then secure everything together using quilting pins or basting spray. Proper basting prevents shifting during stitching.
Choose your quilting style based on the look you want to achieve. Straight-line quilting offers simplicity and modern appeal. Free-motion quilting creates flow and texture. Echo quilting around the Scottie dogs highlights their shape and adds depth to the design.
Experiment with thread color as well. Neutral tones keep attention on the fabrics, while contrasting threads add decorative interest. High-quality thread ensures cleaner stitches and longer-lasting results.
Once quilting is complete, trim the edges and prepare your binding. You can use matching fabric for a cohesive look or choose a bold color to frame your quilt. Binding strips should be cut accurately and attached with steady stitching for a professional finish.
Add a quilt label to personalize your work. Include your name, the year, and any special dedication. Labels preserve your quilt’s story, turning it into a meaningful keepsake. With the final stitch complete, your Scottie quilt is ready to display or gift with pride.
Finishing your quilt is incredibly rewarding. Every stage—from cutting fabric to binding—reflects your creativity and dedication. The PATCHWORK SCOTTIE DOG – Quilt Pattern makes the entire process enjoyable, inspiring, and full of charm.
What fabrics work best for the PATCHWORK SCOTTIE DOG – Quilt Pattern?
High-quality cotton fabrics are ideal because they are easy to cut, press, and sew. Cotton also provides durability and smooth stitching.
Do I need advanced quilting skills to make this pattern?
No. The PATCHWORK SCOTTIE DOG – Quilt Pattern is beginner-friendly, especially if you choose a simple block variation. More detailed versions may require moderate experience.
Can I use fabric scraps for this project?
Yes, this pattern is perfect for scrap quilting. Small pieces and mixed textures enhance the charm of the Scottie dog design.
What size should the quilt be?
The size depends on your layout. You can create anything from a single-block wall hanging to a large bed quilt using multiple Scottie blocks.
Is appliqué required?
Not always. Some patterns use traditional patchwork, while others include appliqué details for added personality.
How can I make my Scottie quilt more unique?
Use creative fabrics, add bows or collars, experiment with sashing, or mix colors and prints to develop your own artistic interpretation.
Creating a PATCHWORK SCOTTIE DOG – Quilt Pattern project is an enjoyable and rewarding experience for quilters of all skill levels. In this article, you learned how to choose fabrics, cut and prepare your pieces, assemble your blocks, and finish your quilt with professional detail. The Scottie dog motif brings charm, creativity, and nostalgia to your project, making it a delightful gift or decorative piece.
I hope this guide inspires you to start your own quilt and enjoy every step of the journey. If you have any questions or would like more tutorials like this, feel free to ask!


