
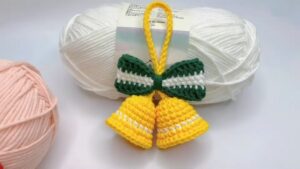
Cross Door - Quilt Pattern
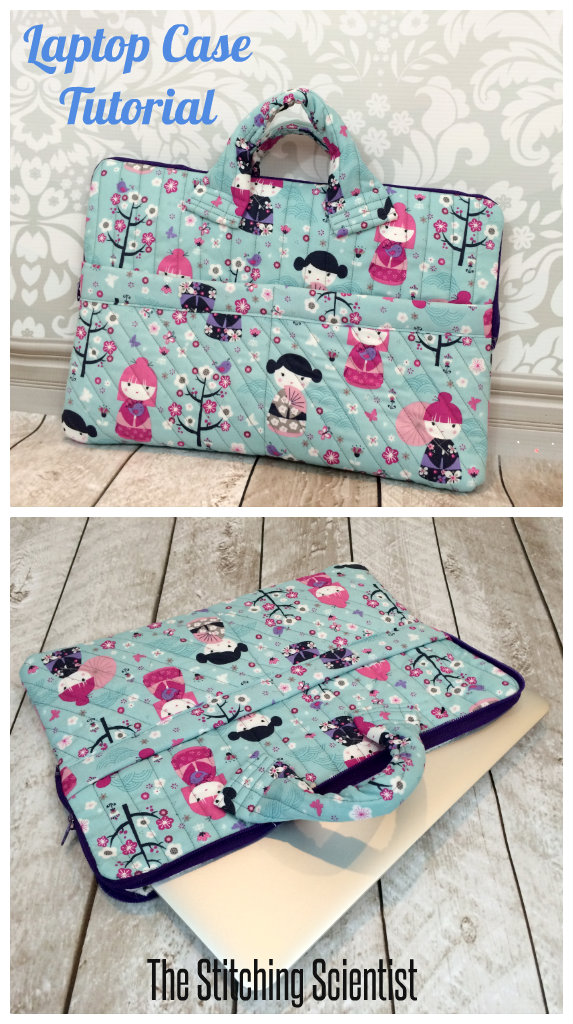
The Quilted Laptop Bag Tutorial – Quilt Pattern is a creative and functional project that allows quilters of all levels to combine style with practicality. In today’s world, where laptops are part of daily life, having a personalized quilted bag is both a protective and fashionable solution. This tutorial not only walks you through the steps but also inspires you to create something that reflects your personality while safeguarding your device.
Creating a quilted laptop bag can be an enjoyable journey because it blends utility with artistry. Quilters can explore different fabrics, patterns, and textures, resulting in a one-of-a-kind item. The quilt pattern in this tutorial is adaptable, making it suitable for laptops of different sizes. Whether you want a bold design, a minimalist look, or a bag filled with vibrant patchwork, this project allows room for endless creativity.
One of the reasons this Quilted Laptop Bag Tutorial – Quilt Pattern stands out is that it is accessible for beginners yet rewarding for experienced quilters. By following the steps carefully, you will not only finish with a stylish laptop bag but also gain confidence in quilting techniques like layering, stitching, and binding. With patience and attention to detail, this project will quickly become one of your favorite handmade creations.
When starting the Quilted Laptop Bag Tutorial – Quilt Pattern, gathering the right materials is essential. A successful project begins with quality supplies, so investing in durable fabric and batting is highly recommended. Quilters should select fabrics that are both visually appealing and sturdy enough to handle daily use.
The most important part of preparation is measuring your laptop. Each laptop varies slightly in size, so take accurate measurements before cutting your fabric. Add extra space for seam allowances and for the thickness of the batting. By planning ahead, you will ensure your bag fits comfortably without being too loose or tight.
For this quilted project, consider using cotton fabric for the exterior and lining. Cotton is easy to quilt, washable, and widely available in beautiful prints. Batting will give your bag a cushioned layer, which helps protect your laptop from bumps and scratches. Choose medium-weight batting for durability and flexibility.
Another aspect of preparation is choosing the right thread and needles. A strong polyester thread works well, as it holds up to the wear and tear of carrying weight. Quilting needles are ideal since they are designed to sew through layers of fabric and batting without breaking.
Before cutting into your main fabric, create a paper or cardboard template using your laptop’s measurements. This step ensures accuracy and reduces the risk of wasting material. Templates also help in planning design placement, especially if you are working with patterned fabric.
Finally, prepare your workspace. Quilting requires precision, so ensure you have a flat surface for cutting and plenty of room to handle large fabric pieces. Good lighting will also make stitching easier, especially if you are using darker fabrics.
The next step in the Quilted Laptop Bag Tutorial – Quilt Pattern involves cutting and assembling the quilt pieces. Start by cutting the main fabric, lining fabric, and batting according to your laptop’s measurements. Be sure to cut additional fabric for the bag flap and straps.
To give your laptop bag its quilted design, layer the exterior fabric with batting and secure it with quilting pins. This step will prevent shifting while sewing. You can mark simple quilting lines with chalk or fabric markers to guide your stitching. Straight-line quilting is beginner-friendly, while more advanced quilters may prefer decorative stitching.
Once the quilting lines are sewn, trim any excess batting and fabric edges to create clean, even layers. This step is crucial for keeping your bag neat and balanced when assembled. The quilted exterior will already begin to look structured and stylish at this point.
Next, focus on the bag flap. Cut a piece of quilted fabric large enough to cover the laptop opening. The flap not only adds to the bag’s design but also provides extra security. Some quilters like to add Velcro, snaps, or magnetic buttons for closure. Choose the option that best suits your needs.
The lining pieces should also be cut and prepared at this stage. Since the lining will not be quilted, it should be slightly smaller than the outer pieces to ensure a smooth fit inside. Be sure to press the fabric to remove wrinkles before sewing.
Finally, prepare the straps. Depending on your style preference, you can make short hand straps, a long shoulder strap, or even an adjustable crossbody strap. For strength, consider adding interfacing to the straps so they remain sturdy even with frequent use.
The most exciting stage of the Quilted Laptop Bag Tutorial – Quilt Pattern is sewing all the pieces together. Begin by placing the quilted exterior pieces right sides together and sewing along the sides and bottom. Leave the top open, as this will become the bag’s opening.
Next, sew the lining pieces in the same way, but leave a small opening at the bottom to turn the bag later. This opening will be hidden once the lining is sewn inside the exterior. Always remember to backstitch at the beginning and end of each seam to secure the stitches.
Once both the lining and exterior are complete, insert the lining inside the quilted bag with right sides facing each other. Sew around the top edge, making sure the straps and flap are properly positioned between the layers. This step requires precision, so take your time aligning the seams.
Turn the bag right side out through the opening left in the lining. Gently pull the quilted fabric and straps into place, then sew the lining’s opening closed with a small hand stitch or machine stitch. Once finished, tuck the lining neatly inside the bag.
Topstitch around the top edge of the bag. This step not only secures the lining but also adds a professional finish. Topstitching can also reinforce the straps and flap, ensuring the bag is strong enough for daily use.
At this stage, you can add finishing touches like pockets, buttons, or embellishments. A front pocket is especially useful for carrying chargers, notebooks, or accessories. These personal touches make your bag both functional and unique.
One of the best parts of following the Quilted Laptop Bag Tutorial – Quilt Pattern is the ability to customize it to your style. Personalization makes your bag stand out while ensuring it fits your specific needs.
Experiment with fabric combinations to achieve different looks. For a classic design, try neutral tones or monochrome fabrics. If you love bold statements, mix vibrant patterns or contrasting colors. Patchwork techniques can add extra personality to the quilted exterior.
You can also adjust the bag size to fit tablets, notebooks, or other devices. By following the same steps but altering measurements, you can create a matching set of quilted bags for different purposes.
Adding decorative quilting designs can also elevate your project. Instead of simple straight lines, consider free-motion quilting or geometric patterns. These techniques can turn a functional bag into a true work of art.
Strap customization is another fun option. Using adjustable straps allows you to wear the bag in different ways, while adding padding to the straps makes it more comfortable to carry. You can also experiment with fabric-covered handles or leather accents.
Finally, think about closures and accessories. Magnetic snaps, wooden buttons, or zippers can all give the bag a unique finish. Decorative trims like lace or ribbon can also highlight the edges, making your quilted bag even more stylish.
1. Is the Quilted Laptop Bag suitable for beginners?
Yes, the Quilted Laptop Bag Tutorial – Quilt Pattern is beginner-friendly. With careful measurements and simple quilting lines, even those new to sewing can complete it successfully.
2. What size laptop does this pattern fit?
The tutorial is adaptable. By measuring your laptop and adjusting fabric cuts, you can create a bag that fits any size, from small tablets to large laptops.
3. What type of batting is best for a quilted laptop bag?
Medium-weight batting works best. It provides enough cushioning for protection while still being flexible enough for sewing.
4. Can I wash the quilted laptop bag?
Yes, most quilted laptop bags can be washed, especially if made with cotton fabric. Always prewash fabric before starting the project to prevent shrinking later.
5. How can I make the bag more durable?
Use strong thread, add interfacing to straps, and reinforce seams. These steps ensure your bag will withstand regular use.
6. Can I add extra compartments or pockets?
Absolutely! Adding pockets is encouraged. You can include inside compartments for chargers, pens, or notebooks to make the bag even more functional.
The Quilted Laptop Bag Tutorial – Quilt Pattern provides an exciting opportunity to create a stylish and practical accessory while improving your quilting skills. From selecting fabrics to customizing details, this project combines creativity with functionality. Whether you are a beginner or an experienced quilter, making a quilted laptop bag is both rewarding and fun.
Now that you have learned the steps and tips for success, I would love to hear from you. Share your honest opinion about this tutorial and leave your suggestions for future quilting projects. Your feedback helps keep the quilting community creative and inspired!


