
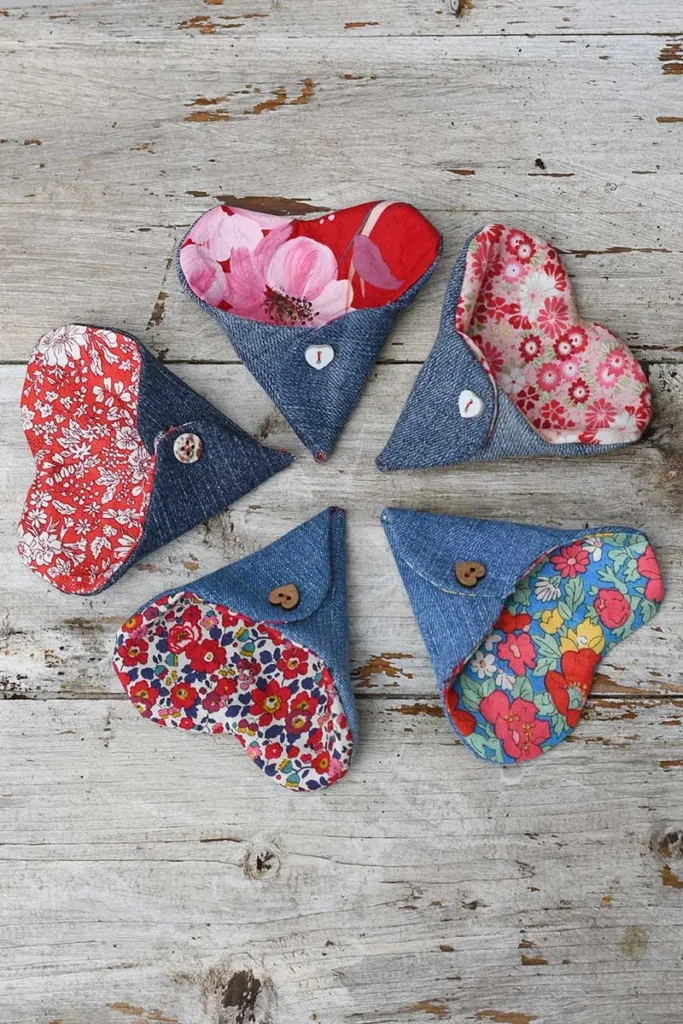
Summer Fountain - Quilt Pattern
The Santa Ornament Made from a Log Cabin Block – Quilt Pattern is a creative and heartwarming project that blends the classic charm of the Log Cabin quilt design with the joyful spirit of Christmas. This pattern allows quilters of all levels to transform fabric scraps into adorable Santa ornaments that can hang beautifully on your Christmas tree, decorate a mantel, or even serve as thoughtful handmade gifts. With a mix of traditional quilting techniques and festive creativity, this project is the perfect way to celebrate the holiday season through sewing.
The Log Cabin block is one of the most iconic designs in quilting history, symbolizing warmth, family, and home — all of which resonate deeply with the Christmas spirit. When transformed into a Santa ornament, it takes on a whimsical and nostalgic charm, reminding us of cozy winter nights and the joy of handmade decorations. This project not only uses basic quilting methods but also introduces a fun twist by turning a flat block into a three-dimensional festive keepsake.
Whether you are a beginner looking for an easy yet satisfying sewing project or an experienced quilter seeking something festive and unique, this Santa Ornament Made from a Log Cabin Block – Quilt Pattern is a delightful choice. It uses minimal materials, can be completed in a short amount of time, and offers endless opportunities for personalization. Let’s dive into how to bring this adorable ornament to life and add a touch of handmade magic to your holiday décor.
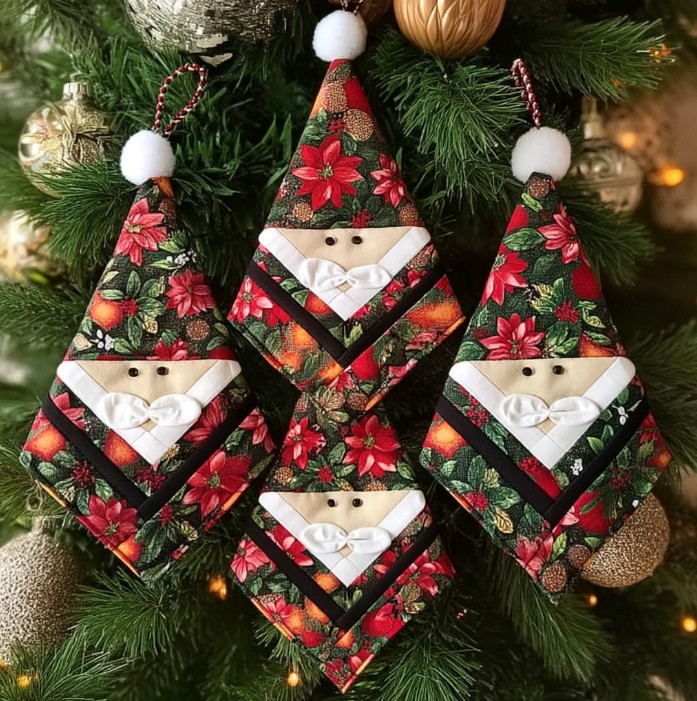
The Log Cabin block has long been celebrated in quilting for its simple yet elegant structure. Traditionally, it consists of strips of fabric (often called “logs”) arranged around a central square, symbolizing the hearth of the home. For this project, that same structure becomes the foundation of our charming Santa ornament, with color placement playing a vital role in creating Santa’s face, hat, and beard.
To achieve the festive look, you’ll want to select fabrics carefully. Choose reds for Santa’s hat, whites or creams for his beard, flesh tones for his face, and perhaps a bit of black or dark brown for his eyes or belt detail. The beauty of this pattern lies in how the color layout transforms a classic quilting block into a recognizable holiday character.
This design is also an excellent way to use up fabric scraps, making it both budget-friendly and eco-conscious. Small pieces that might otherwise go to waste can be repurposed into something beautiful and meaningful. It’s a sustainable and sentimental way to create new traditions from leftover materials.
For beginners, this project offers a chance to practice precision cutting, seam alignment, and color contrast — all essential quilting skills. Experienced quilters can take it further by experimenting with textures, adding embroidery, or embellishing their Santa ornament with tiny buttons or sequins.
The finished ornament can be stuffed lightly with batting or fiberfill, giving it a soft and cozy look. A small loop of ribbon or twine can be attached at the top for easy hanging. Whether you create one or a dozen, each ornament will carry its own charm and personality.
Above all, this Santa Ornament Made from a Log Cabin Block – Quilt Pattern combines creativity, tradition, and a touch of festive fun — the true essence of holiday crafting.
Before you begin sewing, it’s important to gather all the necessary supplies. This ensures a smooth and enjoyable crafting process from start to finish. Luckily, this Santa ornament quilt pattern doesn’t require any special tools or large quantities of fabric.
You’ll need small cuts of cotton fabric in red, white, beige, and black tones. These will be used for the main sections of Santa’s hat, beard, face, and eyes. If you’d like to add a bit of sparkle, metallic or glittery fabrics can work beautifully for accent details. Using quilting cotton is recommended for its crispness and easy handling.
Next, you’ll need a rotary cutter, self-healing cutting mat, and quilting ruler to ensure clean, straight cuts. These tools help maintain accuracy, especially since the Log Cabin block relies on symmetrical fabric placement. For stitching, a sewing machine with a ¼-inch foot is ideal, though hand-sewing is perfectly fine for those who enjoy a slower, meditative process.
You’ll also need thread in coordinating colors, pins or clips, lightweight batting, and fiberfill if you plan to stuff the ornament. To finish it off, prepare a ribbon loop or string to hang your Santa. Optional materials include embroidery floss, buttons, or mini pom-poms to decorate Santa’s hat.
Once your materials are organized, the process becomes much smoother. Having everything at hand helps keep your workspace tidy and your focus on the creative joy of sewing. The beauty of the Santa Ornament Made from a Log Cabin Block – Quilt Pattern is that it’s simple yet flexible — you can customize it endlessly based on the materials you have available.
This project encourages creativity and experimentation. Try different fabric prints, mix solids and patterns, or even use felt for a softer, more rustic look. The possibilities are endless, making this pattern a true reflection of your personal holiday style.
With all materials ready, you’re now prepared to move on to the cutting and sewing phase, where your ornament will start to take sha
Now comes the most exciting part — sewing your Santa Ornament Made from a Log Cabin Block – Quilt Pattern. The process follows the classic structure of a Log Cabin block but with a festive twist.
Start by cutting your center square, which will represent Santa’s face. Choose a neutral or light beige fabric for this step. Then, cut your fabric strips in the following sequence: white (for beard), red (for hat), and alternate as needed to build the block outward. Each strip should be slightly longer than the one before it, creating the signature spiral look of the Log Cabin design.
As you sew, press each seam open or to one side, depending on your preference. Keeping the block flat and neat is key to achieving clean lines. After completing the block, trim it into a perfect square. The finished size can vary, but something around 4×4 inches works well for an ornament.
To assemble the ornament, place your completed block right sides together with a backing fabric square. Stitch around the edges, leaving a small opening for turning. Before flipping it right side out, insert your hanging loop at the top between the two fabric layers.
Turn the ornament right side out, gently push out the corners, and stuff it lightly with batting or fiberfill. Close the opening with a ladder stitch or topstitch for a neat finish. Now, your Santa ornament is complete and ready for decoration!
You can add facial details using embroidery — small French knots for eyes, a tiny stitched smile, or a bit of pink thread for rosy cheeks. Adding a small white pom-pom to the tip of Santa’s hat gives the ornament an extra festive touch.
This pattern is not only enjoyable to make but also highly customizable. Each Santa can have its own expression, fabric choice, and embellishments, making every ornament unique and special.
Once you’ve finished your Santa Ornament Made from a Log Cabin Block – Quilt Pattern, there are many delightful ways to enjoy and share it. One of the most traditional uses is as a Christmas tree ornament — they look stunning nestled among twinkling lights and other handmade decorations.
You can also turn these ornaments into holiday gifts. Attach them to wrapped presents as charming toppers, or give them in sets as thoughtful handmade keepsakes. Adding a personal touch, such as stitching the recipient’s initials on the back, makes them even more meaningful.
Another creative use is turning them into garlands. By stringing several together with twine or ribbon, you can create a festive decoration for your fireplace mantel, stair rail, or window. The repetition of the cheerful Santa faces adds warmth and character to any space.
For those who sell handmade crafts, these ornaments are a perfect addition to a holiday market booth or online shop. They’re lightweight, easy to ship, and appeal to those who love handmade holiday décor. Their charming, nostalgic look often draws attention and spreads cheer.
Children can also get involved in decorating the ornaments. While adults handle the sewing, kids can add final touches like drawing faces or gluing on buttons. It becomes a fun family project that builds lasting memories and traditions.
Finally, you can use the Santa Ornament Made from a Log Cabin Block – Quilt Pattern as inspiration for other seasonal characters — perhaps an elf, snowman, or reindeer using similar quilting techniques. This flexibility makes the pattern a timeless favorite year after year.
1. Can beginners make this Santa ornament easily?
Yes! This pattern is perfect for beginners because it uses basic quilting techniques and small fabric pieces. It’s a great way to practice cutting and sewing straight lines.
2. What fabric works best for this project?
Cotton quilting fabric is ideal because it’s easy to cut, press, and sew. You can mix solids and prints for a fun and textured look.
3. How big should the finished ornament be?
The size can vary depending on your preference, but a 4×4 inch block is common for tree ornaments.
4. Can I make the Santa ornament by hand sewing?
Absolutely. While a sewing machine speeds up the process, hand-sewing gives it a charming, handcrafted touch.
5. How do I add details to Santa’s face?
You can use embroidery floss, fabric paint, or small buttons for eyes and embellishments. A touch of blush or fabric pen works great for cheeks.
6. Can I use the same technique for other holidays?
Yes! You can adapt the Log Cabin block concept to create different themed ornaments, such as bunnies for Easter or hearts for Valentine’s Day.
The Santa Ornament Made from a Log Cabin Block – Quilt Pattern is a heartwarming and creative way to celebrate the holiday season. It combines traditional quilting with festive design, resulting in a beautiful ornament full of handmade charm. Whether you’re a beginner or experienced quilter, this project offers endless possibilities for personalization and joy.
Bring warmth, creativity, and tradition together by crafting your own Santa ornaments this Christmas. They’re not just decorations — they’re memories in the making. Would you like to try this pattern for your next holiday project? Let me know what fabrics and colors you would choose!


