
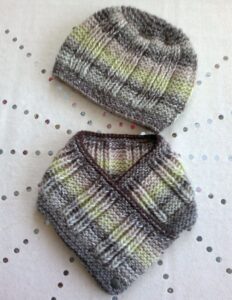
Cross Door - Quilt Pattern
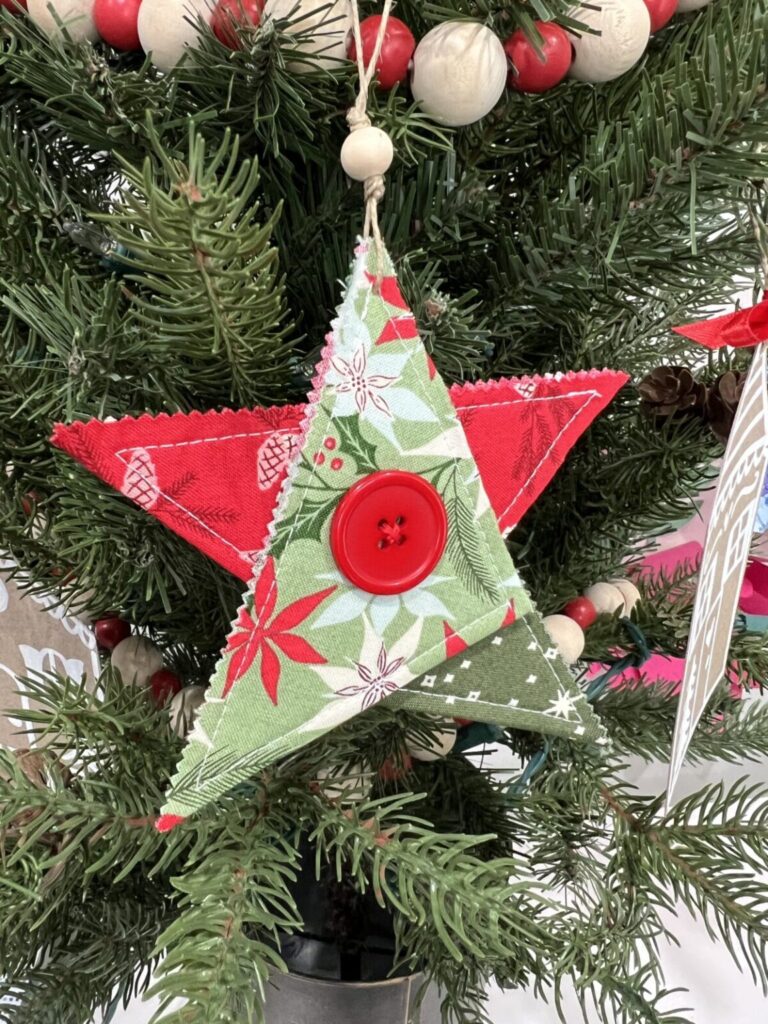
The Scrappy Fabric Star Ornament – Quilt Pattern is a charming and creative way to use leftover fabric pieces while adding a festive, handmade touch to your home décor. This project is not only beginner-friendly but also a fun opportunity for experienced quilters to experiment with colors, textures, and patterns. Whether you are making it for a holiday tree, as a gift topper, or simply as a decorative piece for your home, this design offers endless possibilities for customization. The combination of quilting techniques and scrap fabric usage makes it both sustainable and stylish.
One of the best things about the Scrappy Fabric Star Ornament – Quilt Pattern is how it allows you to turn small fabric leftovers into something truly beautiful. Instead of discarding scraps from previous quilting projects, you can repurpose them into vibrant, eye-catching star designs. The star shape is timeless, symbolizing celebration and warmth, making it a perfect choice for seasonal and year-round decorations alike. With a little creativity, you can match the ornament to any color theme or interior style.
In this article, we will explore everything you need to know about creating your own Scrappy Fabric Star Ornament – Quilt Pattern. From selecting fabrics and preparing your scraps, to assembling the star and adding finishing touches, you will find step-by-step guidance to help you achieve a polished, professional-looking result. By the end, you will be equipped with all the knowledge and inspiration needed to create stunning, personalized ornaments that showcase your quilting skills.
The foundation of the Scrappy Fabric Star Ornament – Quilt Pattern lies in the careful selection of fabric scraps. Since this is a scrap-based project, you can mix and match colors, prints, and textures to create a unique design every time. Quilting cotton is the most common choice because it’s easy to handle and offers crisp edges for precise piecing.
When selecting scraps, try to balance bold prints with solids or subtle patterns. This helps the star shape stand out without appearing too busy. You can also choose fabrics in a particular color family, such as reds and golds for Christmas, pastels for spring, or blues and silvers for a winter theme.
Before cutting, make sure all fabric scraps are clean, pressed, and free of fraying edges. This preparation ensures smoother sewing and a more professional finish. Even though these are scraps, taking the time to prepare them properly makes a big difference in the final result.
Cutting accuracy is essential. Use a rotary cutter and a quilting ruler to create precise shapes. Depending on the pattern variation you choose, you might be cutting diamonds, triangles, or other geometric pieces that will form the star.
If you’re planning to make several ornaments at once, it’s a good idea to cut and sort your pieces into sets before starting assembly. This will save time and keep you organized throughout the process.
By preparing your scraps with care, you set yourself up for a smooth sewing experience and a striking finished ornament that truly shines.
Creating the star shape for the Scrappy Fabric Star Ornament – Quilt Pattern is a satisfying step where the beauty of the design starts to come to life. Depending on the chosen pattern, your star may consist of several diamond or triangle-shaped pieces sewn together to form the points.
Begin by laying out your fabric pieces in the desired arrangement. This allows you to visualize the color placement and make adjustments before sewing. Alternating prints and solids can help the star’s geometry stand out more clearly.
Sew the pieces together in sections, typically forming the star points first. A ¼-inch seam allowance is standard in quilting, ensuring consistency and accuracy. Press seams as you go, either open or to one side, depending on what works best for your fabric and design.
Once the points are assembled, join them to form the full star. Precision in alignment is key here—accurate piecing ensures that the star’s points meet neatly at the center without gaps or distortion.
If your pattern includes a quilted background, sew the star shape onto it at this stage. You can also choose to make the star a standalone piece for a more dimensional ornament.
After the main star shape is completed, check for any uneven edges and trim if necessary. This preparation ensures a smoother finish when you add backing or batting in the next steps.
The assembly process is both creative and technical, allowing you to enjoy the art of quilting while producing a decorative piece you’ll be proud to display.
Quilting is an essential part of the Scrappy Fabric Star Ornament – Quilt Pattern, adding both visual appeal and structure. Even a small ornament benefits from light quilting, as it helps hold the fabric layers in place and enhances the star’s design.
Start by layering your quilt top (the assembled star) with batting and a backing fabric. For small projects like this, low-loft batting works best because it adds just enough body without making the ornament bulky.
Quilting lines can be as simple or elaborate as you wish. Straight-line quilting that follows the star’s points can highlight its shape beautifully. Alternatively, you can add decorative stitching such as swirls, loops, or echo quilting to give it a more festive touch.
If you’re new to quilting, this small project is an excellent opportunity to practice. The manageable size means you can experiment with techniques without the commitment of a large quilt.
Once quilting is complete, trim the layers to match the star’s shape. Use sharp scissors or a rotary cutter for clean edges. This precision will make the final assembly much easier.
Adding structure is especially important if you want the ornament to hold its shape over time. Interfacing or fusible web can provide additional stiffness, ensuring the star remains crisp and flat even after years of use.
With the quilting and structural elements in place, your ornament is ready for finishing touches that will truly bring it to life.
The final stage of making your Scrappy Fabric Star Ornament – Quilt Pattern is all about adding charm and functionality. Small decorative elements can elevate the overall look and give your ornament a unique personality.
One popular finishing touch is adding a loop or ribbon for hanging. Choose a ribbon that complements the colors of your star and securely stitch it to the top point. This makes the ornament easy to display on a tree, wreath, or wall hook.
For a more festive appearance, you can embellish the star with beads, sequins, or small buttons sewn along the points or center. Keep in mind that less can be more—subtle accents often look more elegant than heavy decoration.
Another option is to add hand embroidery details. Simple stitches like running stitch or blanket stitch can outline the star and add texture, while metallic thread can give it a holiday sparkle.
If you’re making a set of ornaments, consider varying the fabrics and quilting patterns for each one. This creates a coordinated yet diverse collection that adds interest to your décor.
For storage, keep your fabric ornaments in a cool, dry place to prevent fading or damage. Wrapping them in tissue paper will help maintain their shape and protect delicate embellishments.
Once complete, your Scrappy Fabric Star Ornament – Quilt Pattern will be a delightful addition to your handmade décor, reflecting your creativity and quilting skills.
1. Can I make this project if I’m a beginner?
Yes! The Scrappy Fabric Star Ornament – Quilt Pattern is beginner-friendly, especially if you take your time with accurate cutting and piecing.
2. What type of fabric works best?
Quilting cotton is ideal, but you can experiment with linen or lightweight canvas for different textures.
3. Do I need special quilting tools?
Basic quilting tools like a rotary cutter, ruler, and cutting mat will make the process easier and more accurate.
4. How big should the ornament be?
Sizes vary, but a common range is between 4 to 6 inches across. You can scale the pattern up or down as desired.
5. Can I make this ornament without batting?
Yes, but batting adds structure and helps the ornament hold its shape better over time.
6. How long does it take to complete one ornament?
Most people can finish one in about 1–2 hours, depending on their quilting experience and level of detail.
The Scrappy Fabric Star Ornament – Quilt Pattern is a beautiful, sustainable, and enjoyable project that lets you transform leftover fabrics into meaningful décor. From selecting and preparing scraps to assembling, quilting, and adding final details, each step is an opportunity to express your creativity. This small yet impactful project is perfect for personal use or as a heartfelt handmade gift.
I hope this guide inspires you to create your own stunning star ornaments—please share your honest opinion and suggestions so we can continue improving and inspiring fellow crafters.


