
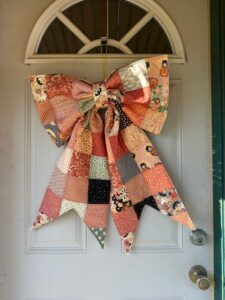
Cross Door - Quilt Pattern
The Trinket Tray Quilt Pattern – A Creative and Functional Quilting Project is more than just another quilting idea—it combines beauty with functionality in a way that every quilter, whether beginner or advanced, can truly appreciate. At its heart, this pattern allows you to design a small quilted tray that can be used for holding jewelry, sewing notions, or small trinkets around the house. It’s both practical and charming, making it a perfect weekend project or a thoughtful handmade gift.
What makes this project so appealing is its flexibility. You can create it using scraps of fabric, mix bold prints with solids, or even choose seasonal colors to match the time of year. Many quilters enjoy the fact that it requires little fabric, yet the end result is something that looks polished and professional. The Trinket Tray Quilt Pattern – A Creative and Functional Quilting Project also gives makers the chance to experiment with quilting stitches and finishing techniques on a smaller scale, which is excellent for building skills.
Another reason this project has become popular is the way it adds organization to your daily life. Instead of clutter, you’ll have a neatly quilted tray to keep small items in place. Whether displayed on a dresser, used in a sewing room, or even placed in an entryway, this functional piece adds warmth and personality to any space. With creativity and care, your Trinket Tray Quilt Pattern – A Creative and Functional Quilting Project can be both beautiful and useful.
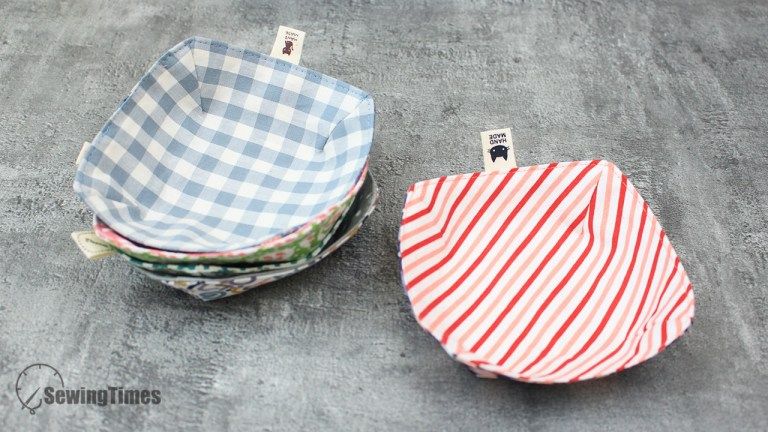
The Trinket Tray Quilt Pattern – A Creative and Functional Quilting Project begins with the concept of creating a small quilted square or rectangle, which is later folded or stitched into the shape of a tray. Unlike large quilt projects, this one is compact and perfect for quick satisfaction. You can see results in just a few hours, making it a go-to project for busy crafters.
One of the best parts about this pattern is how versatile it can be. Whether you want a tray that’s colorful and playful or one that’s more elegant and subtle, the design adapts to your fabric choices. The quilted base provides sturdiness, while the raised corners give it structure. This balance of creativity and practicality is what makes the project stand out.
For beginners, it’s an excellent chance to practice measuring, piecing, quilting, and binding without the stress of managing a large quilt. Each step builds confidence, and the smaller size allows for experimentation without fear of wasting fabric.
Experienced quilters often love the project because it offers a break from larger quilts while still providing creative satisfaction. It’s also an opportunity to use leftover fabric scraps from other projects, turning them into something functional and stylish.
The Trinket Tray Quilt Pattern – A Creative and Functional Quilting Project can be customized in endless ways. Add embellishments, try different quilting stitches, or use unique binding techniques to make your tray truly your own.
Most importantly, the process itself is enjoyable. Quilting is not only about the final product—it’s about slowing down, being mindful, and enjoying the creative journey. This project embodies that philosophy beautifully.
When planning your Trinket Tray Quilt Pattern – A Creative and Functional Quilting Project, it’s helpful to gather all your materials ahead of time. Since the project is small, you won’t need much fabric, but careful selection will make a big difference in the finished tray.
Choose fabrics that inspire you—florals, solids, or seasonal prints can all bring personality to your tray. Cotton quilting fabric is often preferred because it’s easy to work with and provides the durability needed for a functional item.
Batting is another essential element, as it gives the tray its structure and quilted texture. A medium-weight batting is usually best for this type of project. Too thin, and the tray won’t hold its shape; too thick, and it may be difficult to sew.
You’ll also need a good quality thread. Neutral tones work well for blending, while contrasting colors can add visual interest. The stitching is part of the design, so it’s worth considering how your thread choice will enhance the overall look.
Basic sewing tools like scissors, rotary cutters, rulers, and pins will make the process smoother. If you have a walking foot for your sewing machine, it will help achieve even stitches when quilting through multiple layers.
Lastly, make sure your workspace is prepared and comfortable. Since this project doesn’t take long, you can enjoy it as a relaxing afternoon activity without feeling overwhelmed.
The first step in making your Trinket Tray Quilt Pattern – A Creative and Functional Quilting Project is to cut your fabric pieces. A square or rectangle is typical, but feel free to experiment with sizes depending on how big you’d like your tray to be. Remember that larger pieces will hold more items but require more fabric and batting.
Once your fabrics and batting are layered, quilting begins. This can be as simple or complex as you want. Straight-line quilting is an excellent choice for beginners, while free-motion designs or decorative stitches can give your tray a more artistic flair.
After quilting, you’ll bind the edges. Binding helps reinforce the tray’s shape and gives it a polished finish. Many quilters prefer double-fold binding for durability, but single-fold can work if you’re aiming for a lighter look.
Next comes the magic step: shaping the tray. This is typically done by folding the quilted square and stitching or tacking the corners together, creating raised sides. The technique is simple, yet it transforms a flat quilted piece into a functional tray.
If you want added sturdiness, you can use interfacing or even insert a stiff piece of fabric between the layers before quilting. This gives the tray more structure, especially if you plan to use it frequently.
The final step is finishing touches. Press your tray carefully, trim any loose threads, and consider adding small embellishments like buttons, bows, or hand stitching for personality.
The beauty of the Trinket Tray Quilt Pattern – A Creative and Functional Quilting Project is how many ways it can be used in daily life. On a dresser, it’s perfect for holding jewelry, watches, or small accessories. In a sewing room, it can store pins, bobbins, or threads. Even in an entryway, it can keep keys and coins neatly organized.
Because the tray is small and portable, it also makes an excellent travel companion. Quilters often create a few trays in different sizes to use for organizing toiletries, makeup, or other personal items when on the go.
One of the most rewarding ways to use this pattern is as a handmade gift. Imagine giving a beautifully quilted tray filled with treats, sewing supplies, or even small holiday gifts. It’s thoughtful, personal, and shows the time and care you put into making it.
The project can also be customized for seasonal themes. Make one with autumn colors for fall, bright florals for spring, or festive prints for the holidays. These trays are easy to swap out with the seasons, adding charm to your home decor.
If you have children, the tray can even serve as a fun and safe organizer for small toys, crayons, or craft supplies. The soft, quilted sides make it a gentle and appealing option for kids’ spaces.
Ultimately, the Trinket Tray Quilt Pattern – A Creative and Functional Quilting Project is not just a craft—it’s a way to create something meaningful and practical that fits seamlessly into everyday life.
What size should I make my trinket tray?
The size depends on your needs. A small 6-inch square is perfect for jewelry or keys, while larger 10- or 12-inch trays can hold sewing supplies or other household items.
Do I need special fabric for this project?
No, standard cotton quilting fabric works beautifully. You can also experiment with linen or blends, but cotton is the most beginner-friendly.
Is this project suitable for beginners?
Yes! The Trinket Tray Quilt Pattern – A Creative and Functional Quilting Project is beginner-friendly, offering practice with quilting, binding, and simple assembly techniques.
Can I wash my trinket tray?
Yes, but gentle hand washing is best. Since the tray is quilted, frequent washing may cause wear over time. Spot cleaning is usually enough for regular use.
How long does it take to make a tray?
Most people complete it in 2–3 hours, making it an ideal weekend or evening project.
Can I make multiple trays in one session?
Absolutely. Many quilters enjoy batch-sewing trays, especially when planning to give them as gifts or sell them at craft fairs.
The Trinket Tray Quilt Pattern – A Creative and Functional Quilting Project is a delightful way to combine quilting skills with everyday functionality. It’s easy enough for beginners yet versatile enough to keep experienced quilters inspired. With just a few materials and a little creativity, you can transform fabric scraps into a useful, stylish, and heartfelt creation.
I hope this guide has inspired you to try this project for yourself. If you’ve made a trinket tray before, or if this is your first time considering it, I’d love to hear your thoughts. Please share your honest opinion and suggestions so we can continue creating and learning together.


